How to Style and Fit a Spiked Choker Necklace Perfectly
Master the spiked choker necklace with our step-by-step guide on precision fitting, material grading, neckline pairing, and hardware care.

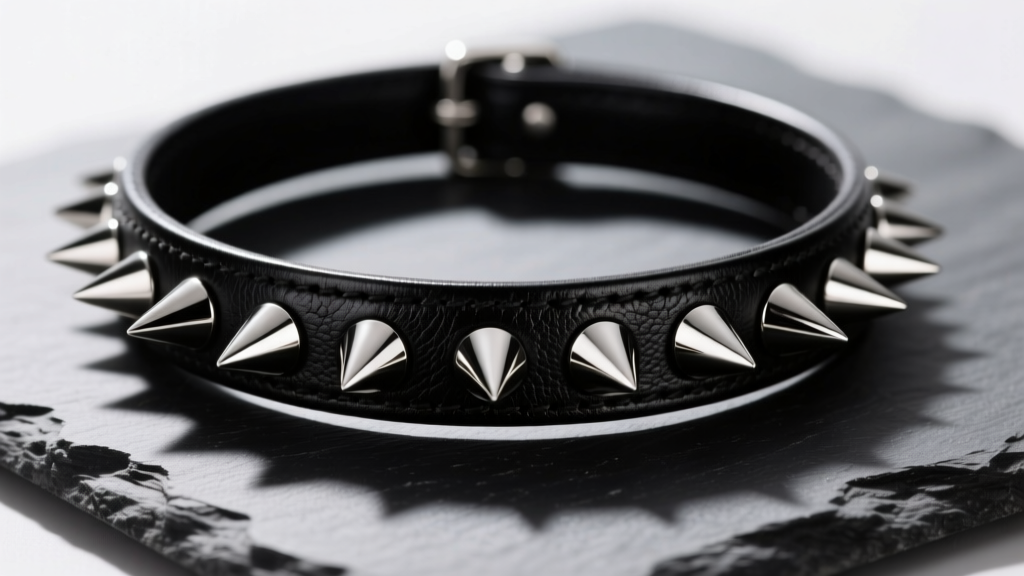
The spiked choker necklace has successfully transcended its underground punk-rock origins to become a staple of avant-garde and high-fashion styling. However, pulling off this bold accessory requires more than just slipping it around your neck. The weight of the metal spikes, the rigidity of the leather, and the visual gravity of the hardware all demand a strategic approach to sizing, proportion, and material selection. In this comprehensive step-by-step guide, we will break down the exact mechanics of fitting, styling, and maintaining a spiked choker so it sits perfectly and lasts for years.
Understanding Spiked Choker Anatomy and Material Grades
Before measuring your neck, you must understand what you are buying. A high-quality spiked choker necklace is defined by its base material and the hardware used to anchor the spikes. Cheap alternatives will cause skin irritation, breakage, and tarnishing within weeks.
The Base Material
For leather chokers, always seek out vegetable-tanned leather with a thickness between 3mm and 4mm. Vegetable tanning uses natural tannins from tree bark, making it hypoallergenic and highly durable. Avoid bonded leather or PU (polyurethane) leather, which will crack under the tension of heavy metal spikes and trap sweat against the skin. According to standards outlined by the Jewelers of America, proper material sourcing is the first line of defense against contact dermatitis in heavy jewelry pieces.
The Spike Hardware
The spikes themselves should be cast from 316L surgical stainless steel or solid brass. 316L steel is highly resistant to corrosion and contains very low levels of nickel, making it safe for sensitive skin. Furthermore, inspect how the spikes are attached. Screw-in spikes utilizing M3 or M4 machine threading are vastly superior to push-pin or glued spikes, as they allow for easy replacement and tightening.
Step 1: Precision Measuring for Weight Drag
Fitting a spiked choker necklace is fundamentally different from fitting a delicate gold chain. The combined weight of 15 to 30 metal spikes creates a downward pull, a phenomenon known in jewelry design as "weight drag." If you measure for a spiked choker the same way you measure for a silk ribbon, it will sag and expose the clasp at the front.

Follow this precise measurement protocol:
- Locate the Placement: Decide where the choker will sit. A true choker rests at the mid-neck (usually 14 to 15 inches for most women), while a collar-style spiked necklace sits at the base of the neck (15.5 to 17 inches).
- Wrap the Tape: Use a soft tailor's tape measure. Keep it snug but comfortable—you should be able to slide one index finger beneath the tape.
- Apply the Drag Multiplier: Subtract 0.5 inches from your raw measurement to account for the weight drag of the spikes. For example, if your mid-neck measures exactly 15 inches, order or cut your leather base to 14.5 inches. The weight of the steel will pull it down to a perfect, flush 15-inch circle.
Step 2: Matching Spike Proportions to Necklines
The visual impact of a spiked choker necklace relies heavily on the geometry of the spikes relative to your neckline and the garment you are wearing. Spikes generally come in three profiles: low-profile studs (5mm-8mm), standard cones (12mm-20mm), and dramatic pyramids or extra-long cones (25mm+).
"The rule of thumb for aggressive hardware is contrast. If the spikes are long and sharp, the fabric of your top should be soft, fluid, or deeply cut to prevent the piece from looking like armor."
The Spike-Length Matrix
| Spike Profile | Height / Shape | Ideal Neck Type | Best Neckline Pairing |
|---|---|---|---|
| Low-Profile Studs | 5mm - 8mm / Dome | Shorter or wider necks | Crew necks, turtlenecks, button-downs |
| Standard Cones | 12mm - 20mm / Pointed | Average length necks | Scoop necks, off-the-shoulder, V-necks |
| Dramatic Pyramids | 25mm+ / Angular | Long, slender necks | Deep V-necks, backless tops, strapless |
When wearing a standard cone spiked choker with a V-neck top, ensure the bottom point of the V falls at least two inches below the lowest spike. This prevents the metal from visually clashing with the seam of your clothing and allows the skin to act as a neutral canvas.
Step 3: Advanced Layering Techniques
Layering a spiked choker necklace requires strict adherence to spatial distribution. Because the choker is visually heavy and physically rigid, any secondary necklaces must provide a contrasting texture and adequate physical clearance to prevent tangling and scratching.
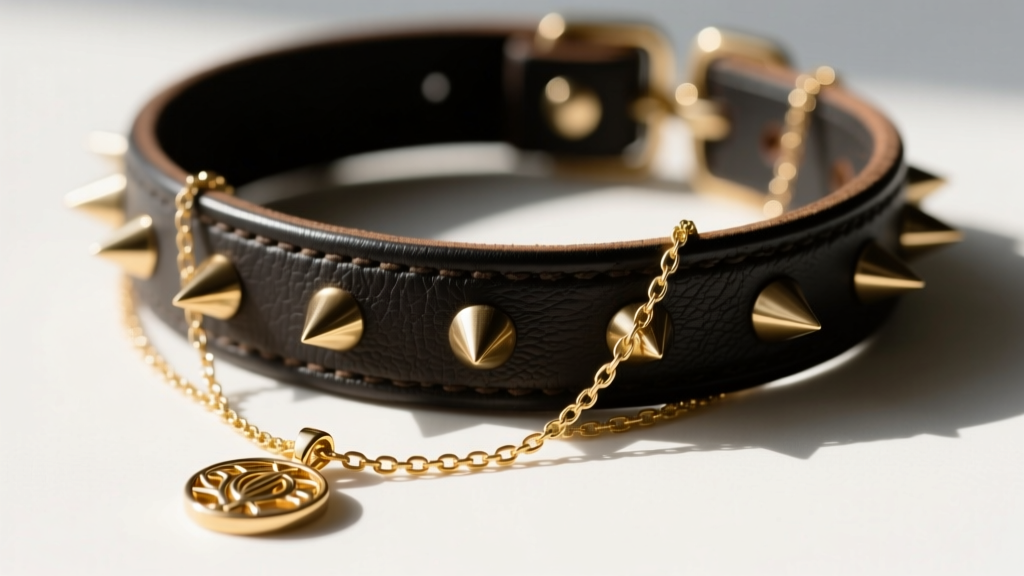
The 2.5-Inch Cascade Rule
When building a stack around your spiked choker, the next necklace in the stack must drop at least 2.5 inches below the choker's leather base. If your choker is 15 inches, your second chain should be 17.5 inches or 18 inches. This ensures the spikes do not catch on the links of the secondary chain, which can cause severe scratching to softer metals like 14k or 18k gold.
- Chain Selection: Avoid delicate cable chains. Opt for structural chains like Cuban links, rope chains, or box chains that can visually hold their own against the heavy leather and steel.
- Pendant Weight: If adding a pendant to the second layer, ensure it has a heavy enough bail to lay flat. A lightweight pendant will constantly flip over when competing with the magnetic and physical presence of the spiked choker above it.
- Metal Mixing: Mixing metals is highly encouraged. A black leather and silver-spiked choker pairs exceptionally well with a warm 18k yellow gold rope chain underneath, creating a deliberate, curated contrast.
Step 4: Hardware Maintenance and Skin Safety
The most common failure point of a spiked choker necklace is not the leather, but the hardware. Body oils, sweat, and friction will degrade cheap clasps and loosen spike threads over time. Proper maintenance requires a few specialized jewelry care techniques.
Securing the Spikes
Vibration and daily movement will naturally back out the M3 or M4 screws holding your spikes in place. To prevent losing a spike, apply a microscopic drop of blue Loctite 242 (a medium-strength, removable threadlocker) to the screw threads before tightening them with a jeweler's flathead screwdriver. Never use red Loctite, as it is permanent and will make it impossible to remove the spike if the leather base ever needs replacing.
Clasp Upgrades and Allergy Prevention
Many mass-produced spiked chokers come with cheap alloy lobster clasps that snap under the weight of the leather. Consider upgrading the clasp to a solid stainless steel heavy-duty lobster clasp or a neodymium magnetic tube clasp for seamless closure. If you experience mild skin irritation from the back of the spikes pressing into your neck, a quick fix is to coat the interior base of the spikes with a thin layer of clear, hypoallergenic nail polish or a specialized jewelry coating like Jewelry Shield. As noted by metal hallmarking authorities like the Sheffield Assay Office, understanding the exact alloy composition of your jewelry is vital for managing long-term skin contact and avoiding nickel allergies.
By treating your spiked choker necklace not just as an accessory, but as a piece of engineered hardware, you ensure it remains a powerful, comfortable, and enduring element of your personal style arsenal.


