Crossover Earrings Explained: A Beginner's Style Guide
Discover how crossover earrings and ear climbers work. Learn about sizing, secure clasps, and the best materials for comfortable, multi-piercing illusions.


What Exactly Are Crossover Earrings?
Crossover earrings, frequently referred to as ear climbers or ear crawlers, represent a clever evolution in jewelry design. Unlike traditional studs that sit statically on the earlobe, crossover earrings are engineered to "cross over" the anatomy of the ear, moving vertically from the lobe toward the cartilage. This creates the highly sought-after illusion of multiple piercings without requiring additional needle punctures.
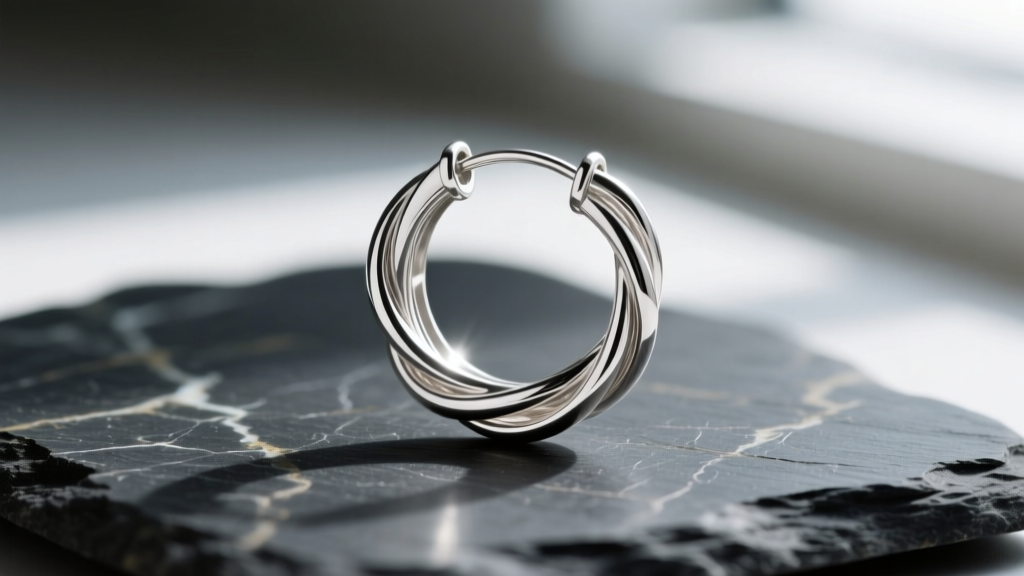
There are two primary variations in this category. The first is the ear climber, which features a standard post that feeds through the piercing, while a decorative wire extends upward, hugging the outer edge of the ear. The second is the crossover hoop, a continuous wire that threads through the lobe and wraps around the back, with the ends crossing over one another to form a seamless, interlocking geometric shape. Both styles rely on tension, gravity, and precise anatomical mapping to stay secure.
The Anatomy and Gauge Mechanics
To understand how crossover earrings stay in place without a traditional butterfly backing, you need to look at wire gauges and tension mechanics. A standard earring post is typically 20-gauge (0.8mm) or 22-gauge (0.64mm). However, the "spine" or climbing wire of an ear climber must be significantly thicker to prevent warping. High-quality crossover earrings utilize an 18-gauge (1.0mm) or 16-gauge (1.2mm) wire for the decorative climb.
The securing mechanism relies on a tension gap. When you receive a new ear climber, the gap between the front decorative wire and the back tension wire is usually set to about 2.5mm. This is too wide to grip an average earlobe (which is typically 4mm to 8mm thick at the base, but tapers to about 1.5mm at the outer edge). You must gently squeeze the back wire toward the front wire to reduce the gap to roughly 0.8mm, creating enough friction to hold the jewelry in place without restricting blood flow.
Sizing Guide: Lobe vs. Cartilage Placement
Choosing the correct length for your crossover earrings is critical. If a climber is too long for your ear's outer ridge, it will poke into your anti-helix or helix, causing discomfort and pushing the jewelry away from the head. Use the framework below to match the jewelry to your anatomy.
| Size Category | Length (mm) | Placement & Illusion | Best Ear Type |
|---|---|---|---|
| Petite / Mini | 10mm - 15mm | Sits entirely on the lower lobe; mimics a tight cluster of studs. | Small lobes, attached lobes. |
| Standard / Medium | 16mm - 25mm | Crosses from the lobe to the anti-helix; classic multi-piercing illusion. | Average to large lobes with a defined outer ridge. |
| Statement / Long | 26mm - 40mm | Reaches the upper helix/cartilage; dramatic, sweeping aesthetic. | Large ears with a prominent, flat outer helix. |
Material Selection for Tension Jewelry
The friction inherent in tension-based jewelry makes material choice a matter of dermatological health, not just aesthetics. Because crossover earrings require you to slide them along the skin and apply pressure, plated metals (like gold-plated brass or silver) will quickly degrade. The constant friction acts like mild sandpaper, wearing away the microscopic plating layer and exposing the base metal.
According to the Association of Professional Piercers (APP), jewelry that maintains prolonged contact and friction against the skin should be made of biocompatible, solid materials to prevent adverse reactions. For crossover earrings, your best options are:
- Implant-Grade Titanium (ASTM F-136): The gold standard for sensitive skin. It is lightweight, highly durable, and contains zero nickel.
- Solid 14k or 18k Gold: Excellent for longevity. While more expensive ($120–$350+ per pair), solid gold will never flake or expose a reactive core metal.
- Niobium: A highly reactive metal that is safely anodized to create vibrant colors without using dyes or plating.
Avoid "gold vermeil" or "gold filled" for crossover styles if you have sensitive skin. The American Academy of Dermatology (AAD) notes that nickel allergy is one of the most common causes of allergic contact dermatitis, and the friction of tension earrings can easily trigger a flare-up if the underlying brass or nickel alloy is exposed.

Step-by-Step: How to Secure Your Crossover Earrings
Putting on an ear climber requires a different technique than a standard stud. Follow these steps to ensure a secure, comfortable fit:
- Open the Gap: Gently pull the back tension wire away from the front decorative wire until the gap is about 3mm wide.
- Insert the Post: Feed the standard post through your earlobe piercing from front to back, just like a normal earring.
- Rotate Upward: Once the post is through, rotate the entire earring 90 degrees so the decorative wire points upward, aligning with the natural curve of your ear's outer edge.
- Position the Wire: Slide the earring so the decorative wire rests flat against the outer ridge of your ear.
- Pinch to Secure: Gently squeeze the back tension wire and the front decorative wire together. Stop squeezing when you feel light resistance. The earring should feel snug but should not cause a throbbing sensation.
Troubleshooting Common Fit Issues
Problem: The earring keeps sliding down my ear.
Solution: Your earlobe's outer edge may be too thick for the current tension gap, or the wire has warped open over time. Remove the earring and use clean fingers to gently squeeze the back wire closer to the front wire to increase the tension. Do not use pliers, as they will mar the metal finish.
Problem: My earlobe throbs or turns red after an hour.
Solution: This is a condition called ischemia, caused by cutting off blood circulation. You have pinched the tension gap too tightly. Gently open the gap by a fraction of a millimeter. If the earring falls out when you loosen it, the design is incompatible with your lobe thickness; switch to a crossover threader earring, which uses gravity and a dangling chain rather than tension to stay in place.
Problem: The top of the climber pokes into my cartilage.
Solution: The earring is too long for your specific ear anatomy. A 25mm climber might look beautiful on a model, but if your lobe-to-helix distance is only 20mm, the jewelry will catch on your cartilage. Size down to a 15mm mini-climber for a flush, comfortable fit.


