How to Put Earrings In: A Step-by-Step Guide for Lobes & Cartilage
Learn exactly how to put earrings in standard lobes and stubborn cartilage piercings using tapers, proper angles, and threadless jewelry.

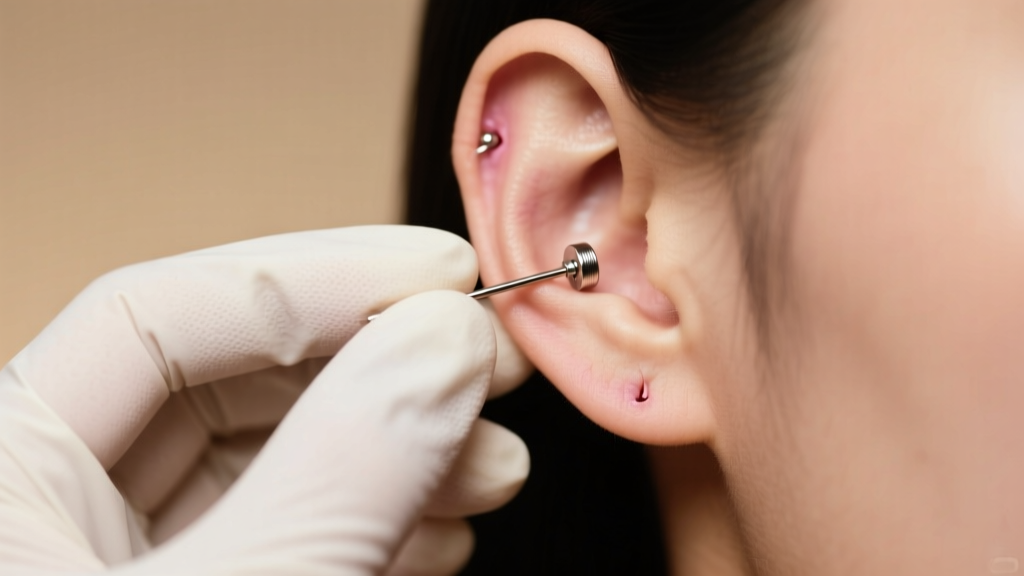
Learning how to put earrings in seems like a basic skill, but anyone who has struggled with a stubborn cartilage piercing, a lost earring back, or a freshly healed fistula knows the reality is often frustrating. Piercings are not simple holes; they are complex, living tunnels of tissue called fistulas. When you attempt to insert jewelry, you are navigating a biological pathway that can shrink, shift, or swell based on your body's current state.
This comprehensive guide moves beyond generic advice. We will cover the exact biomechanics of inserting jewelry into both standard earlobes and complex cartilage placements (like the helix, tragus, and conch). You will learn how to utilize insertion tapers, master the tension mechanics of threadless jewelry, and avoid the micro-tears that lead to hypertrophic scarring.
Why Putting Earrings In Can Be Difficult: The Anatomy of a Fistula
When a piercing heals, your body forms a fistula—a protective tube of skin cells lining the puncture wound. Unlike a simple cut, a fistula has 'tissue memory' and a specific angle of incidence. If you remove your jewelry, the fistula immediately begins to contract. While a well-healed standard lobe might remain open for months, a healed tragus or helix can shrink to an impassable size within hours.
Furthermore, piercings are rarely drilled perfectly perpendicular to the skin. A professional piercer angles a standard lobe piercing slightly downward and backward to follow the natural drape of the ear. If you attempt to insert an earring straight horizontally, you will hit the 'wall' of the fistula, causing pain and tissue trauma. Understanding the original angle of your piercing is the first step to effortless insertion.
Essential Tools for Frustration-Free Insertion
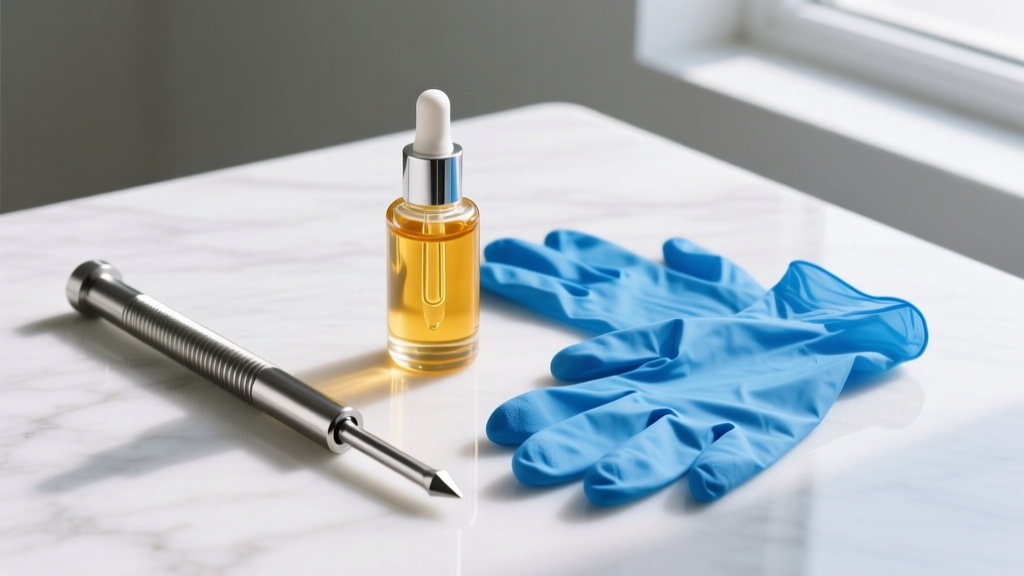
Before attempting to insert jewelry, especially in cartilage, gather the proper tools. Relying on bare fingers and brute force is the primary cause of insertion-related irritation bumps.
- Nitrile Gloves: Metal jewelry becomes incredibly slippery when touched with natural skin oils. Nitrile gloves provide the grip necessary to hold tiny 16-gauge or 14-gauge posts without dropping them.
- Single-Flare Insertion Tapers: These are medical-grade steel or titanium cones that gradually increase in thickness. They gently stretch a shrunken fistula back to its original gauge without causing micro-tears.
- Water-Based Lubricant or Jojoba Oil: Never use petroleum jelly (Vaseline) inside a piercing, as it traps bacteria and blocks oxygen. A tiny drop of pure jojoba oil or sterile saline provides the necessary slip for the jewelry or taper.
- Magnifying Mirror: Essential for blind-spot cartilage piercings like the rook or daith, allowing you to see the exact exit point of the fistula.
Step-by-Step: How to Put Earrings In Standard Lobe Piercings
Standard lobes typically accommodate 20-gauge (0.8mm) or 18-gauge (1.0mm) jewelry. The most common lobe jewelry features a butterfly friction back or an internally threaded flat-back labret.
For Butterfly Backs (Friction Posts)
- Cleanse and Dry: Wash your hands and ensure the front and back of the earlobe are completely dry. Moisture increases friction on standard push-posts.
- Find the Angle: Gently palpate the back of your lobe to feel the exit divot. Align the post with this divot, angling slightly downward.
- The Twist Technique: Do not just push. Apply gentle forward pressure while rotating the earring clockwise. This rotation helps the post navigate any slight strictures in the fistula.
- Secure the Back: Slide the butterfly back onto the post until it rests comfortably against the ear. Never push the back so tightly that it compresses the skin, as this restricts blood flow and causes swelling.
For Internally Threaded Flat-Backs
Internally threaded jewelry (where the screw is on the back post, not the decorative front) is vastly superior for lobes. Insert the smooth post through the front of the ear, then gently screw the flat-back disc onto the rear threads until snug.
Step-by-Step: How to Put Earrings In Cartilage (Helix, Tragus, Conch)
Cartilage piercings are usually done at 16-gauge (1.2mm) or 14-gauge (1.6mm). Because cartilage lacks the elasticity of the earlobe, it requires specialized jewelry, most commonly threadless (push-pin) styles. Threadless jewelry relies on the tension of a slightly bent metal pin inside a hollow receiving tube.
Mastering Threadless Tension
If your threadless earring falls out, the pin isn't bent enough. If you can't push it in, it's bent too much. For a 16-gauge pin, insert the pin into the receiving tube about halfway, then bend it slightly toward the 1 o'clock position. For an 18-gauge pin (which is thinner and more flexible), bend it toward the 2 o'clock position.
The Taper Method for Stubborn Cartilage
If your helix or tragus feels tight or 'closed', do not force the jewelry. Forcing a blunt post through a shrunken cartilage fistula will cause a 'blowout' (where tissue is pushed out the back, forming a permanent bump).
- Lubricate your insertion taper with a drop of jojoba oil.
- Gently push the thinnest end of the taper into the piercing hole, following the natural angle.
- Slide the taper through until the thickest end (which matches your jewelry gauge) is flush with the exit hole.
- Align your jewelry post directly against the flat back of the taper.
- Push the jewelry in while simultaneously pulling the taper out from the back, effectively 'handing off' the fistula from the taper to the jewelry.
Cartilage Gauge and Placement Data
| Piercing Type | Standard Gauge | Typical Jewelry Style | Insertion Difficulty |
|---|---|---|---|
| Standard Lobe | 20G - 18G | Butterfly / Threadless | Low |
| Helix | 16G - 14G | Threadless Flat Back | Medium |
| Tragus | 16G | Threadless Flat Back | High (Awkward Angle) |
| Conch | 14G - 12G | Threadless Flat Back | Medium |
| Rook | 16G | Internally Threaded Curved | Very High (Blind Spot) |
Troubleshooting Stubborn Piercings
Even with the right tools, you may encounter a piercing that refuses to accept jewelry. This usually happens after swimming, sleeping on the ear, or during periods of high sodium intake (which causes tissue swelling).
The Warm Compress Technique
If the hole feels blocked by a thin layer of skin or dried lymph, apply a warm, damp compress to the ear for 3 to 5 minutes. The heat dilates local blood vessels, softens the epithelial tissue, and melts away any microscopic crusting inside the fistula. Attempt insertion immediately after removing the compress.
Never Use Externally Threaded Jewelry
If you are struggling to insert jewelry, check the threads. Externally threaded jewelry (where the screw pattern is on the post that goes through the ear) acts like a cheese grater on the delicate fistula lining. According to the Association of Professional Piercers (APP), externally threaded jewelry should never be used in fresh or healing piercings, and it makes insertion into tight, healed holes unnecessarily painful and damaging.
'Jewelry should be internally threaded or threadless to ensure a smooth surface passes through the piercing channel, preventing trauma to the fistula.' — Association of Professional Piercers (APP) Guidelines
Material Matters: Choosing the Right Metal for Insertion
The material of your earring dictates how smoothly it will glide through the tissue and how your body will react post-insertion. When learning how to put earrings in sensitive or easily irritated piercings, material choice is non-negotiable.
- Implant-Grade Titanium (ASTM F136): The gold standard for body jewelry. It is completely nickel-free, lightweight, and highly polished, allowing for frictionless insertion. If you have a stubborn piercing, switch to titanium immediately.
- Niobium: Another highly biocompatible, hypoallergenic metal that is excellent for sensitive cartilage.
- 14k or 18k Solid Gold (Nickel-Free): Safe for healed piercings, but ensure it is alloyed without nickel. White gold often contains nickel and should be avoided in tight cartilage fistulas.
- Surgical Steel: Avoid this for insertion into stubborn holes. Despite the name, surgical steel contains nickel, which can trigger contact dermatitis in a micro-teared fistula. For more on metal sensitivities, refer to the Mayo Clinic's guide on body piercings.
Post-Insertion Care to Prevent Irritation Bumps
The way you treat the piercing immediately after insertion dictates whether you will develop an irritation bump (hypertrophic scarring). Once the jewelry is in, do not twist it, spin it, or play with it. Twisting introduces bacteria and tears the newly settled cells.
Spray the front and back of the piercing with sterile 0.9% sodium chloride wound wash. Gently pat the area dry with non-woven gauze or a paper towel. Avoid cloth towels, as their loops can catch on the jewelry and cause micro-trauma. If the area feels warm or tender after a difficult insertion, apply a sterile ice pack wrapped in a clean paper towel to the area for 5 minutes to constrict blood vessels and reduce localized swelling.
Mastering how to put earrings in is ultimately about patience and respecting your body's anatomy. By utilizing tapers, understanding threadless tension, and choosing implant-grade materials, you transform a frustrating daily chore into a seamless, painless routine.


