How to Create and Style a Metallic Feather Necklace Tattoo
Learn how to design, apply, and style a metallic feather necklace tattoo. Our step-by-step guide covers skin prep, placement, and layering.

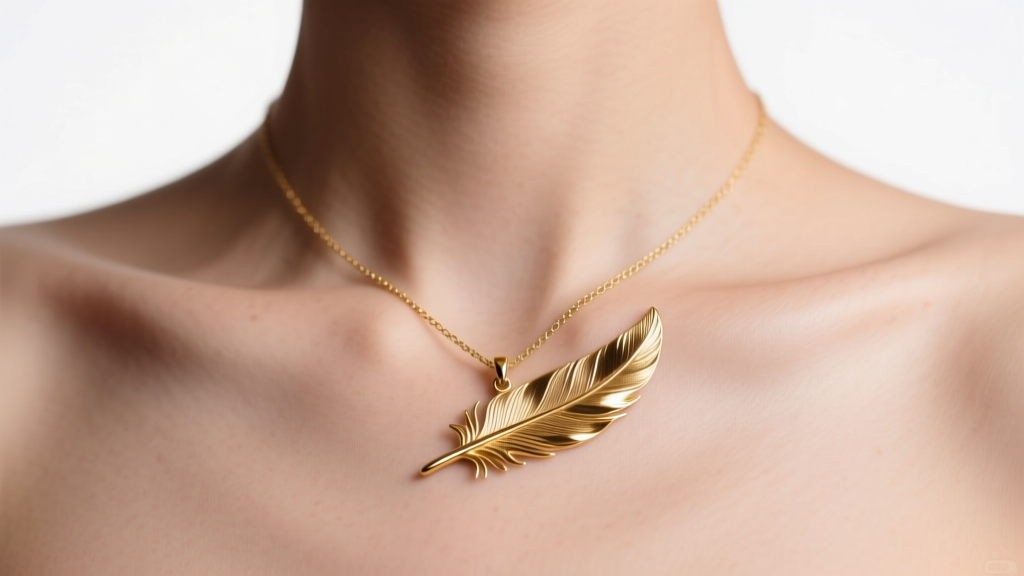
The intersection of body art and fine jewelry has evolved dramatically, and as we move through 2026, the demand for sweat-proof, ultra-lightweight accessories has never been higher. For festival-goers, beach vacationers, and dancers, wearing a delicate sterling silver or gold pendant can be a liability. Enter the metallic feather necklace tattoo—a stunning, temporary body decal that perfectly mimics the look of a fine chain and pendant without the risk of tarnishing, losing, or damaging physical jewelry. Whether you are looking to complement an existing collarbone tattoo or create a standalone statement piece, mastering the creation and application of a metallic temporary tattoo necklace requires precision, the right materials, and an understanding of skin preparation.
Materials Needed: Crafting Your Custom Design
To achieve a realistic jewelry effect, standard waterslide tattoo paper will not suffice. You must use metallic foil temporary tattoo paper, which features a reflective, foil-stamped layer that catches the light much like polished gold or silver. Brands like Silhouette America produce high-quality metallic tattoo paper compatible with standard inkjet printers and electronic cutting machines.
Step 1: Sourcing the Right Paper and Adhesive
Metallic tattoo paper typically comes in two sheets: the printable metallic foil sheet and a clear, water-activated adhesive sheet. Ensure your printer is an inkjet model, as the heat from laser printers can melt the metallic foil and damage the fuser unit. You will also need a craft cutting machine (like a Cricut or Silhouette Cameo) or a pair of precision micro-tip scissors for trimming the decal.
Step 2: Designing the Feather Pendant Motif
Designing a realistic feather necklace tattoo requires attention to anatomical details and jewelry proportions. Using vector software like Adobe Illustrator or Silhouette Studio, you will map out three distinct components:
- The Chain Line: To mimic a delicate cable chain, use a dashed line with a weight of 0.5pt. The dashes should be spaced closely together to resemble interlocking metal links.
- The Bail and Jump Ring: Where the chain meets the pendant, draw a small 3mm circle to represent the jump ring, adding a touch of realism to the transition.
- The Feather Anatomy: A realistic feather features a central shaft (rachis) and branching barbs. Set the rachis line weight to 2.0pt for structural visibility, and use 1.0pt bezier curves for the barbs. Ensure all vector paths are closed and no lines are thinner than 0.5pt, as ultra-fine lines often fail to transfer properly from the adhesive sheet.

Step-by-Step Application Guide for Collarbone Placement
The longevity and realism of your feather necklace tattoo depend entirely on skin preparation. The outermost layer of your skin, the stratum corneum, is naturally coated in sebum and dead skin cells, which act as a barrier to water-activated adhesives.
Skin Preparation: Stripping the Barrier
Begin by washing the neck and chest area with a gentle, non-moisturizing cleanser. Rinse thoroughly and pat dry. Next, saturate a cotton pad with 70% isopropyl alcohol and wipe the exact area where the chain and pendant will sit. According to guidelines from the American Academy of Dermatology, removing surface oils and lotions is critical to preventing contact dermatitis and ensuring that topical adhesives bond directly to the skin rather than sliding off oily residues. Allow the alcohol to evaporate completely for about 60 seconds.
Transfer and Sealing Technique
Once the skin is prepped, follow these precise steps for a flawless transfer:
- Cut and Peel: Trim the tattoo paper as close to the design as possible. Peel off the clear plastic protective top sheet to expose the adhesive layer.
- Positioning: Use a mirror and a washable eyeliner pencil to mark the center of your sternum. Align the center of the feather pendant with this mark, draping the chain lines evenly over your collarbones.
- Activation: Press the design firmly onto the skin. Using a sponge soaked in warm water, thoroughly wet the paper backing. Hold it in place for 45 to 60 seconds. Do not rub; simply press.
- The 180-Degree Peel: This is the most crucial step. Instead of pulling the paper backing straight up, peel it back flat against itself at a 180-degree angle. This prevents the delicate chain lines from stretching or tearing.
- Sealing: Once dry, the metallic foil can be prone to rubbing off on clothing. Lightly dust the tattoo with translucent setting powder, or mist it with a polymer-based makeup setting spray to create a protective, friction-resistant barrier.
Real vs. Temporary: A Comparative Breakdown
Understanding when to wear a physical necklace versus a metallic tattoo is essential for jewelry styling. Below is a data-driven comparison to help you decide which option suits your environment.
| Attribute | Real 925 Sterling Silver Feather Pendant | Metallic Temporary Feather Tattoo |
|---|---|---|
| Average Cost | $45 - $120 | $2 - $5 per application |
| Weight on Skin | 4g - 12g (can cause neck fatigue) | 0g (weightless) |
| Sweat & Water Resistance | High (but prone to tarnish over time) | Low to Medium (degrades with heavy friction) |
| Longevity | Lifetime (with proper polishing) | 1 to 4 days |
| Skin Sensitivity Risk | Low (if nickel-free) | Very Low (hypoallergenic adhesives) |
For multi-day music festivals, water sports, or high-heat environments where metal can become uncomfortably hot or cause sweat-induced irritation, the temporary tattoo is vastly superior. For formal events or daily wear, physical jewelry remains the standard.

Styling Your Feather Necklace Tattoo with Physical Chains
One of the most advanced styling techniques in 2026 is mixing physical jewelry with temporary tattoo jewelry. Because the metallic tattoo lies completely flush against the skin, it eliminates the tangling issues associated with layering multiple physical chains. To achieve a curated, bohemian layered look, follow the 'Rule of Thirds' for necklace lengths:
- Layer 1 (The Choker): Wear a physical 14-inch gold figaro or herringbone chain. This sits high on the neck and provides a solid, reflective anchor.
- Layer 2 (The Princess): Add a physical 16-inch chain featuring a small, minimalist geometric pendant, such as a tiny moon or bar.
- Layer 3 (The Tattoo Drop): Apply your metallic feather necklace tattoo so that the pendant rests at the 20-inch matinee length, right on the sternum. The visual weight of the feather draws the eye downward, elongating the neck and torso without the heavy clinking of three physical metal chains.
This hybrid approach allows you to experiment with bold, dramatic drops that would be cost-prohibitive or physically heavy if executed in solid gold or silver.
Safe Removal and Skin Aftercare
When you are ready to remove your feather necklace tattoo, never scrub the skin with abrasive cloths or harsh exfoliants, as this can cause micro-tears in the epidermis. Instead, saturate a cotton round with a lipid-based solvent. Baby oil, coconut oil, or a dedicated adhesive remover will break down the acrylic polymers in the tattoo adhesive. Press the oiled cotton pad against the tattoo for 30 seconds to let the lipids penetrate, then gently wipe away the foil and adhesive residue. Follow up with a gentle cleanse and apply a ceramide-rich moisturizer to restore the skin barrier, ensuring your canvas is perfectly prepped for your next jewelry styling endeavor.


