Troubleshooting a Broken Bead and Chain Necklace: Repair Guide
Learn how to diagnose and fix a broken bead and chain necklace. Expert troubleshooting for frayed wire, slipped crimps, and clasp failures.

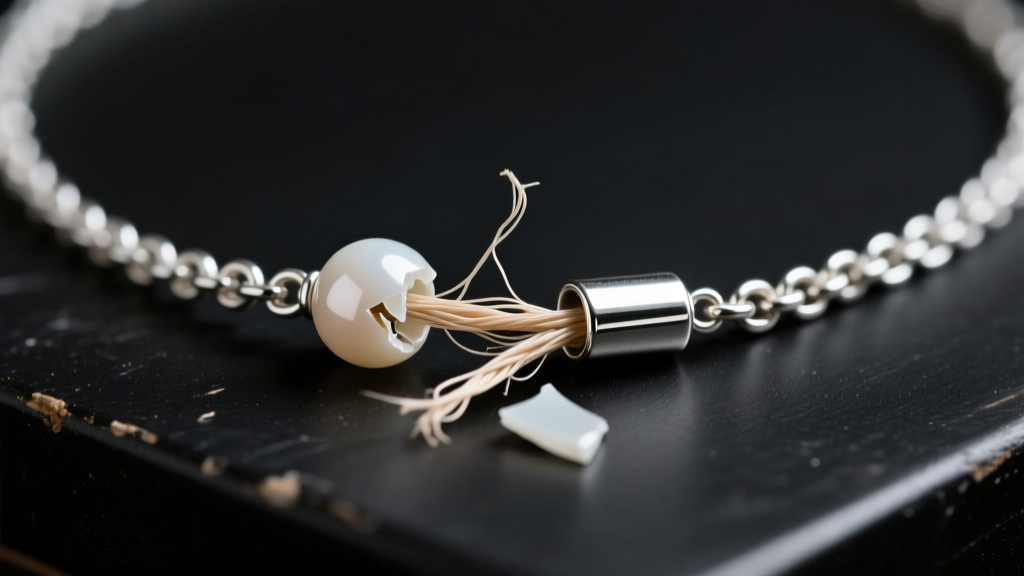
A bead and chain necklace is a masterclass in mixed-media jewelry design, combining the fluid, lightweight drape of a metal chain with the structural weight, texture, and color of gemstone or glass beads. However, this hybrid construction creates unique mechanical stress points that solid chain necklaces or fully strung bead necklaces simply do not face. When a bead and chain necklace breaks, it rarely happens in the middle of a chain link or the center of a bead. Instead, failures almost exclusively occur at the transition zones—the exact millimeters where rigid materials meet flexible ones.
If your favorite piece has snapped, suffered bead slippage, or developed a frustrating habit of flipping its clasp to the front of your neck, you are dealing with a structural engineering issue, not just bad luck. In this comprehensive troubleshooting guide, we will dissect the anatomy of these failures, provide a diagnostic chart for common issues, and walk you through professional-grade repair techniques using industry-standard materials.
The Anatomy of a Bead and Chain Necklace Failure
To effectively troubleshoot a broken bead and chain necklace, you must first understand the physics of how it wears. The transition point—where the nylon-coated beading wire threads through the terminal chain link—is a high-friction environment. Every time you move, the wire saws microscopically against the interior of the metal jump ring or chain link. Over time, this friction compromises the nylon sheath, exposing the stainless steel core to moisture and bending fatigue.
Furthermore, the crimp tube, which secures the wire to the chain, is often subjected to lateral pulling forces. If the jeweler or manufacturer used a standard stamped crimp bead rather than a seamless crimp tube, the structural integrity of the connection is compromised from day one. According to manufacturing standards outlined by Rio Grande, seamless tubes distribute compression forces evenly, whereas stamped beads have a weak seam that can slice into the wire coating when crushed with flat-nose pliers.
Diagnostic Troubleshooting Chart
Before attempting a repair, accurately diagnose the root cause of the failure. Use the table below to identify your specific issue and the corresponding professional solution.
| Symptom | Root Cause | Professional Solution |
|---|---|---|
| Beads sliding over the chain | Crushed or split crimp bead failing to grip the wire | Replace with a 2mm sterling silver or 14k gold-filled seamless crimp tube and use a micro-crimping tool. |
| Wire snapping at the chain link | Nylon sheath worn through by friction; metal fatigue | Install a sterling silver wire guardian (Accu-Guard) to line the interior of the chain link. |
| Chain link pulling apart | Unsoldered jump ring used to connect wire to clasp | Replace with an 18-gauge soldered jump ring or a heavy-duty split ring. |
| Clasp constantly flipping to front | Center of gravity imbalance; beads are heavier than chain | Add a 3mm tungsten or sterling balancing bead on the chain, one inch from the clasp. |
| Wire fraying inside the bead | Sharp, unreamed drill holes in quartz or crystal beads | Ream the bead holes with a diamond bead reamer or use flexible 49-strand wire. |
Step-by-Step Repair: Fixing the Transition Zone
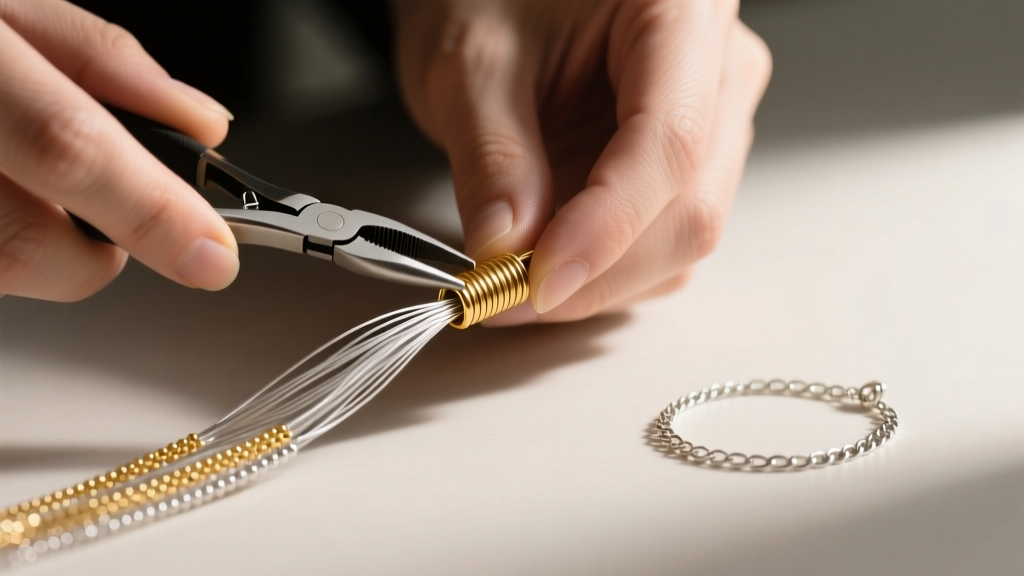
Repairing a bead and chain necklace requires more than just re-threading the wire. You must upgrade the materials at the stress points to ensure the repair outlasts the original manufacturing. According to Beadalon, the industry leader in stringing materials, selecting the correct wire strand count is critical for hybrid necklaces.
Selecting the Right Beading Wire
Never use 7-strand or 19-strand wire for a bead and chain necklace. These wires have thicker individual steel filaments, making them stiff. When forced to bend sharply through a 1.2mm or 1.5mm cable chain link, stiff wire will kink and eventually snap. You must use 49-strand nylon-coated stainless steel wire. The 49 micro-filaments allow the wire to behave like a fluid, bending sharply at the transition zone without suffering metal fatigue. For most glass and semi-precious stone beads (2mm to 6mm), a 0.018-inch (0.46mm) diameter is the optimal choice, providing enough tensile strength to support the beads while remaining flexible enough to navigate chain links.
The Wire Guardian Technique
To permanently solve the issue of the wire sawing through the chain link, you must introduce a wire guardian (also known as French wire or an Accu-Guard). This is a tiny, horseshoe-shaped tube of sterling silver or gold-filled metal.
- Step 1: Cut away the damaged wire and the compromised terminal chain link using flush cutters.
- Step 2: Thread your 49-strand wire through a 2mm seamless crimp tube, then through the wire guardian.
- Step 3: Loop the wire back through the crimp tube, creating a small, protected loop at the end of the wire guardian.
- Step 4: Hook the intact, next-link of your chain over the silver wire guardian. The wire now never touches the chain link directly; it only touches the smooth interior of the silver guardian.
Proper Crimping Mechanics
Do not simply smash the crimp tube flat with chain-nose pliers. This creates sharp edges that can cut the nylon coating over time. Instead, use a dedicated micro-crimping tool. The first notch on the pliers compresses the tube and separates the two wires into distinct channels. The second notch folds the tube in on itself, creating a smooth, rounded, bead-like finish that is completely secure and will not snag on clothing or skin.

Solving the 'Flipping Clasp' Problem
One of the most common, non-breakage complaints regarding a bead and chain necklace is the clasp migrating to the front of the neckline. This is not a defect in the clasp; it is a basic physics issue related to the center of gravity. The beaded section of the necklace is significantly heavier than the delicate metal chain. As you move, gravity pulls the heavy beaded section to the lowest point (the center of your chest), which forces the lighter chain and the clasp to slide upward and around to the front.
To troubleshoot this, you must artificially shift the center of gravity. The most elegant solution is to add a balancing bead. By threading a dense, 3mm to 4mm tungsten, sterling silver, or hematite bead onto the chain approximately one inch away from the clasp, you add just enough counterweight to the back of the neck to anchor the clasp in place. This minor modification drastically improves the wearability of the necklace without altering its visual design.
Preventative Maintenance and Material Upgrades
Once your bead and chain necklace is repaired, implementing a routine maintenance schedule will prevent future catastrophic failures. The Gemological Institute of America (GIA) frequently notes that environmental factors and improper storage accelerate the degradation of stringing materials.
Expert Insight: Never store a bead and chain necklace hanging on a standard jewelry tree. The constant downward pull of gravity on the heavy beads places continuous tension on the crimp tubes and transition links, accelerating metal fatigue. Always store hybrid necklaces laid flat in a velvet-lined drawer or loosely coiled in a ziplock bag to allow the nylon-coated wire to relax and retain its memory.
Additionally, inspect your crimp tubes and jump rings every six months. Use a jeweler's loupe (10x magnification) to examine the wire where it enters the crimp tube. If you see any fraying of the nylon coating or a visible gap between the crimp tube and the wire, it is time to restring the piece before it breaks. Finally, avoid wearing your necklace in chlorinated pools or hot tubs; chlorine aggressively attacks the copper alloys in sterling silver and gold-filled wire guardians, causing them to become brittle and snap under the weight of the beads.


