What Is a Journey Necklace? A Beginner’s Guide to Graduating Pendants
Discover what a journey necklace is, how to choose the right diamond or gemstone pendant, and the best chain pairings for this meaningful jewelry style.

The Anatomy and History of the Journey Necklace
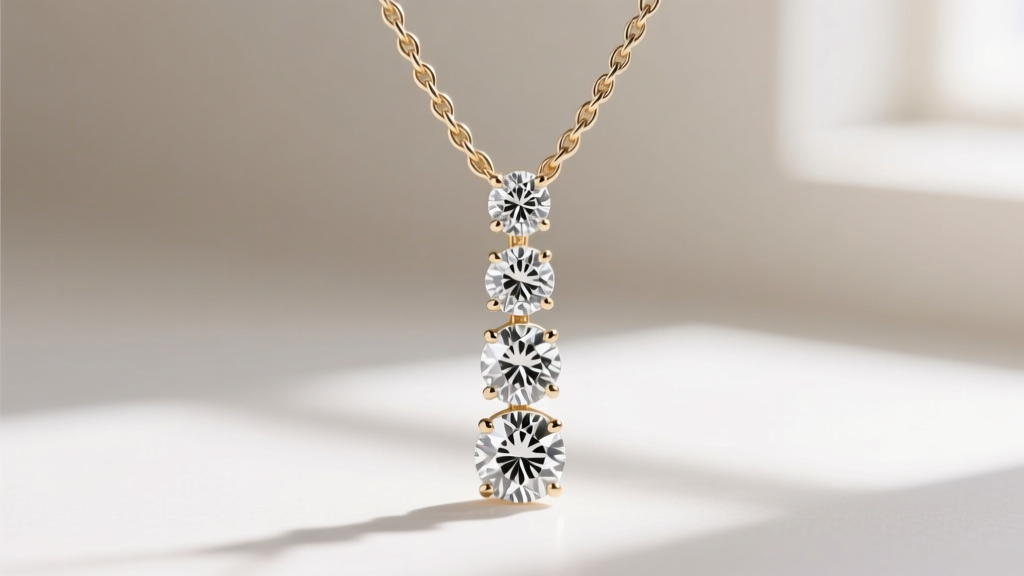
If you have ever browsed a fine jewelry counter, you have likely seen a journey necklace, even if you did not know its specific name. At its core, a journey necklace is a pendant featuring a sequence of graduating gemstones—most commonly diamonds—that decrease or increase in size along a curved or straight vertical path. The largest stone typically rests at the bottom, acting as the visual anchor, while the smaller stones trail upward toward the chain.
The term was popularized in 2004 when De Beers launched their massive 'Journey' marketing campaign, positioning the graduating diamonds as a symbol of a relationship's evolving path, personal growth, or life's milestones. While the specific trademarked campaign has since faded, the structural design became a permanent staple in the jewelry industry. Today, a journey pendant is recognized universally by its cascading stone configuration, offering a more dynamic and modern alternative to the traditional solitaire pendant.
For beginners, the appeal lies in its versatility and movement. Unlike a static solitaire, the graduated stones catch the light at multiple angles as the wearer moves, creating a 'waterfall' effect that draws the eye downward and elongates the neckline.
Stone Configurations: Finding Your Perfect Sequence
Journey pendants are not one-size-fits-all. The number of stones drastically alters the pendant's length, total carat weight (TCW), and overall price point. Understanding these configurations is crucial before making a purchase.
| Stone Count | Typical TCW Range | Pendant Drop Length | Best For | Avg. Price (Lab-Grown) |
|---|---|---|---|---|
| 3 Stones | 0.15ct - 0.50ct | 12mm - 18mm | Minimalists, everyday wear, petite frames | $250 - $600 |
| 4 Stones | 0.35ct - 1.00ct | 18mm - 25mm | The classic standard, balanced visibility | $450 - $1,200 |
| 5 to 7 Stones | 0.75ct - 2.00ct+ | 25mm - 40mm+ | Statement pieces, evening wear, deep V-necks | $800 - $2,500+ |
Note: Prices for natural, earth-mined diamonds with comparable grading will typically be 3x to 5x higher than the lab-grown estimates listed above.
The 4 Cs Applied to Graduating Stones
A common beginner mistake is overpaying for diamond grades that do not matter in a journey setting. Because the stones in a journey pendant are usually 'melee' or 'semi-melee' (under 0.20 carats each), the standard rules of diamond buying shift.
Clarity: Where You Can Save
In a solitaire ring, you might hunt for VS1 or VS2 clarity. In a journey necklace, the stones are simply too small for the naked eye to detect minor inclusions. According to the Gemological Institute of America (GIA), inclusions in melee diamonds are exceptionally difficult to see without 10x magnification. Opting for SI1 or even SI2 clarity will save you significant money without any visible compromise in brilliance.
Color and Cut: Where You Must Spend
Because the stones are lined up directly next to one another, color mismatches are glaringly obvious. You want all the diamonds to face up as the same color. Aim for the G-H color range (near colorless). More importantly, prioritize Ideal or Excellent Cut. A poorly cut small diamond will look like a dull piece of glass, whereas a precisely cut stone will reflect maximum light, creating that signature sparkle.
Metals and Settings: Durability Meets Design
The metal you choose dictates both the aesthetic and the maintenance requirements of your necklace.
- 14k White Gold: The most popular choice for diamond journey pendants. It requires rhodium plating every 1-2 years to maintain its bright white finish, but it is highly durable and affordable.
- 18k Yellow Gold: Offers a rich, warm contrast against white diamonds. It is softer than 14k gold, meaning the prongs may require occasional checking by a jeweler to ensure the stones remain secure.
- Platinum: The premium choice. Platinum is naturally white, hypoallergenic, and incredibly dense. It will develop a patina over time, but it will never require rhodium plating. It is also the safest metal for securing precious stones due to its strength.
Regarding settings, shared prong settings are the industry standard for journey pendants. This technique uses a single prong to hold two adjacent stones, minimizing the amount of visible metal and maximizing light exposure. Alternatively, bezel settings (where a thin rim of metal surrounds each stone) offer a modern, sleek look and provide superior protection against snagging on clothing.
How to Style and Layer a Journey Pendant
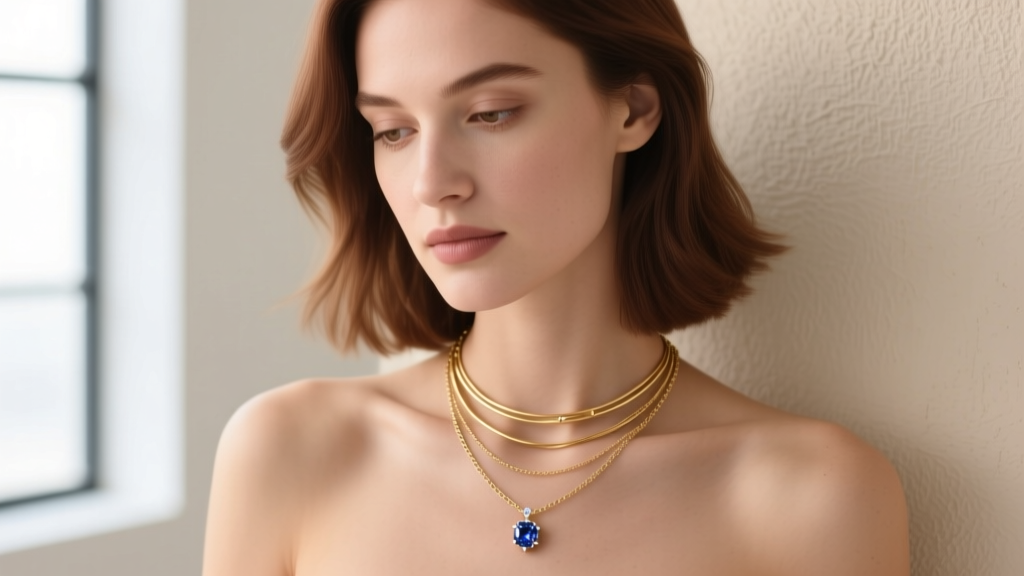
The vertical, 'V-shaped' drop of a journey necklace makes it an exceptional layering piece. However, getting the proportions right requires an understanding of chain lengths.
- The Base Layer (14-16 inches): Start with a simple choker or a small 3mm puka shell necklace. This sits high on the collarbone and frames the face.
- The Journey Layer (18 inches): Your journey pendant should sit squarely in the middle. An 18-inch chain allows the graduating stones to rest just below the collarbone, drawing the eye downward without getting lost in fabric.
- The Anchor Layer (22-24 inches): Finish with a longer, heavier chain, such as a 2.0mm gold rope chain or a simple lariat, to anchor the stack.
Pro Tip: If you plan to layer, ensure your journey pendant has a fixed, soldered bail rather than a hidden bail. Fixed bails slide more easily over the clasps of other necklaces, reducing tangling.
The Beginner's Buying Checklist
Before you finalize your purchase, run through this quick technical checklist to ensure you are getting a high-quality piece of jewelry:
- Chain Thickness Compatibility: Most journey pendant bails accommodate chains up to 1.2mm thick. If you already own a 2.0mm box chain, verify the bail dimensions first, or you will need to buy a new chain.
- Clasp Quality: Avoid cheap spring-ring clasps, which are notoriously difficult to operate and prone to snapping. Insist on a lobster clasp for security and ease of use.
- Hallmark Stamps: Inspect the bail or the clasp for a quality stamp. You should see '14K', '18K', 'PT' (Platinum), or '925' (Sterling Silver). For further reading on precious metal standards, consult the GIA research archives on metal hallmarking and consumer protection.
- Stone Security: Run your fingernail gently over the prongs. They should feel smooth and flush against the stones. Any snagging indicates poorly finished prongs that will eventually tear your clothing or lose a diamond.
Final Thoughts
A journey necklace is more than just a sequence of stones; it is a masterclass in proportion and light performance. By understanding the nuances of stone configurations, prioritizing cut over clarity, and selecting the appropriate chain gauge, you can invest in a piece that offers both profound symbolism and enduring everyday elegance. Whether you choose a subtle three-stone lab-grown diamond pendant or a dramatic seven-stone natural sapphire cascade, the journey necklace remains a timeless testament to personal style and meaningful milestones.