How to Choose and Layer a Gold Side Cross Necklace
Learn how to choose, size, and layer a gold side cross necklace. Our step-by-step guide covers chain gauges, gold karats, and neckline pairing.


The gold side cross necklace—featuring a horizontal or asymmetrical off-center cross pendant—has become a staple in modern jewelry styling. Unlike traditional vertical crucifixes, the side cross offers a subtle, contemporary edge that pairs beautifully with both minimalist and maximalist wardrobes. However, styling a horizontal pendant introduces unique mechanical challenges, such as the dreaded 'pendant flip' and uneven weight distribution. This comprehensive, step-by-step guide will teach you how to select the correct gold karat, measure for the perfect drop, and master the art of layering your side cross necklace like a professional stylist.
Step 1: Decoding the Side Cross Orientation and Bail Mechanics
Before purchasing, you must understand the anatomy of a horizontal pendant. The most common issue with a gold side cross necklace is rotation. Because the center of gravity on a horizontal cross is wider than it is tall, a standard sliding bail will cause the pendant to flip upside down or slide off-center along the chain. To prevent this, look for specific bail mechanics:
- Soldered Fixed Bails: The bail is permanently soldered to the exact center of the cross, locking it in a horizontal position. This is the gold standard for side cross pendants.
- Dual-Ring Sliders: Two small jump rings thread the chain through the left and right arms of the cross, keeping it perfectly level while allowing slight movement.
- Silicone Stoppers: If your necklace features a sliding pendant, use transparent silicone necklace spacers on the chain to lock the cross in the desired off-center or horizontal position.
Step 2: Selecting the Right Gold Karat and Chain Gauge
The structural integrity of your necklace depends heavily on the gold alloy and chain thickness. According to the Gemological Institute of America (GIA), pure 24k gold is too soft for daily wear jewelry. For a side cross necklace, which experiences lateral tension, 14k gold (58.5% pure gold) is the optimal choice. It provides the tensile strength necessary to support the off-center weight distribution without stretching the jump rings over time. If you prefer the richer, warmer hue of 18k gold (75% pure gold), you must compensate by choosing a thicker chain gauge to prevent micro-fractures.
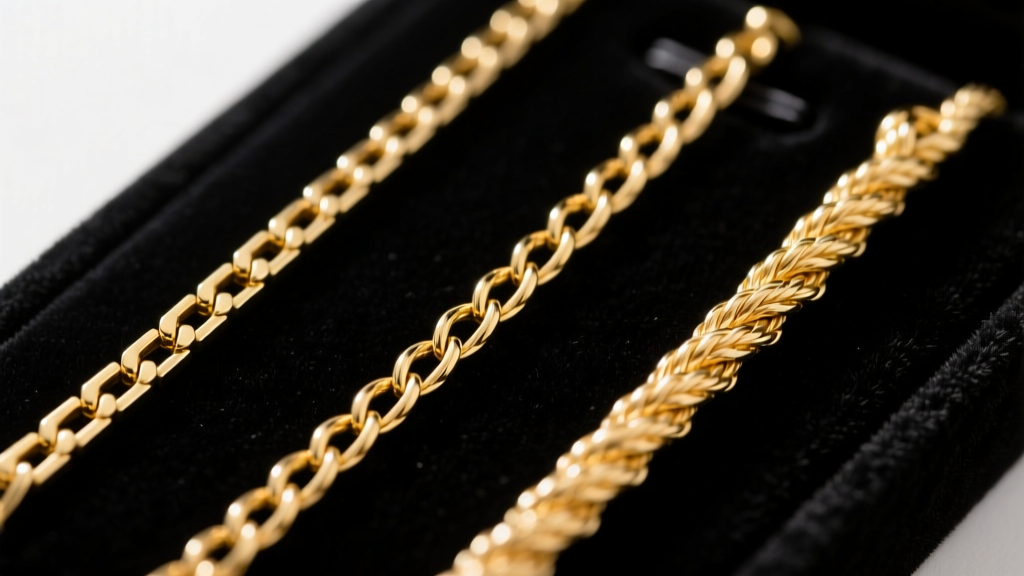
| Chain Type | Ideal Gauge | Best For Side Cross? | Why? |
|---|---|---|---|
| Box Chain | 0.9mm - 1.2mm | Yes (Highly Recommended) | Lays completely flat, preventing the horizontal pendant from twisting. |
| Franco Chain | 1.2mm - 1.5mm | Yes | V-shaped links offer excellent rigidity and resist kinking under lateral weight. |
| Cable Chain | 0.8mm - 1.0mm | No | Oval links easily twist, causing the horizontal cross to flip upside down. |
| Rope Chain | 1.5mm+ | No | The helical twist of the rope competes visually with the clean lines of a side cross. |
Step 3: Measuring for the Perfect Drop and Asymmetry
The visual impact of a side cross necklace relies entirely on where it hits the décolletage. Horizontal pendants require more precision than vertical ones because they draw the eye laterally. To find your ideal length, use a soft measuring tape or a piece of string cut to the following standard lengths:
- 15 Inches (Choker): Sits tightly at the base of the neck. Best for a highly modern, edgy look. Requires a smaller, minimalist side cross (under 15mm wide).
- 16 Inches (Collarbone): The most versatile length. The horizontal cross will rest perfectly in the hollow of the collarbone, making it ideal for crew necks and off-shoulder tops.
- 18 Inches (Crew Neck Drop): Sits a few inches below the collarbone. This is the safest choice for layering, as it provides enough real estate to stack with shorter chains without tangling.
Pro Tip: Always opt for a chain with a 2-inch extender. This allows you to adjust the horizontal drop based on the neckline of your outfit, ensuring the cross never awkwardly bisects a seam or collar.
Step 4: Step-by-Step Layering Techniques
Layering a gold side cross necklace requires adherence to the 2-Inch Separation Rule to prevent the chains from braiding together and hiding the horizontal pendant. Here is a step-by-step framework for building a balanced, asymmetrical stack:
- The Base Layer (14"): Start with a delicate 14-inch 18k gold snake chain or a simple bead chain. This draws the eye upward and frames the face.
- The Focal Point (16" or 18"): Place your gold side cross necklace here. Ensure the chain gauge is at least 0.2mm thicker than your base layer to establish visual hierarchy.
- The Anchor (20"+): Finish with a 20-inch or 22-inch lariat or a simple, heavier pendant (like a gold coin or bar) to create a V-shape that elongates the torso.
"When layering horizontal pendants, avoid stacking them with other wide geometric shapes. Pair the side cross with organic textures, like pearl or baroque freshwater beads, to create a striking contrast between structured and fluid elements."

Step 5: Matching Necklines to Horizontal Pendants
The geometry of your clothing must complement the geometry of your jewelry. A gold side cross necklace interacts with necklines differently than traditional pendants:
- Boatnecks (Bateau): The horizontal line of the cross perfectly mirrors the horizontal line of a boatneck sweater, creating a cohesive, high-fashion silhouette.
- V-Necks: While V-necks traditionally call for Y-drop or vertical pendants, a shorter 15-inch side cross sitting above the V-neckline creates a chic, unexpected contrast.
- Asymmetrical Tops: If wearing a one-shoulder top, position the side cross so the longer arm of the cross points toward the exposed shoulder, balancing the visual weight of the garment.
Step 6: Maintenance and Cleaning Intricate Joints
Because side cross necklaces often feature soldered joints or dual-ring sliders to maintain their horizontal orientation, they require specific cleaning protocols. The Jewelers of America advises against using harsh ultrasonic cleaners on hollow or intricately soldered pendants, as the high-frequency vibrations can weaken the microscopic solder points holding the cross in its fixed horizontal position.
The Safe Cleaning Method:
- Mix three drops of mild, phosphate-free dish soap into a bowl of lukewarm distilled water.
- Submerge the gold side cross necklace for exactly 5 minutes to loosen sebum and cosmetic residue.
- Use an extra-soft baby toothbrush to gently sweep the crevices where the bail meets the cross arms.
- Rinse under a gentle stream of lukewarm water and pat dry with a microfiber cloth. Never air-dry, as water spots will dull the high-polish finish of the gold.
By following these precise steps, your gold side cross necklace will remain a structurally sound and impeccably styled cornerstone of your jewelry collection for years to come.


