How to Temporarily Shorten a Necklace: Expert Hacks & Techniques
Learn how to temporarily shorten a necklace without cutting or damaging the chain. Expert techniques, tools, and material-specific hacks for perfect layering.

The Physics of Chain Tension and Metallurgical Abrasion
Layering necklaces or adapting a 20-inch chain to a 16-inch choker length is a common styling dilemma. While a jeweler can easily remove links and solder the chain, this permanent alteration destroys the original versatility of the piece. Understanding how to temporarily shorten a necklace requires a technical grasp of chain gauge, tensile strength, and metallurgical abrasion. In this expert deep dive, we bypass the superficial social media hacks and explore structurally sound, zero-damage methods to adjust your necklace length on the fly. Whether you are working with a fragile 0.5mm herringbone chain or a heavy 4mm Cuban link, the mechanics of tension and friction must be respected to preserve the integrity of your jewelry.
When you bunch a chain to shorten it, you create stress concentration points at the gathering node. A standard 14k gold cable chain (typically 0.8mm to 1.2mm gauge) relies on soldered link joints. If you use a rigid metal binder ring or a standard steel safety pin to gather the excess chain at the nape of the neck, the friction between the pin and the soft gold alloy will cause micro-abrasions. On the Mohs hardness scale, hardened steel sits around 5.5 to 6.5, while 14k and 18k gold alloys range from 2.5 to 3.0. The steel will inevitably scratch and gouge the precious metal. According to the Gemological Institute of America (GIA), improper handling and friction-based storage of precious metals accelerates surface degradation and compromises structural solder joints. Therefore, any temporary shortening method must introduce a buffer material between the chain links and the gathering mechanism.
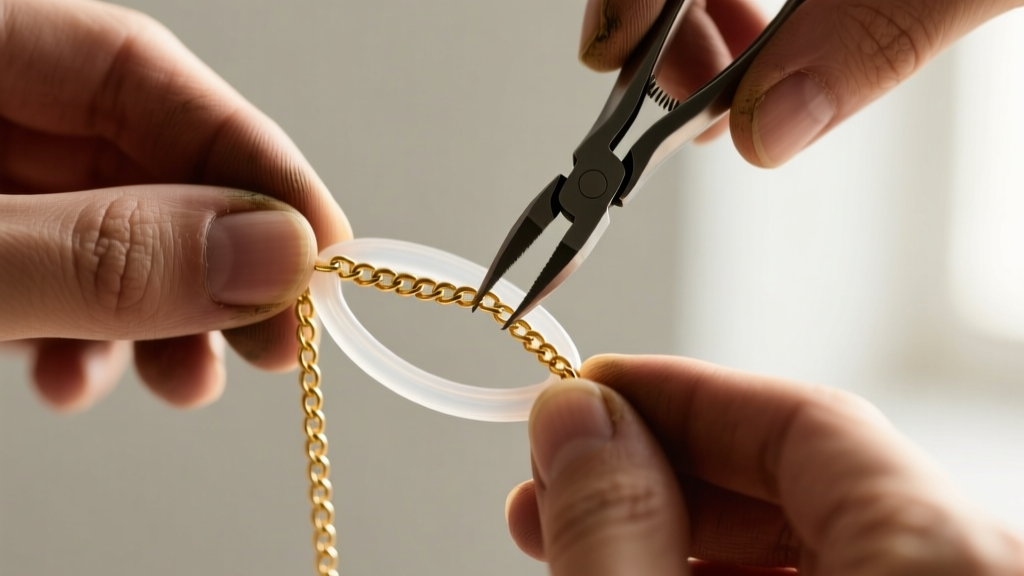
Method 1: The Clear Polyurethane Elastic Loop
This method is engineered for delicate chains ranging from 0.5mm to 1.5mm in gauge, such as cable, box, and rolo chains. Materials required include 0.5mm or 0.8mm clear polyurethane elastic thread (commonly sold under brand names like Stretch Magic) and flush micro-cutters. The critical error most consumers make is looping the elastic through a single soldered joint and pulling it taut. This places the entire tensile load of the bunched chain onto one microscopic solder seam, which will eventually snap under the dynamic movement of the neck.
Instead, thread the elastic through three to five consecutive links, creating a distributed load bridge. Loop the elastic back through the links and tie a secure surgeon's knot, applying a micro-drop of cyanoacrylate adhesive to the knot tail. Trim the excess flush. This creates a flexible, invisible tension loop that gathers the excess chain at the nape without applying shear force to any single link.
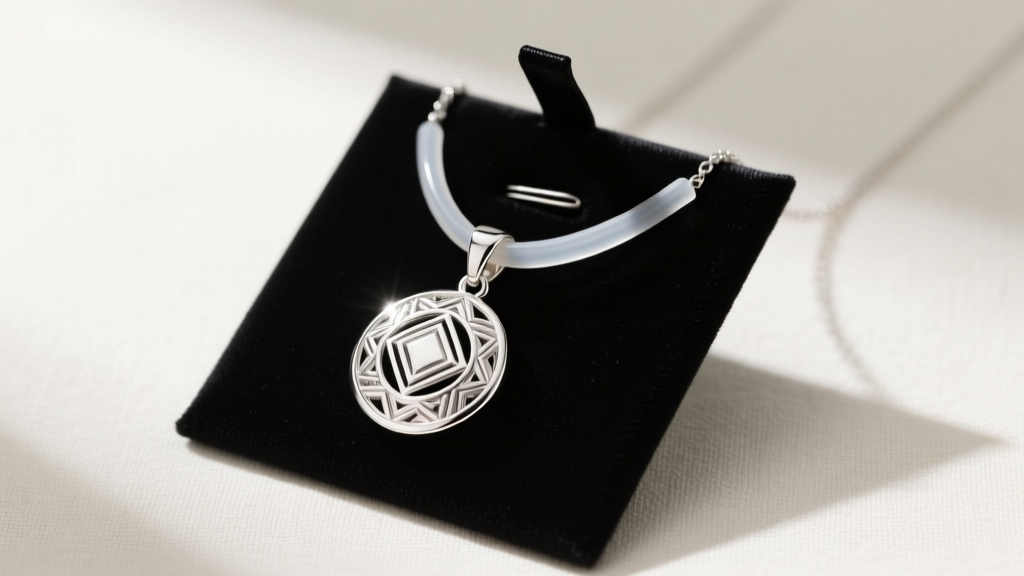
Method 2: The Silicone-Sleeved Anchor Pin
For heavy pendants weighing over 15 grams and thick chains (2.0mm to 5.0mm gauge), elastic thread lacks the necessary shear strength and will snap. You must use a rigid anchor, but you must isolate the metal. Standard safety pins are unacceptable due to the Mohs hardness mismatch mentioned earlier. The professional solution is to use a stainless steel safety pin encased in a medical-grade silicone sleeve or heat-shrink tubing.
Slide a 2mm inner-diameter silicone tube over the pin's bridge before closing it. When you gather the heavy chain links at the back of the neck, the silicone acts as a high-friction, zero-abrasion buffer. The Halstead Bead findings guide emphasizes that isolating base metals and hardened steels from precious alloys is the cornerstone of preventive jewelry conservation. The silicone sleeve also prevents the pin from slipping through larger gauge links, a common failure mode when shortening 3mm+ Figaro or Cuban chains.
Method 3: Neodymium Magnetic Clasp Converters
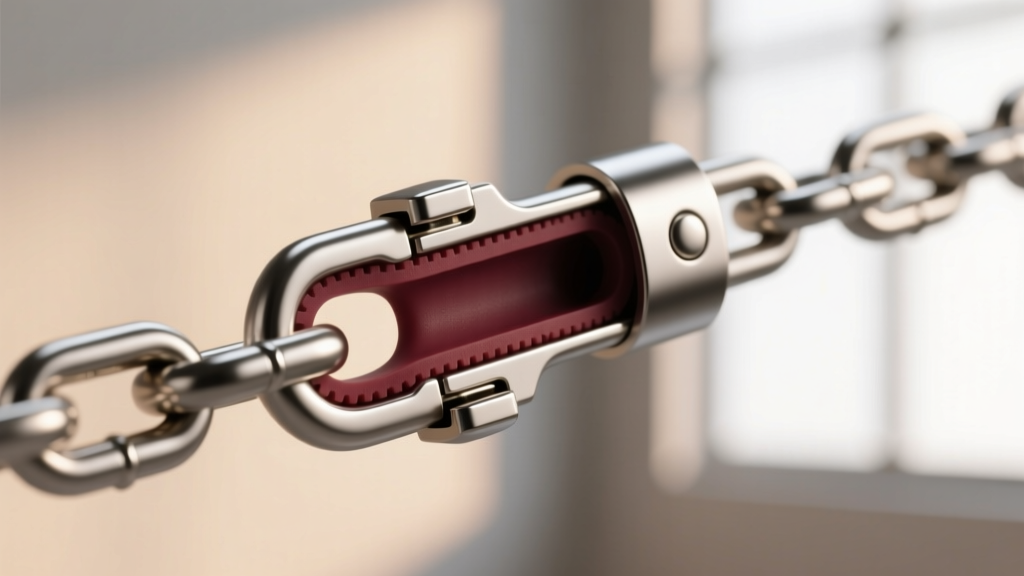
If you are shortening a necklace to achieve a specific choker fit rather than just hiding excess length at the nape, a magnetic clasp converter is the optimal technical solution. These devices feature N52-grade neodymium magnets housed in a brass or stainless steel cylinder. The interior of the cylinder is lined with a ribbed silicone friction insert.
To shorten the chain, you simply fold the necklace in half, insert both the original clasp and a midpoint of the chain into the magnetic converter, and let the magnets snap shut. The internal silicone ribs grip the chain links, preventing slippage, while the magnetic housing bears the tensile load. This method is particularly effective for snake chains and omega chains, which cannot be bunched or looped without suffering permanent, catastrophic kinking. The Silver Institute notes that maintaining the structural alignment of non-traditional chain weaves is critical, as bending an omega chain past its natural radius will permanently fracture the internal support mesh.
Material-Specific Considerations: Vermeil vs. Solid Gold
Gold vermeil (a thick layer of gold over sterling silver) requires extreme care when adjusting lengths. The gold layer is typically 2.5 microns thick. Any metal-on-metal friction from a makeshift shortening hack will burn through this layer in a matter of days, exposing the silver base to rapid oxidation. Solid 14k or 18k gold is more forgiving but still susceptible to work hardening and micro-scratches. Sterling silver, while softer, is prone to tarnishing when the protective rhodium plating is scratched away. Therefore, the buffer methods detailed above are not optional; they are mandatory for preserving the financial and aesthetic value of your jewelry.
Comparison Matrix: Temporary Shortening Techniques
| Technique | Optimal Chain Gauge | Max Pendant Weight | Abrasion Risk | Best Chain Weave |
|---|---|---|---|---|
| Elastic Loop | 0.5mm - 1.5mm | 5 grams | Zero | Cable, Rolo, Box |
| Silicone Anchor Pin | 2.0mm - 5.0mm | 45+ grams | Zero | Cuban, Figaro, Rope |
| Magnetic Converter | 1.0mm - 3.0mm | 15 grams | Very Low | Snake, Omega, Herringbone |
Troubleshooting: Slippage, Kinking, and Clasp Failure
Even with the correct technique, specific chain weaves present unique engineering challenges. Herringbone and snake chains are notoriously prone to kinking. Never use the elastic loop or safety pin method on these weaves; the lateral pressure will permanently fold the flat links. Always use the magnetic converter or a specialized ribbon slide clasp for these styles.
Another common issue is slippage on polished box chains. The smooth, flat surfaces of box links offer very little friction for elastic loops. To counteract this, wrap a microscopic piece of clear matte tape around the links before applying the elastic loop, creating a high-friction surface that will not damage the gold or silver plating.
Pro-Tip: If your temporary shortening method places excessive tension on the original lobster clasp, you risk deforming the clasp's internal spring mechanism. Always ensure that the gathering node at the nape of the neck bears the dynamic tension, leaving the front clasp to simply rest in a closed, unloaded state.
Conclusion
Mastering how to temporarily shorten a necklace is not about quick fixes; it is about applied jewelry mechanics. By understanding gauge tolerances, tensile distribution, and metallurgical hardness, you can adapt your necklaces to any neckline or layering configuration without sacrificing the longevity of your pieces. Ditch the paperclips and rubber bands, and invest in polyurethane elastic, silicone sleeves, and neodymium converters to maintain your collection in pristine, wearable condition.


