Find Your Earring Stack Inspo: A Step-by-Step Guide
Discover the best earring stack inspo with our step-by-step guide. Learn gauge sizing, metal pairings, and cartilage placement for a curated ear.

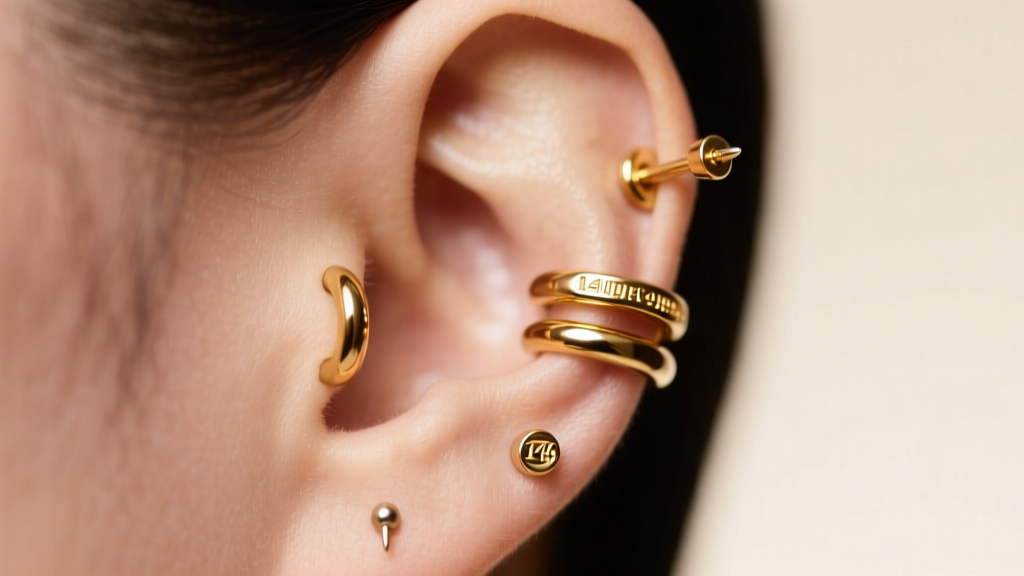
The Anatomy of a Curated Ear: Beyond Basic Earring Stack Inspo
Searching for earring stack inspo online often yields beautifully lit photos of celebrity ears, but translating those images to your own anatomy requires a strategic approach. A truly curated ear is not just about buying expensive jewelry; it is an exercise in spatial planning, metallurgy, and anatomical mapping. As we move through 2026, the trend has shifted away from chaotic, overloaded cartilage constellations toward intentional, balanced compositions that prioritize tissue health and visual hierarchy.
This step-by-step guide will walk you through the exact framework professional piercers and high-end jewelry curators use to build a stack. We will cover gauge constraints, implant-grade materials, and the mathematical spacing required to avoid the dreaded "cluttered" look while ensuring your piercings heal without migration or irritation bumps.
Step 1: Mapping Your Ear Anatomy and Gauge Constraints
Before purchasing any jewelry, you must understand the structural limitations of your ear. Cartilage thickness, the depth of your conch bowl, and the surface area of your helix ridge dictate what jewelry profiles will actually sit flush against your skin. Furthermore, gauge sizing is not universal across the ear.
While standard mall-kiosk lobe piercings are often done at 20-gauge (0.81mm) or 18-gauge (1.02mm), professional curators strongly recommend upgrading to 16-gauge (1.29mm) or even 14-gauge (1.63mm) for stacked lobes. Thicker posts provide structural stability, reducing the "cheese-cutter effect" where thin wires slowly migrate through the tissue over time. For cartilage piercings like the helix, conch, and tragus, 16-gauge is the undisputed industry standard for initial piercing and long-term wear.
| Piercing Placement | Standard Gauge | Optimal Curator Gauge | Common Jewelry Types |
|---|---|---|---|
| Standard Lobe | 20g - 18g | 16g | Threadless studs, huggies, clickers |
| Upper Lobe | 18g | 16g | Micro studs, small seamless rings |
| Helix / Flat | 16g | 16g | Flat-back studs, hoop clickers |
| Conch | 16g - 14g | 14g | Large studs, conch cuffs, hoops |
| Tragus | 16g | 16g | 3mm-5mm flat-back gems, micro hoops |

Step 2: Selecting Metals and Material Grades for Healing
The most common failure mode in building an ear stack is contact dermatitis or chronic irritation caused by subpar metallurgy. When curating a stack, especially if you are adding new piercings to existing ones, the metal grade is non-negotiable. According to the Association of Professional Piercers (APP), only specific materials are safe for long-term wear and fresh tissue.
The Big Three: Titanium, Gold, and Steel
- ASTM F136 Implant-Grade Titanium: The absolute gold standard for fresh piercings or highly reactive ears. It contains zero nickel and is lightweight, reducing pressure on the piercing channel. Brands like Anatometal and Industrial Strength specialize in this.
- 14k or 18k Solid Gold: Must be alloyed for biocompatibility (often with palladium or silver instead of nickel). High-end brands like BVLA and Maria Tash use nickel-free 14k/18k gold. Avoid gold-plated or gold-filled jewelry for cartilage stacks, as the base metal will eventually expose and cause severe reactions.
- 316L Surgical Steel: Despite the name "surgical," this steel contains 8-12% nickel. While fine for fully healed, non-reactive lobes, it is a primary trigger for nickel allergies. The National Center for Biotechnology Information (NCBI) notes that prolonged exposure to nickel-releasing alloys is the leading cause of allergic contact dermatitis.
Pro-Tip: Always opt for threadless (push-pin) or internally threaded jewelry. Externally threaded jewelry has sharp ridges that tear the delicate fistula (piercing channel) every time you change the top, leading to scar tissue buildup.
Step 3: The Rule of Three – Building the Visual Hierarchy
When gathering earring stack inspo, you will notice that the most aesthetically pleasing ears never treat every piercing equally. A successful stack relies on a strict visual hierarchy: the Focal Point, the Bridge, and the Accent.
1. The Focal Point (1-2 Pieces)
This is the anchor of your ear. It should be the largest, most intricate, or most expensive piece in your stack. Typically placed in the primary lobe or the conch. Think a 7mm diamond cluster, an ornate enamel floral stud, or a heavily paved daith clicker. This piece commands attention and sets the color palette for the rest of the ear.
2. The Bridge (2-4 Pieces)
These pieces connect the focal point to the outer edges of the ear. They should be complementary but subdued. If your focal point is a yellow gold diamond cluster, your bridge pieces might be 3mm solid gold bezel-set sapphires or simple 16-gauge gold huggie hoops in the upper lobes. Pricing for high-quality bridge pieces typically ranges from $80 to $250 per piece.
3. The Accent (3-5 Pieces)
Accents fill the negative space and provide a delicate finish. These are your 1.5mm micro-gems, tiny seamless rings, or minimalist tragus studs. They should not compete with the focal point. In a well-balanced stack, accents are often the first to be removed if the ear begins to look cluttered.
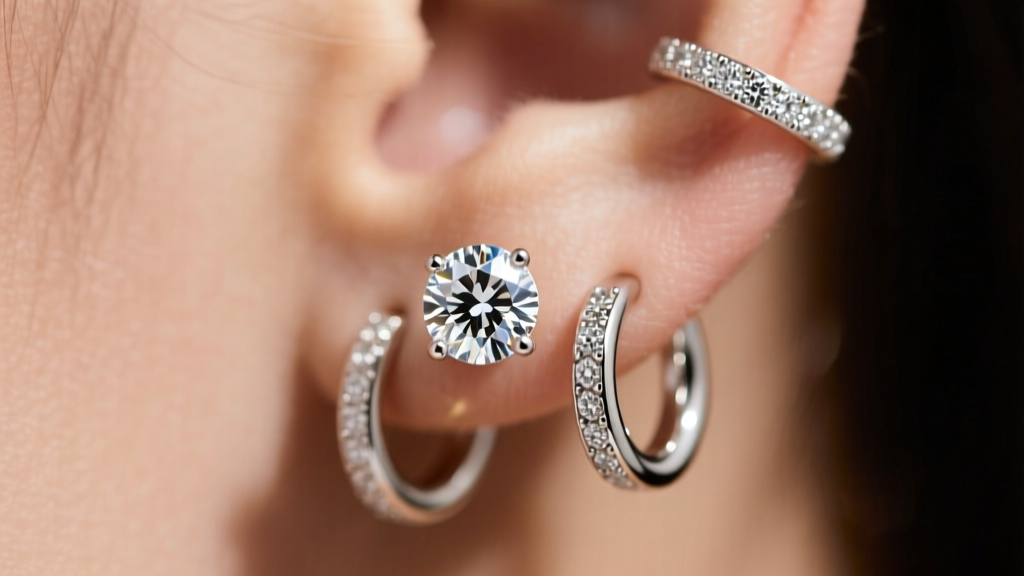
Step 4: Spacing, Angles, and Avoiding the "Clutter" Trap
The difference between a curated ear and a messy one comes down to millimeters. A common mistake is placing piercings too close together, which not only ruins the aesthetic but causes jewelry to physically overlap, trapping moisture and bacteria against the skin.
When planning your spacing, you must account for the footprint of the jewelry, not just the piercing hole. A standard flat-back disc is 3mm to 4mm in diameter. If you are wearing a 5mm gemstone, the total footprint is closer to 9mm. Therefore, adjacent piercings must be spaced at least 8mm to 10mm apart (measured center-to-center) to allow for swelling, jewelry bases, and proper cleaning access.
Angles are equally critical. A helix hoop must be pierced at an angle that allows the ring to hug the outer rim of the ear without pressing into the cartilage ridge. If a piercer uses a standard 90-degree entry for a flat piercing, a flat-back stud will stick straight out rather than lying flush against the ear's natural plane. Always seek out a piercer who specializes in "curated ear" angles and brings a variety of post lengths (from 6mm to 10mm) to accommodate your specific cartilage swelling.
Troubleshooting Common Stacking Failures
Even with perfect earring stack inspo and a master piercer, things can go wrong. Here is how to troubleshoot the most common issues:
- Irritation Bumps (Hypertrophic Scarring): Often mistaken for keloids, these small, fleshy bumps near the piercing hole are usually caused by pressure (sleeping on the ear), improper angles, or snagging. Solution: Downsize the post length immediately, switch to a flat-back titanium stud, and use a travel pillow to keep pressure off the ear while sleeping.
- Migration: If a surface piercing or shallow helix appears to be moving toward the edge of the skin, it is rejecting. Solution: Remove the jewelry immediately to prevent permanent scarring and tissue splitting.
- The "Cheese-Cutter" Effect: Thin 20-gauge hoops in the upper lobe slowly slicing downward through the tissue. Solution: Retire the thin wire hoops and switch to 16-gauge clickers or threadless studs to distribute the weight evenly.
"A curated ear is a living composition. What looks perfect on a mannequin or a digital render must adapt to the reality of your hair, your headphones, and your sleeping habits. Functionality must always precede aesthetics." — Senior Piercing Curator, Jewel Style Radar
Building your ultimate ear stack is a marathon, not a sprint. By prioritizing anatomical mapping, investing in implant-grade metals, and strictly adhering to visual hierarchy, you will create a timeless, healthy, and breathtaking curated ear that transcends fleeting seasonal trends.


