How to Wear a Climber Earring: Step-by-Step Fitting Guide
Learn how to securely fit and style a climber earring. Our step-by-step guide covers tension adjustment, gauge sizes, and troubleshooting drooping.

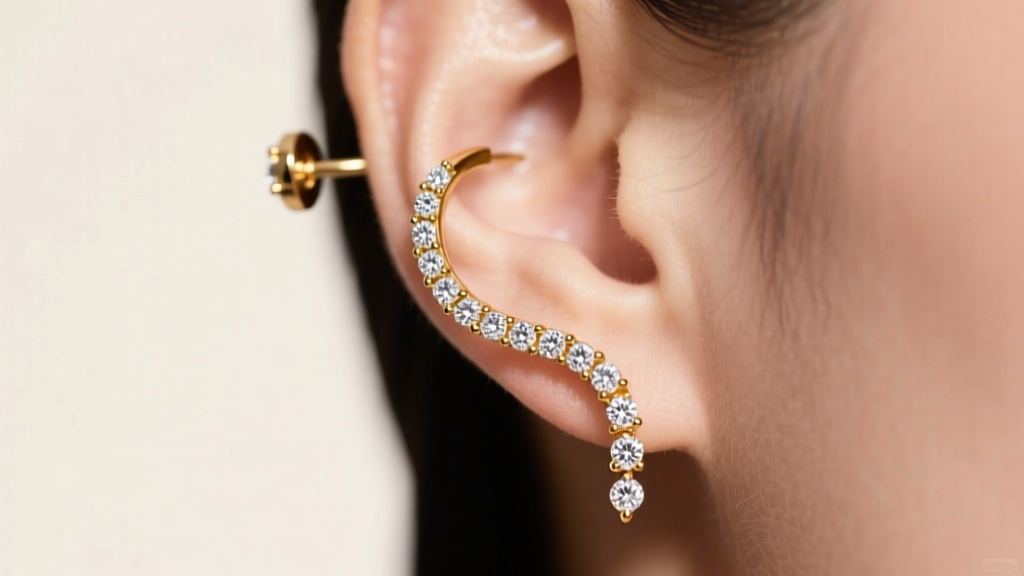
The climber earring (often called an ear crawler) has dominated ear curation trends well into 2026, offering the illusion of multiple cartilage piercings using only a single standard lobe fistula. However, the most common complaint among jewelry enthusiasts is the dreaded "droop"—when the earring loses its grip and sags downward, ruining the aesthetic. Unlike standard studs that rely on gravity and a friction back, a climber earring relies on precise biomechanical tension. If you do not install it correctly, it will slip, spin, or pinch. This comprehensive, step-by-step guide will teach you how to fit, secure, and troubleshoot your climber earrings like a professional jeweler.
The Biomechanics of an Ear Climber: Why They Slip
To master the application, you must first understand the anatomy of the jewelry. A standard climber earring utilizes a two-point anchor system. The first anchor is the straight post that passes through your ear piercing (the fistula). The second anchor is the tension wire—a curved, un-pierced extension that sweeps upward and presses gently against the back of your auricle (the ear's cartilage and skin).
When an ear climber droops, it is rarely a design flaw; it is almost always a failure of tension calibration. The space between the decorative front face and the posterior tension wire must be exactly equal to, or slightly narrower than, the thickness of your earlobe. If the gap is too wide, gravity pulls the heavy decorative front downward, using the post as a fulcrum. If the gap is too narrow, the earring will pinch the lobe, restricting blood flow and causing localized contact dermatitis or pressure necrosis over time.
Step-by-Step Guide to Fitting Your Climber Earring
Follow these exact steps to achieve a secure, comfortable fit that will last all day without needing constant adjustment.
Step 1: Assess the Fistula Angle
Ear piercings are rarely perfectly horizontal. Most lobe piercings are angled slightly downward or upward depending on the piercer's technique and your ear anatomy. Hold the climber earring up to your ear without inserting it. Note the angle of the post relative to the decorative curve. You must insert the post following the natural angle of your piercing hole to avoid tearing the tissue or creating unnatural leverage on the jewelry.
Step 2: The Downward Insertion
Do not attempt to put the earring on in the "upward" climbing position. Hold the earring so the decorative front is facing downward (towards the floor). Insert the post through the back or front of your earlobe (whichever is more comfortable for your specific fistula angle) until the post protrudes from the other side.
Step 3: The 180-Degree Rotation
Once the post is fully through the ear, gently rotate the entire earring 180 degrees so the decorative climber curve points upward along the edge of your ear. At this stage, the earring will feel loose and likely fall forward. This is normal.
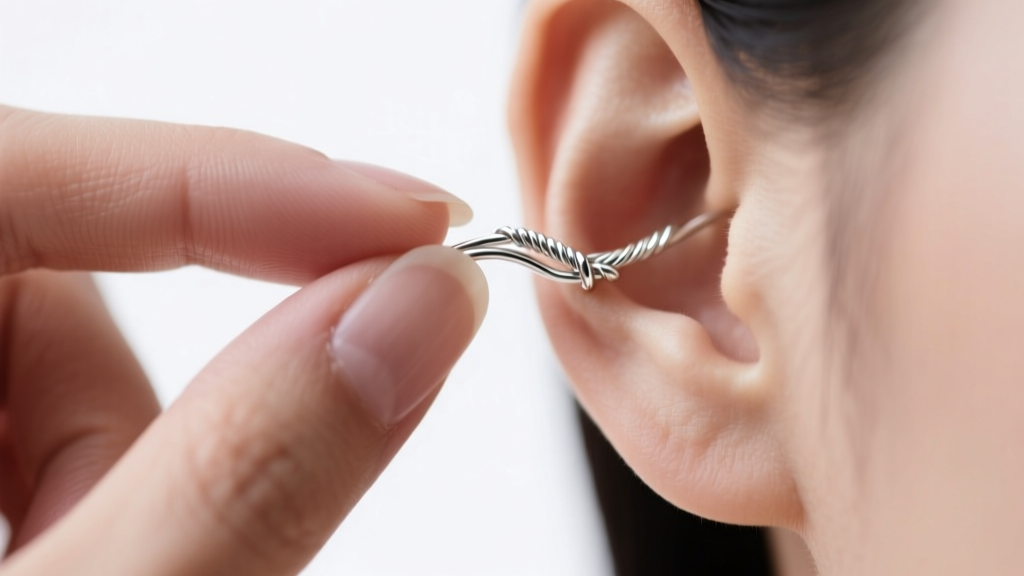
Step 4: Calibrating the Tension Wire (The Squeeze)
This is the most critical step. Using your thumb and index finger, gently pinch the base of the tension wire (the part closest to the post) toward the back of the decorative front piece. Never squeeze the delicate decorative elements or the gemstone settings. Apply micro-adjustments, squeezing for one second, releasing, and testing the fit against your ear. You want the wire to press firmly against the back of your ear without causing pain. A properly calibrated climber should require a slight, deliberate pull to remove from the ear.
Troubleshooting Common Climber Earring Failures
Even with perfect installation, environmental factors and ear anatomy can cause issues. Use this diagnostic table to solve common problems.
| Issue | Probable Cause | Expert Solution |
|---|---|---|
| Earring droops or falls forward | Tension wire gap is wider than earlobe thickness. | Remove earring. Pinch the base of the tension wire inward by 1-2mm. Re-test. |
| Earring spins in the piercing | Post gauge is too thin for a stretched fistula (e.g., 20g post in an 18g hole). | Slide a 1mm silicone O-ring or friction back onto the post behind the ear to lock the axis. |
| Sharp pain or red indentation | Wire is over-tightened or the wire tip is unfinished/sharp. | Gently bend the wire outward. If the tip is sharp, lightly buff it with a jeweler's cloth or emery board. |
| Wire snaps off during adjustment | Metal fatigue from repeated bending (work-hardening). | Stop adjusting once fitted. Never bend the wire back and forth repeatedly. |
Metallurgy and Gauge Specifications for Long-Term Wear
The material composition of your climber earring dictates how well it holds tension over time. According to the Association of Professional Piercers, the structural integrity of body jewelry is paramount for avoiding tissue irritation.
Understanding Gauge Thickness
Most standard ear climbers are manufactured in 18-gauge (1.0mm) or 20-gauge (0.81mm). While 20g is standard for basic stud earrings, an 18g post is vastly superior for climbers. The thicker post resists bending under the lever-action torque created by the weight of the climbing curve. If you purchase a heavy, gemstone-encrusted 20g climber, the post will eventually warp, causing permanent drooping.
Gold Alloys vs. Titanium
When choosing metals, consider the yield strength. The Gemological Institute of America (GIA) notes that 14k gold contains more alloy metals than 18k gold, making it physically harder and more resistant to scratching. However, for the tension wire itself, ASTM F136 Implant-Grade Titanium is the gold standard. Titanium possesses a low modulus of elasticity, meaning it acts like a microscopic spring. It can be pinched to fit the ear and will maintain that exact tension for years without suffering from the metal fatigue that plagues softer, high-karat gold wires.
Jeweler's Warning: Sterling silver (925) is highly discouraged for the tension wire of a climber earring. Silver work-hardens very quickly. If you repeatedly bend a silver tension wire to adjust the fit, it will become brittle and snap off at the solder joint within a few months.
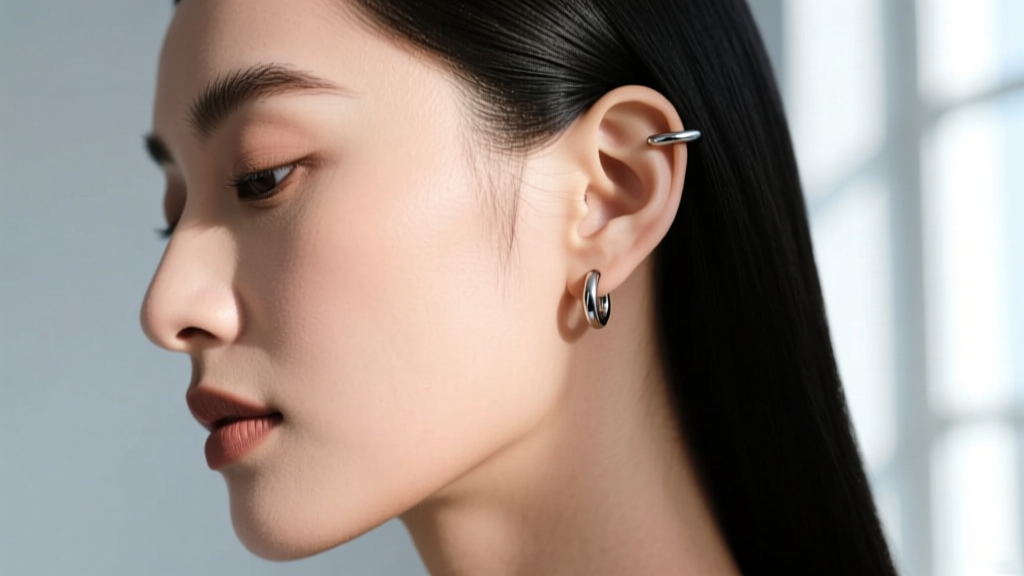
Styling Cartilage and Lobe Combinations
In 2026, the "curated ear" relies on balancing visual weight. Because a climber earring draws the eye vertically up the edge of the ear, it occupies the visual space typically reserved for mid-helix or auricle piercings.
- For Round Face Shapes: Choose a climber earring with sharp, geometric angles or elongated marquise stones. The vertical line created by the climber helps elongate the jawline and cheekbones.
- Pairing with Cartilage: If you have upper cartilage piercings (like a helix or flat), avoid wearing a second climber on the same ear. Instead, pair the lobe climber with a simple, flush-fitting cartilage stud or a small seamless hoop. This prevents the ear from looking cluttered and allows the climber's silhouette to stand out.
- Asymmetry is Key: Wear a bold, diamond-encrusted climber on one ear, and balance it with a stack of three minimalist, matching metal studs on the opposite ear. This creates a modern, intentional aesthetic without overwhelming your features.
Final Fitting Checklist
Before leaving the house, run through this rapid checklist to ensure your climber earring is secure:
- Is the decorative front sitting flush against the skin without gaps?
- Can you slide a piece of paper between the tension wire and the back of your ear, but not a credit card? (This indicates perfect tension).
- Is the post locked in place with a silicone stopper if the fistula is slightly stretched?
- Have you avoided applying hairspray or heavy oils directly onto the tension mechanism, which can cause the wire to slip against the skin?
Mastering the climber earring requires a departure from the "push and forget" mentality of standard studs. By respecting the biomechanics of the tension wire, choosing the correct gauge and metallurgy, and applying micro-adjustments, you can wear ear crawlers with absolute confidence, knowing they will stay perfectly in place from morning until night.


