How to Style Earrings: Big Earrings Lobe Support Guide
Learn how to style and wear heavy statement pieces comfortably. Our step-by-step guide to big earrings covers lobe support, gauge sizes, and balance.

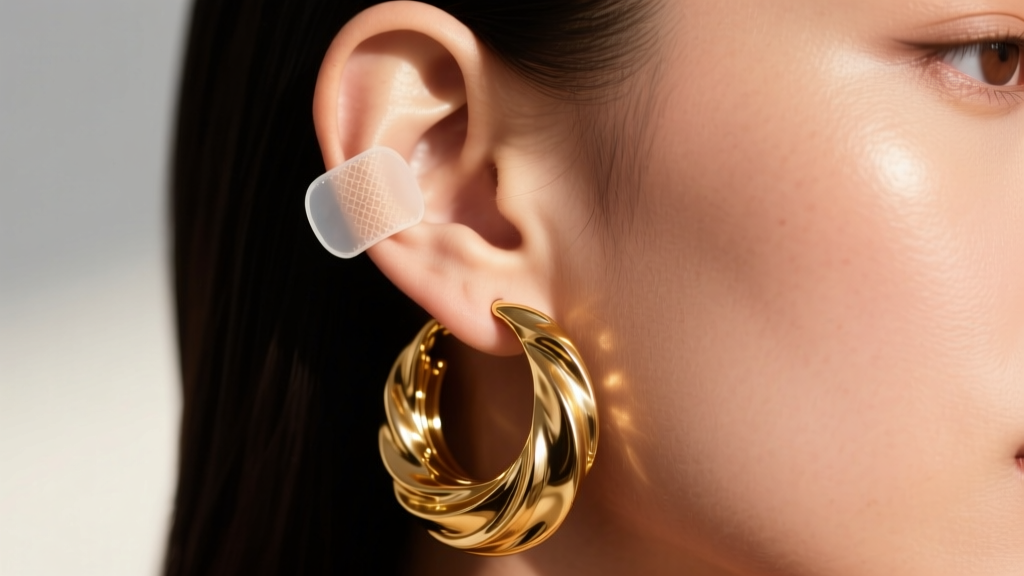
When shopping for statement earrings, big earrings often catch the eye but present unique structural challenges. Oversized dangles, heavy geometric brass drops, and thick metallic hoops can easily exceed the natural weight-bearing capacity of the human earlobe. Without proper support, heavy jewelry leads to stretched piercing holes, the dreaded 'cheese-cutter' effect, and chronic lobe fatigue. In 2026, the trend of maximalist ear curation remains dominant, making it essential to understand the biomechanics of heavy jewelry. This step-by-step guide will teach you how to select the right hardware, prep your lobes, and style oversized pieces without sacrificing comfort or tissue health.
The Physics of Heavy Jewelry: Why Big Earrings Drag
The human earlobe is primarily composed of adipose (fat) tissue and loose connective tissue, lacking the rigid cartilage found in the upper ear. Because of this soft composition, the average earlobe can comfortably support between 7 to 10 grams of weight before the downward pull begins to distort the piercing channel. When you wear 20-gram statement pieces, gravity forces the earring wire or post against the bottom edge of the piercing hole. Over time, this localized pressure restricts blood flow and slowly stretches the tissue downward.
The thickness of the earring wire—measured in gauge—plays a critical role in weight distribution. Standard fashion earrings are typically 20-gauge (0.81mm) or 22-gauge (0.64mm). A thin 22-gauge wire bearing 15 grams of weight acts like a blade, accelerating tissue tearing. For heavy pieces, you must look for 18-gauge (1.02mm) or 16-gauge (1.29mm) posts and wires. The wider surface area disperses the gravitational load across more tissue, significantly reducing the risk of migration and tearing.
Step 1: Selecting the Right Hardware and Backings
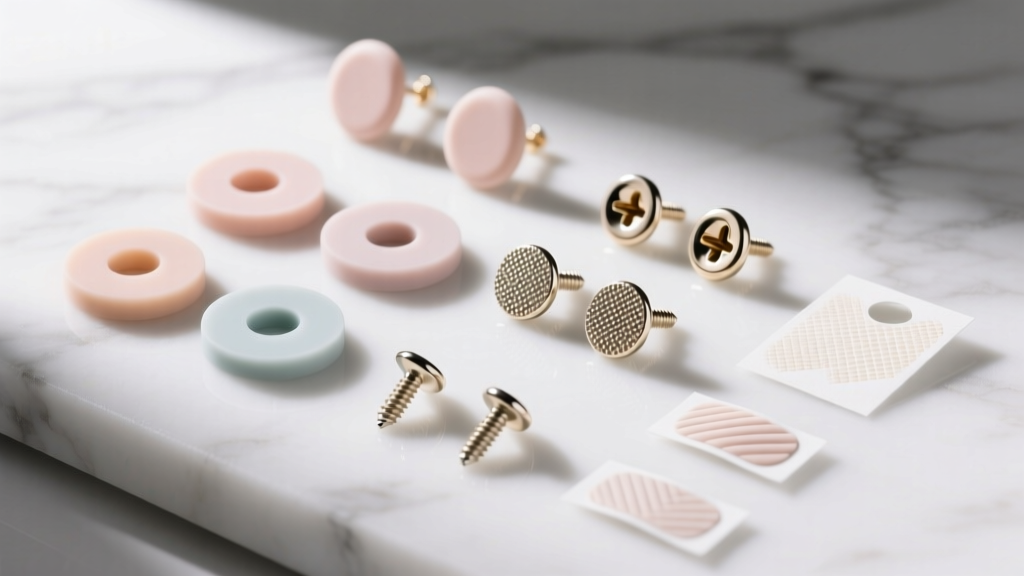
The earring backing is your first line of defense against gravity. Standard butterfly friction backs are entirely inadequate for heavy jewelry; they slip down the post, allowing the earring to tilt forward and pull on the bottom of the piercing hole. To properly anchor big earrings, you must upgrade your backing system based on the specific weight and post type of the jewelry.
| Backing Type | Best For | Weight Limit | Pros & Cons |
|---|---|---|---|
| Silicone Disc Backings | Standard posts, lightweight dangles | Up to 12g | Pros: Grips post tightly, cushions lobe. Cons: Can degrade with oils/perfume. |
| Screw-Back Posts | Heavy diamond/gemstone drops | Up to 25g | Pros: Impossible to lose, highly secure. Cons: Requires threaded posts, hard to adjust. |
| Adhesive Lobe Patches | Oversized hoops, heavy brass drops | Up to 40g | Pros: Lifts the lobe, distributes weight. Cons: Single-use, requires clean skin. |
| French Wire Ear Hooks | Dangle earrings, bohemian styles | Up to 15g | Pros: Easy to insert. Cons: No back support, relies entirely on lobe strength. |
Step 2: Prepping and Supporting the Earlobe
If your statement pieces exceed 15 grams, adhesive lobe support patches (often made from medical-grade polyurethane) are mandatory. These patches adhere to the back of the earlobe, providing a rigid, invisible scaffold that absorbs the downward pull. Follow this exact protocol to apply them:
- Cleanse the Area: Wash the back of your earlobe with an alcohol wipe to remove natural sebum, lotions, and dead skin cells. Allow it to dry completely; adhesive will fail on oily skin.
- Apply the Patch: Peel the protective backing off the support patch. Align the pre-punched hole with your piercing, pressing the patch firmly against the back of your lobe for 10 seconds to activate the medical adhesive.
- Insert the Earring: Push the earring post through the front of your lobe, passing through both the tissue and the patch. Secure it with a wide silicone or metal backing against the patch.
- Distribute the Weight: Gently push the earring face upward while securing the back. This ensures the patch holds the lobe in a lifted, neutral position rather than a stretched, downward angle.
Step 3: Balancing Proportions and Face Shape
Styling big earrings is not just about structural support; it is about visual equilibrium. Oversized earrings command attention, meaning they will dictate the focal point of your entire silhouette. When integrating large pieces into your wardrobe, consider your face shape and neckline to avoid overwhelming your features.
- Round Faces: Avoid large, circular hoops or wide button studs, which will emphasize facial width. Instead, opt for long, angular geometric drops or linear chandeliers that create a vertical elongating effect.
- Square Faces: Soften a strong jawline with large, curved teardrop dangles or organic, fluid metallic shapes. Avoid harsh, boxy geometric studs that mirror the jaw's angles.
- Heart-Shaped Faces: Balance a narrower chin with bottom-heavy designs, such as oversized inverted triangles or wide, flared chandelier earrings that add visual weight to the lower half of the face.
- Oval Faces: The most versatile canvas. You can successfully pull off massive, architectural ear cuffs and wide, shoulder-grazing statement hoops.
Furthermore, pair big earrings with minimalist necklines. A heavy, shoulder-dusting metallic drop earring will clash violently with a busy, sequined collar or a loud statement necklace. Let the ears be the sole protagonist by opting for deep V-necks, strapless silhouettes, or simple silk blouses.
Step 4: Cartilage vs. Lobe Placement for Oversized Pieces
When lobe fatigue sets in, or if you are dealing with previously stretched piercing channels, relocating heavy jewelry to the cartilage is a highly effective styling pivot. The upper ear is supported by a rigid network of elastic cartilage, which does not stretch or tear under weight the way adipose lobe tissue does.
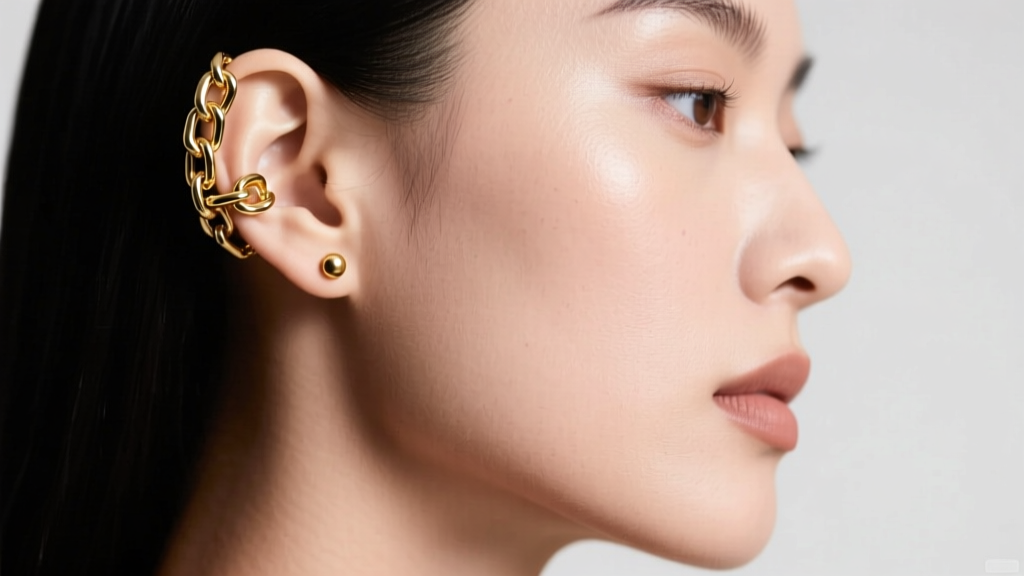
According to guidelines from the Association of Professional Piercers (APP), cartilage piercings (such as the helix or conch) are typically performed at 16-gauge or 14-gauge. This thicker baseline jewelry provides immense structural integrity. You can utilize heavy 14k gold chain-link ear cuffs or weighted helix dangles that clip onto or thread through the upper cartilage. Because the cartilage is anchored to the side of the skull, the weight is borne by the bone structure rather than soft tissue, completely eliminating the 'cheese-cutter' effect while maintaining a maximalist aesthetic.
Troubleshooting Common Big Earring Disasters
Even with perfect preparation, wearing heavy jewelry can introduce specific dermatological and structural issues. Here is how to troubleshoot the most common problems associated with oversized earrings.
The 'Green Skin' Reaction
If the skin behind your lobe turns green or black after wearing heavy vintage or brass statement pieces, you are experiencing a chemical reaction, not necessarily an allergy. Copper and brass alloys oxidize when exposed to the salts and acids in human sweat. To prevent this, coat the earring posts and backs with a thin layer of clear, flexible jewelry sealant, or invest exclusively in solid 14k/18k gold, platinum, or ASTM F136 implant-grade titanium.
Contact Dermatitis and Itching
If your earlobes become red, itchy, and flaky beneath heavy earrings, you may be suffering from nickel contact dermatitis. The American Academy of Dermatology (AAD) notes that nickel is the most common culprit in jewelry allergies, frequently hidden in cheap metal alloys and soldering points used in large, complex statement pieces. If you experience this, immediately remove the jewelry, cleanse the area with a mild, fragrance-free soap, and apply an over-the-counter hydrocortisone cream. Going forward, strictly purchase oversized pieces crafted from Niobium or high-karat solid gold, as these metals are inherently hypoallergenic.
Piercing Channel Migration
If you notice your piercing hole slowly moving downward toward the edge of the earlobe, this is migration caused by chronic overloading. You must immediately cease wearing heavy earrings for a minimum of 8 to 12 weeks. During this recovery period, wear only ultra-lightweight 22-gauge titanium or bioplast retainers to keep the channel open while the collagen fibers in the lobe rebuild and tighten. If the tissue has already thinned to the point of tearing, consult a professional piercer or dermatologist regarding surgical lobe repair before attempting to wear heavy jewelry again.


