How to Style and Wear Ear Bud Earrings for Everyday Elegance
Master the art of wearing ear bud earrings. Learn step-by-step styling, sizing, gauge selection, and secure backing tips for these minimalist staples.

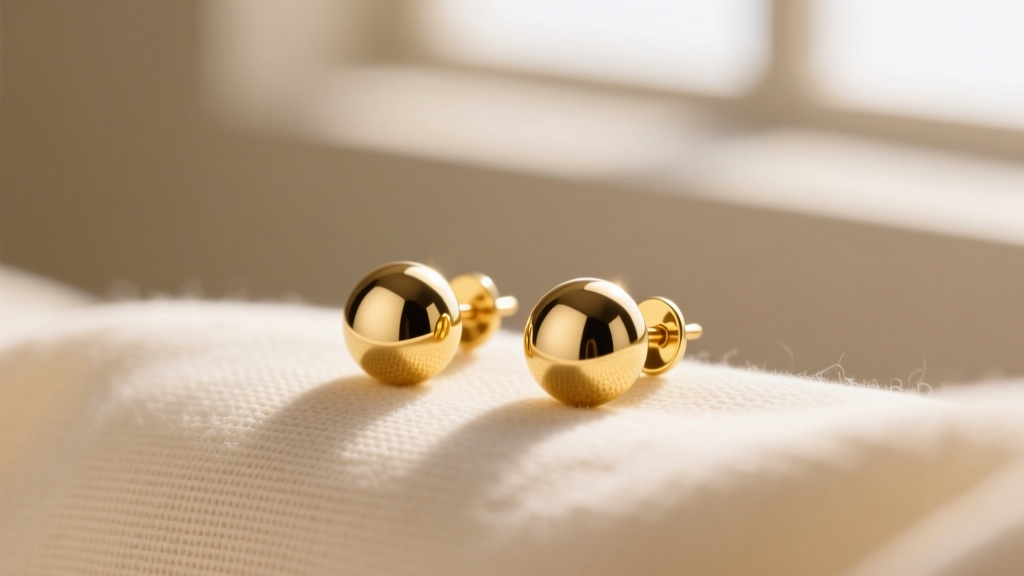
In the ever-evolving landscape of fine jewelry, ear bud earrings have cemented their status as the ultimate minimalist staple. Unlike traditional flat studs or dangling drops, ear buds feature a rounded, dome-like, or spherical silhouette that mimics the organic shape of a flower bud. They sit snugly against the earlobe, offering a seamless, modern aesthetic that bridges the gap between casual everyday wear and refined evening elegance. However, achieving that perfect, gravity-defying dome look requires more than just slipping them on. Heavy bezels, improper gauge sizes, and inadequate backings can cause these pieces to droop or irritate sensitive piercings.
This comprehensive, step-by-step guide will teach you exactly how to select, secure, and style ear bud earrings in 2026, ensuring they sit perfectly and last a lifetime.
The Anatomy of Ear Bud Earrings
Before diving into styling, it is crucial to understand the structural anatomy of an ear bud earring. A true ear bud consists of three primary components:
- The Dome or Sphere: The visible 'bud' portion, which can be crafted from solid metal, enamel, or a bezel-set gemstone (like a pearl or sapphire). This part is typically convex, ranging from 3mm to 10mm in diameter.
- The Post: The straight wire that passes through the ear piercing. Because the dome adds front-heavy weight, the post must be precisely welded to prevent snapping or bending.
- The Backing: The mechanism that secures the earring. Due to the front-heavy nature of the dome, standard friction backs often fail, requiring specialized support.
Step 1: Sizing and Gauge Selection Framework
The most common failure mode with ear bud earrings is 'the droop'—when the weight of the dome pulls the post downward, causing the earring to face the floor rather than sitting flush against the lobe. Selecting the correct gauge (thickness) relative to the dome size is the ultimate fix.
| Dome Diameter | Recommended Post Gauge | Best For Lobe Type | Weight Consideration |
|---|---|---|---|
| 3mm - 4mm (Petite) | 20G (0.81mm) or 22G (0.64mm) | Thin or delicate lobes | Lightweight; standard friction backs work well. |
| 5mm - 6mm (Standard) | 18G (1.02mm) or 20G (0.81mm) | Average to thick lobes | Moderate weight; requires silicone O-rings or jumbo backs. |
| 7mm - 10mm (Statement) | 18G (1.02mm) or 16G (1.29mm) | Thick lobes or stretched piercings | Heavy; mandates screw-backs or specialized earring lifters. |
Pro Tip: If you already own a pair of 5mm or larger ear buds with a thin 22G post that constantly droops, you do not necessarily need to replace them. Purchase a set of silicone earring lifters (small, clear discs that slide onto the post behind the ear) to artificially support the weight of the dome.
Step 2: Material Grades for Sensitive Lobes
Because ear bud earrings feature a solid, often unvented dome that sits flush against the skin, they can trap moisture and heat against the piercing hole. This makes material selection critical to avoid contact dermatitis or localized irritation.
According to the Association of Professional Piercers (APP), the gold standard for sensitive or healing piercings is implant-grade titanium. When shopping for titanium ear buds, look specifically for the ASTM F-136 designation. This ensures the metal is entirely nickel-free and biocompatible.
For those who prefer the warmth of gold, opt for 14k or 18k solid gold. Avoid 'gold-plated' or 'gold vermeil' ear buds for daily wear. The constant friction of the dome rubbing against the earlobe, combined with trapped sweat, will quickly wear away thin plating, exposing the base metal (usually brass or copper) and triggering allergic reactions.
Step 3: Mastering the Backing Mechanism
The backing is the unsung hero of the ear bud earring. Because the dome acts as a lever, pulling the top of the post forward, your backing must provide exceptional counter-tension.
1. La Pousette (Butterfly) Backs with Silicone Sleeves
Standard metal butterfly backs can slip off the smooth post of an ear bud. Upgrading to La Pousette backs—which feature a tiny internal locking mechanism—or sliding a 1mm silicone O-ring over the post before applying the backing will lock the heavy dome securely in place.
2. Screw-Backs
For high-value ear buds (such as those featuring bezel-set diamonds or South Sea pearls), screw-backs are non-negotiable. The threaded post screws directly into the backing, making it physically impossible for the earring to fall off during sleep or physical activity. Note that screw-backs require a thicker post, usually 18G or 16G.
3. Flat-Back Labret Posts
If you are wearing ear buds in a cartilage piercing or a secondary lobe piercing where traditional butterfly backs dig into the neck, look for ear buds designed with flat-back labret posts. These slide in from the front and secure with a threaded end, offering unparalleled comfort for side-sleepers.
Step 4: Curating the Perfect Ear Stack

Ear bud earrings are the ultimate team players in a curated ear stack. Their smooth, rounded profile provides a visual 'anchor' that balances out more complex, textured pieces. Here is a structural framework for stacking in 2026:
- The Anchor (Primary Lobe): Place your largest ear bud (6mm-8mm) here. A high-polish gold or mother-of-pearl dome catches the light and grounds the entire ear.
- The Bridge (Secondary/Tertiary Lobe): Step down the size. If your primary lobe has a 6mm gold bud, place a 4mm gemstone bud (like a deep blue lapis or black onyx) in the second hole to create a gradient effect.
- The Contrast (Cartilage/Helix): Contrast the smooth, solid nature of the ear bud with something linear or textured. A delicate, diamond-studded huggie hoop or a jagged raw-stone cartilage stud creates a beautiful visual tension against the perfect sphere of the ear bud.
When styling ear buds, remember the rule of visual weight: the smooth, reflective surface of a metal dome will always draw the eye first. Place your ear buds where you want to command attention, and use matte or intricate pieces as supporting accents.
Step 5: Daily Maintenance and Cleaning
The convex shape of ear bud earrings means that oils, lotions, and dead skin cells easily accumulate in the microscopic seam where the dome meets the post. Over time, this buildup can dull the metal and cause piercing irritation.
The Gemological Institute of America (GIA) recommends gentle, non-chemical cleaning for everyday jewelry. Follow this weekly protocol:
- The Soak: Mix a few drops of mild, phosphate-free dish soap into a bowl of warm (not hot) water. Let your ear buds soak for 10 minutes to loosen sebum and lotion buildup.
- The Agitation: Use a brand-new, ultra-soft baby toothbrush to gently sweep the seam where the post meets the dome. Never use hard-bristled brushes, as they will leave micro-scratches on high-polish gold or silver.
- The Rinse and Dry: Rinse thoroughly under distilled water to prevent hard water spots. Pat dry with a lint-free microfiber cloth. Ensure the backing mechanism is completely dry before reattaching it to prevent rust on internal springs.
Warning: If your ear bud earrings feature porous gemstones like pearls, opals, or turquoise, skip the soaking step entirely. Simply wipe the dome with a damp, soapy cloth and dry immediately to protect the stone's delicate nacre or internal water content.
Final Thoughts
Ear bud earrings are a masterclass in understated luxury. By paying close attention to gauge thickness, prioritizing biocompatible materials like ASTM F-136 titanium, and utilizing secure backing mechanisms, you can ensure your ear buds sit perfectly flush and comfortable all day long. Whether worn as a solitary statement of minimalism or as the foundational anchor in a complex cartilage stack, mastering the mechanics of the ear bud will elevate your jewelry game from simply wearing accessories to truly curating your personal style.


