How to Build an Ear Stack at Earrings Plaza Broadway
Master your ear stack with our step-by-step guide to shopping Earrings Plaza Broadway. Learn gauge sizes, metals, and curation tips.

The Blueprint: Pre-Visit Anatomy Mapping
Building a cohesive, high-end ear stack is no longer just about picking out pretty gems; it is an exercise in anatomical precision and material science. As we move through 2026, the trend has shifted heavily toward bespoke, micro-curated earscapes that prioritize fistula health and long-term wearability. If you are planning a pilgrimage to the renowned Earrings Plaza Broadway—a premier hub for fine jewelry curation and advanced piercing artistry—you need a strategic game plan before you even step through the doors.
Walking into a high-volume, luxury piercing environment without a map is a recipe for buyer's remorse and healing complications. Your ear's cartilage ridges, the flat, the conch bowl, and your lobe anatomy all dictate which jewelry profiles will sit flush and which will migrate or reject.
Understanding Gauge and the 'Cheese Cutter' Effect
Most standard mall kiosks pierce lobes at 20-gauge (0.81mm) or 18-gauge (1.02mm) using piercing guns, which creates a narrow fistula. However, master piercers at Earrings Plaza Broadway will typically recommend sizing up to 16-gauge (1.2mm) or even 14-gauge (1.6mm) for both lobes and cartilage. Why? A thicker post distributes weight more evenly. If you hang a heavy 14k gold chain or a pavé diamond drop on a thin 20-gauge wire, the jewelry acts like a cheese wire, slowly slicing through the bottom of your lobe over time. Upgrading to 16-gauge provides a stable, permanent foundation for luxury jewelry.
Step-by-Step: Navigating the Plaza Experience
To maximize your time and budget at Earrings Plaza Broadway, follow this sequential curation process.
- The Anatomical Consultation: Before looking at display cases, sit with a senior piercer. They will use a sterile surgical pen to mark potential placement points on your ear, checking for blood vessels and ensuring the angles align perfectly with your ear's natural helix curve.
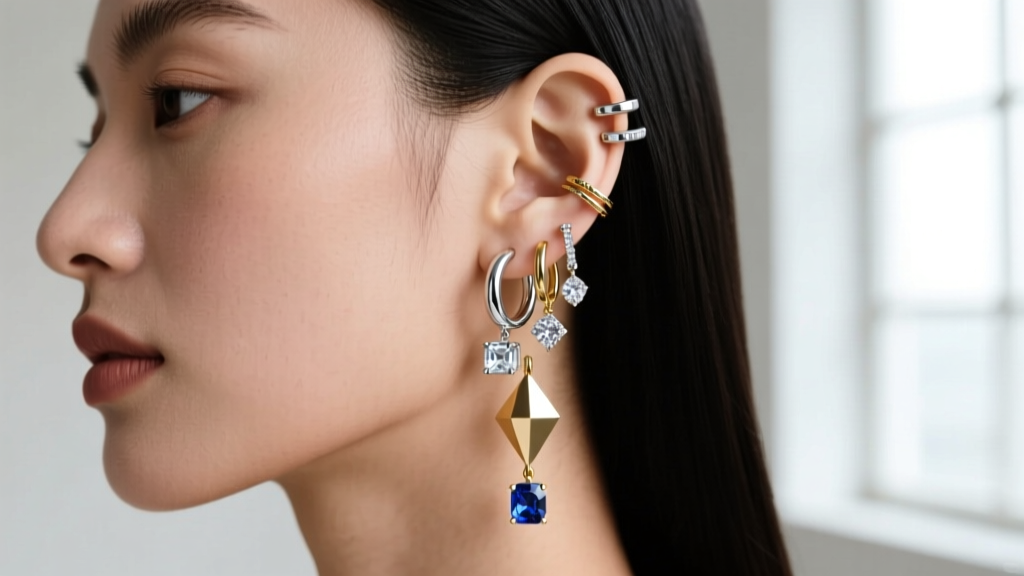
- The Anchor Selection: Choose your 'hero' piece first. This is usually a large conch stud, an intricate daith clicker, or a statement lobe shield. The rest of your stack will be built to frame and complement this anchor.
- The Satellite Placement: Select smaller, complementary pieces (like 2mm or 3mm bezel-set diamonds) for the helix, tragus, and upper lobe. The goal is to create a gradient of size and sparkle, drawing the eye upward.
- The Fitting and Threading Check: Ensure every piece of jewelry selected meets modern safety standards for threading and polish (detailed below).
Material Matrix: What to Buy at the Plaza
Not all gold and silver are created equal, especially when introduced to an open wound or a healing fistula. When shopping the showcases at Earrings Plaza Broadway, you must verify the exact alloy compositions. According to the Association of Professional Piercers, only specific implant-grade materials are safe for initial piercing and long-term cartilage health.
| Material | Specific Grade / Standard | 2026 Price Range (Ends Only) | Best Application |
|---|---|---|---|
| Implant-Grade Titanium | ASTM F136 (Ti6Al4V ELI) | $45 - $95 | Initial piercings, sensitive ears, MRI-safe |
| 14k Solid Gold | Nickel-free, Palladium-alloyed white/yellow | $180 - $650 | Healed lobes, helix, everyday luxury wear |
| 18k Solid Gold | High-purity, specific hardening alloys | $350 - $1,200+ | Conch statements, rook, heirloom pieces |
| Niobium | Commercially Pure (CP), unalloyed | $30 - $60 | Color-anodized pieces, extreme metal allergies |
Avoid 'Surgical Steel' (316L or 316LVM) for fresh piercings. Despite the name, it contains up to 10% nickel, which can leach into healing tissue and cause severe contact dermatitis.

The Fitting Room: Threadless vs. Internally Threaded
One of the most critical E-E-A-T factors in fine jewelry piercing is the connection mechanism between the decorative end and the post (barbell). When a specialist at Earrings Plaza Broadway hands you a piece, inspect the pin.
Why Externally Threaded is Obsolete
Externally threaded jewelry (where the screw is on the decorative end and passes through your skin) is essentially a microscopic file. Pushing those sharp threads through a fistula tears the delicate epithelial lining, causing micro-trauma and delaying healing. High-end boutiques have entirely phased this out.
The Superiority of Threadless (Press-Fit) Jewelry
Threadless jewelry relies on the tension of a slightly bent pin. To secure a threadless end, you insert the pin about halfway into the barbell shaft, bend it slightly (about 10 to 15 degrees) using your fingers or sterile pliers, and then push it flush. The tension of the bent metal against the inner wall of the shaft holds it securely. This allows for a seamless, gapless fit that won't unscrew in your hair or while sleeping, making it the gold standard for flat and helix piercings.
Pro-Tip for the Plaza: If you are buying a threadless setup for a conch or flat piercing, ask the piercer to leave the pin slightly longer before bending it. Cartilage can swell unpredictably in the first 48 hours, and a custom-bent pin can be adjusted on the fly without needing to swap the entire post.
Post-Plaza Aftercare Protocol
Leaving Earrings Plaza Broadway with a fresh stack is only 20% of the battle; the remaining 80% is strict, disciplined aftercare. Cartilage is avascular, meaning it lacks direct blood supply and heals much slower than lobe tissue. The American Academy of Dermatology emphasizes keeping the area clean without disrupting the fragile new cells forming the fistula.
- Sterile Saline Only: Spray a 0.9% sterile wound wash (no additives, no aloe, no tea tree oil) twice daily. Let it air dry or gently pat with non-woven sterile gauze.
- The 'No-Touch' Rule: Never twist or rotate your jewelry. The old advice of 'twisting to prevent it from sticking' is a myth that introduces bacteria and tears healing tissue.
- Sleep Discipline: Invest in a travel neck pillow or a specialized piercing pillow with a hole in the center. Sleeping on a fresh helix or conch will cause pressure-induced migration and hypertrophic scarring (piercing bumps).
- Healing Timelines: Expect lobes to stabilize in 8-12 weeks. Helix and flat piercings will take 6-9 months, while complex inner-ear piercings like the daith or rook can take up to 12-18 months to fully mature.
Final Thoughts on Your Broadway Stack
Curating an ear stack at Earrings Plaza Broadway is an investment in your personal aesthetic and your anatomical health. By understanding the vital differences in gauge thickness, demanding ASTM F136 titanium or nickel-free 14k gold, and insisting on threadless or internally threaded connections, you ensure your jewelry looks spectacular and heals flawlessly. Take your time, respect the healing process, and let your ear architecture guide your curation.