Master Front Back Pearl Earrings: A Step-by-Step Styling Guide
Learn how to wear, assemble, and style front back pearl earrings. Our step-by-step guide covers lobe sizing, pearl grades, and styling hacks.

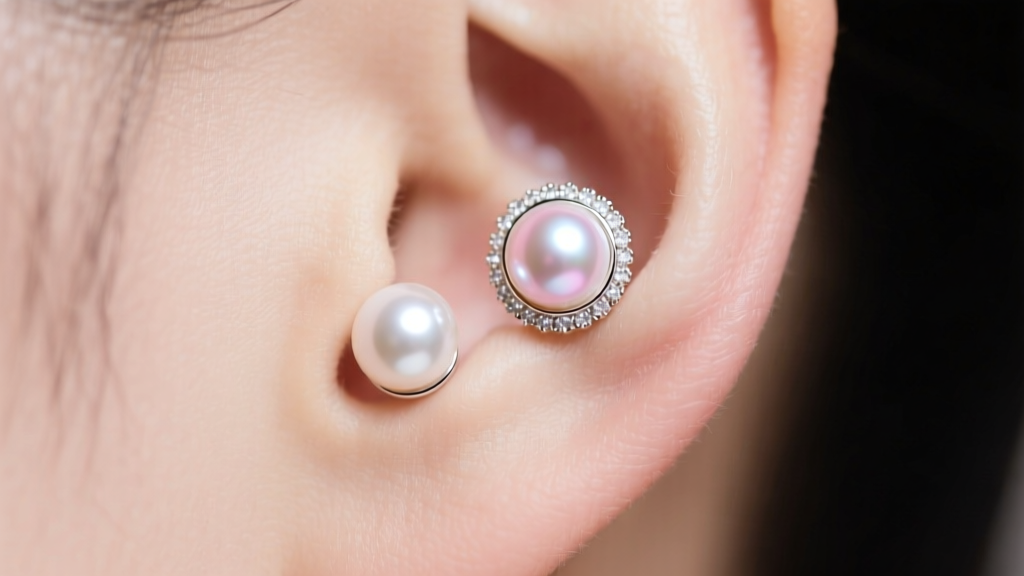
Front back pearl earrings—often referred to as pearl jackets or two-piece earrings—have completely redefined classic pearl jewelry. By anchoring a traditional stud at the front of the lobe and suspending a larger pearl or geometric pearl cluster behind it, these earrings create a striking, three-dimensional optical illusion. However, their unique two-part construction often leaves wearers frustrated with assembly, drooping posts, and improper sizing. This comprehensive guide will walk you through the exact mechanics of wearing, sizing, and styling front back pearl earrings with professional precision.
The Anatomy of Front Back Pearl Earrings
Unlike standard stud earrings, a front back pearl earring relies on a multi-component structural system. Understanding these parts is critical for ensuring comfort and preventing damage to your earlobe.
- The Front Stud: Typically a smaller pearl (4mm to 7mm) mounted on a metal post. This acts as the visual anchor and the structural pin.
- The Post (Gauge & Length): High-quality front back earrings utilize an 18-gauge (1.02mm) or 19-gauge (0.91mm) post. Avoid 20-gauge (0.81mm) posts for heavy pearl jackets, as the thinner metal will bend under the lever-arm weight of the back piece.
- The Back Jacket: The secondary pearl or pearl cluster (8mm to 14mm) featuring a hollow metal tube or a notched channel that slides over the post.
- The Securing Mechanism: While traditional butterfly clutches are common, heavy front back earrings require silicone O-rings, jumbo friction backs, or threaded screw-backs to prevent the heavy jacket from slipping off.
Step-by-Step: How to Put On Two-Piece Pearl Earrings
Assembling a two-piece earring while it is already on your ear can lead to dropped pearls and tangled hair. Follow this exact sequence for a secure fit.
Step 1: Preparation and Alignment
Pull your hair back completely. Hold the front stud by the pearl (never by the thin metal post, which can bend). Insert the post through your piercing from the front. Do not attach the backing yet.
Step 2: Threading the Jacket
Take the back pearl jacket and align its hollow tube or channel with the exposed post behind your earlobe. Slide the jacket forward until it sits flush against the back of your earlobe. If your jacket features a specific orientation (such as a teardrop or geometric shape), ensure it is rotated to the correct upright position before securing.
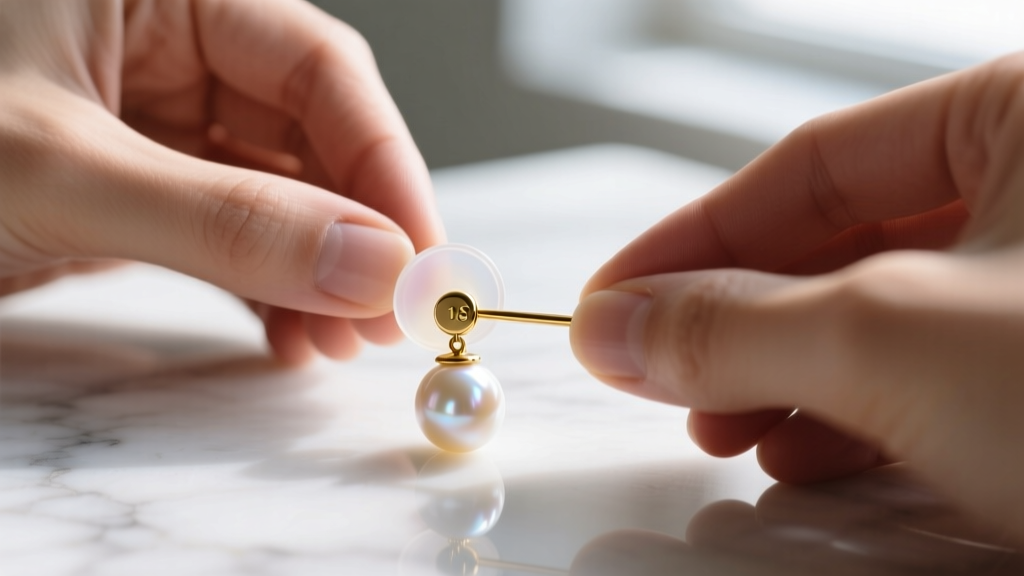
Step 3: The Pinch-and-Slide Securing Method
Take your silicone friction back or jumbo metal clutch. Pinch the back of the earring post between your thumb and index finger to stabilize the front pearl against your collarbone or jawline. Slide the backing onto the post until it firmly touches the back of the pearl jacket. You should feel a slight resistance; the backing must compress the jacket gently against the earlobe to prevent spinning.
Pro-Tip for Heavy Jackets: If your back pearl is 10mm or larger, slide a 10mm clear silicone support disc onto the post before adding the backing. This disc distributes the torque across a wider area of your earlobe, completely eliminating the forward droop that plagues heavy front back earrings.
Sizing Your Earlobe: Post Length and Pearl Proportions
The most common failure point with front back pearl earrings is an incompatible post length. If the post is too short, the backing will crush the jacket against your lobe, cutting off circulation. If it is too long, the jacket will slide and droop. Use the data table below to determine your ideal specifications.
| Earlobe Thickness | Required Post Length | Ideal Front Pearl Size | Ideal Back Jacket Size | Recommended Backing Type |
|---|---|---|---|---|
| Thin (Under 4mm) | 9mm - 10mm | 4mm - 5mm | 7mm - 9mm | Standard Butterfly Clutch |
| Average (4mm - 7mm) | 11mm - 12mm | 5mm - 6mm | 9mm - 11mm | Silicone O-Ring / Friction Back |
| Thick (Over 7mm) | 13mm - 15mm | 6mm - 7.5mm | 11mm - 14mm | Jumbo Clutch + Silicone Support Pad |
Material Deep Dive: Choosing the Right Pearl Grade
Because front back earrings utilize multiple pearls, the surface area of nacre visible to the eye is doubled. This makes pearl grading and luster consistency absolutely critical. According to the Gemological Institute of America (GIA), pearl value is determined by luster, surface cleanliness, and nacre thickness.
Akoya Pearls: The Mirror-Luster Standard
For front back earrings, Japanese Akoya pearls are the premium choice. They possess a sharp, mirror-like luster due to their highly crystalline nacre structure. A high-quality Hanadama-grade Akoya front back pair (featuring a 6mm front and 9mm back) will typically cost between $250 and $500. Ensure the nacre thickness is at least 0.4mm to prevent peeling over time.
Freshwater Pearls: The Budget-Friendly Alternative
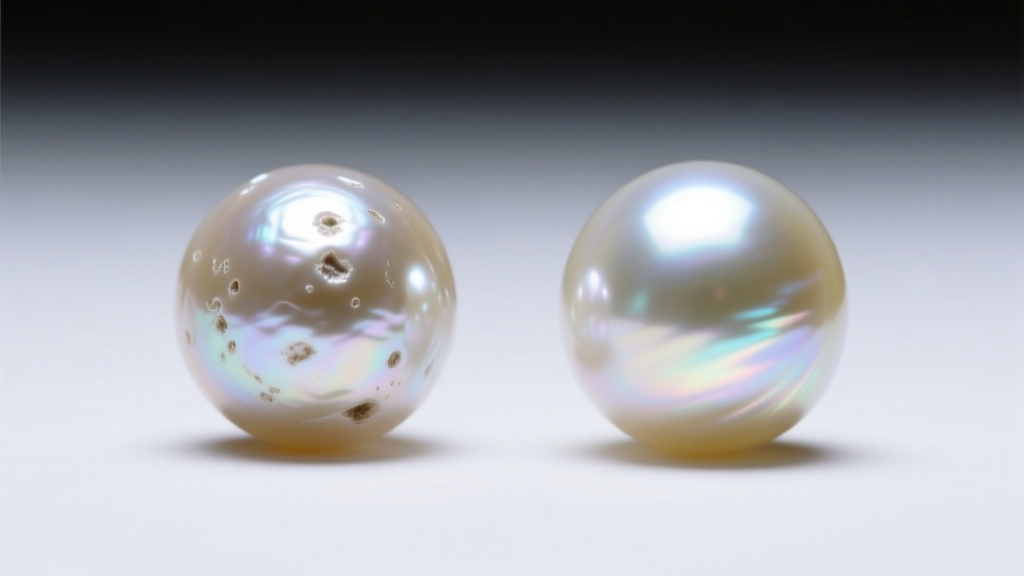
Modern Edison and nucleated Freshwater pearls offer incredible value, often mimicking the roundness of Akoyas at a fraction of the price ($40 to $120 for a front back set). However, they tend to have a softer, more satiny luster. When buying Freshwater front back earrings, inspect the drill holes; chalky or dull rings around the drill hole indicate premature harvesting and thin nacre.
South Sea Pearls: The Statement Piece
White and Golden South Sea pearls are massive (10mm to 16mm) and feature a luxurious, satin-like luster. Front back earrings utilizing South Sea pearls are heavy and require 18-gauge or even 16-gauge posts. Expect to invest $800 to $2,500+ for a matched pair. Their large size makes them ideal for evening wear but impractical for daily office use due to their weight.
3 Step-by-Step Styling Formulas
The beauty of the front back pearl earring lies in its modularity. Here are three distinct ways to style them for different aesthetics.
Formula 1: The Minimalist Deconstruction
Separate the components. Wear the smaller front stud on its own for a delicate, everyday look. Alternatively, pair a diamond or sapphire stud with the pearl back jacket. The contrasting front stone peeking through the lobe while the pearl frames the back creates a highly customized, avant-garde appearance.
Formula 2: The Asymmetrical Ear Stack
Wear the complete front back pearl earring on your primary lobe piercing. On the opposite ear, skip the jacket and wear only the front stud, pairing it with a small 3mm gold huggie hoop in your helix or upper lobe piercing. This balances the visual weight of the large back pearl without overwhelming your face shape.
Formula 3: The Earlobe Elongation Illusion
If you have short or attached earlobes, choose a front back earring where the back jacket is a vertical teardrop or an elongated oval pearl rather than a perfect sphere. The vertical drop draws the eye downward, visually elongating the neck and the earlobe. Keep your hair tucked behind the ears to maximize this architectural effect.
Maintenance and Cleaning Protocol
The multi-part construction of front back earrings creates hidden crevices where skin oils, hairspray, and cosmetics accumulate. This buildup dulls the pearl's luster and can corrode the metal post. The GIA recommends strict, non-chemical cleaning methods for organic gems.
- Never Use Ultrasonic Cleaners: The high-frequency vibrations can shatter the pearl's nacre layers and dissolve the epoxy adhesive holding the pearl to the metal cup.
- The Microfiber Wipe-Down: After every wear, gently wipe both the front and back pearls with a damp, lint-free microfiber cloth to remove acidic skin oils.
- Post and Tube Cleaning: Once a month, use a cotton swab lightly dipped in rubbing alcohol to clean the metal post and the inside of the jacket's hollow tube. Crucial: Do not let the alcohol touch the pearl, as it will strip the nacre's natural moisture and cause micro-cracking.
- Storage: Store the assembled earrings flat in a soft pouch. Hanging them can cause the heavy back jacket to pull against the post, slowly warping the metal over time.
By understanding the precise mechanics, gauge requirements, and grading standards of front back pearl earrings, you transform a potentially frustrating accessory into a flawless, architectural statement piece that perfectly frames your face.


