How to Authenticate and Restring a Tibetan Amber Necklace
Learn how to authenticate, clean, and restring a vintage Tibetan amber necklace with our step-by-step guide for collectors and enthusiasts.


The secondary market for antique jewelry is flooded with beautiful, deeply colored beads marketed as 'Tibetan amber.' However, the term is largely a romanticized trade name rather than a strict geological classification. True amber is fossilized tree resin dating back 30 to 90 million years, while much of the material sold in Himalayan markets or antique shops is actually copal (sub-fossilized resin aged 1 to 5 million years), dyed casein, or early plastics like Bakelite. For collectors and jewelry enthusiasts, knowing how to properly authenticate, clean, and restring a Tibetan amber necklace is essential to preserving both its monetary value and structural integrity.
In this comprehensive guide, we will walk you through the exact gemological testing methods used to verify your beads, the safest cleaning protocols for soft organic gems, and a professional-grade restringing technique that prevents bead degradation over time.
The Allure and Reality of 'Tibetan' Amber
Historically, amber was traded along the Silk Road, and pieces found in Tibet and Nepal were often highly prized, deeply oxidized specimens originating from Baltic or Burmese deposits. Over decades of wear, genuine amber develops a rich, dark patina—often described as 'cherry red' or 'oxblood'—which is highly sought after today. Unfortunately, the high demand for this specific patina has led to a market saturated with artificially aged copal and heat-treated resins. Before you restring or repair a vintage piece, establishing the true nature of the material is a mandatory first step.
Step 1: Authenticating Your Beads
To separate genuine fossilized amber from copal and modern synthetics, we rely on non-destructive gemological tests. According to the Gemological Institute of America (GIA), amber has a specific gravity of roughly 1.05 to 1.10, making it one of the lightest gemstones in existence.
The Saltwater Float Test
This is the safest and most effective initial screening method for unstrung beads or necklaces with non-metallic clasps. Mix a solution of 1 part table salt to 2 parts warm water, stirring until the salt is completely dissolved. Genuine amber and copal will float in this saturated saline solution, while most plastics, glass, and phenolic resins (like Bakelite) will sink to the bottom. Note that if your necklace has a heavy sterling silver or gold clasp attached, the metal's density will cause the entire piece to sink, rendering this test inaccurate.
The UV Fluorescence Test
Using a standard 365nm UV blacklight, illuminate the beads in a dark room. Genuine Baltic or Burmese amber will exhibit a distinct pale blue, greenish-blue, or milky white fluorescence. Copal, being much younger and lacking the full polymerization of true amber, typically glows a stark, chalky white. Modern plastics will either show no fluorescence or an unnatural, artificial purple hue.

The Hot Needle Test (Use with Extreme Caution)
This is a micro-destructive test and should only be performed on an inconspicuous area, such as the inner edge of a bead's drill hole. Heat a fine sewing needle until it is red hot, then gently touch it to the bead. Genuine amber will emit a pleasant, piney, or resinous smoke and leave a tiny, hard mark. Copal will melt quickly, become sticky, and smell like burning sap. Plastics will melt instantly, emit a harsh chemical odor, and the needle will easily penetrate the material.
Authentication Results Matrix
| Test Method | Genuine Amber (30M+ Years) | Copal (1-5M Years) | Plastic / Phenolic Resin |
|---|---|---|---|
| Saltwater Float | Floats | Floats | Sinks |
| UV Light (365nm) | Pale blue / greenish glow | Chalky white glow | No glow / purple tint |
| Hot Needle | Piney smoke, hard mark | Sticky melt, sap smell | Chemical smell, melts fast |
| Mohs Hardness | 2.0 - 2.5 | 1.5 - 2.0 (softer) | Varies (often harder) |
Step 2: Safely Cleaning Antique Resin Beads
Amber and copal are incredibly soft organic gems, ranking only 2.0 to 2.5 on the Mohs hardness scale. They are highly susceptible to chemical damage and thermal shock. Never use ultrasonic cleaners, steamers, alcohol, acetone, or commercial jewelry dips, as these will strip the natural patina and cause severe surface crazing (micro-cracking).
- Prepare a Mild Bath: Fill a bowl with lukewarm (never hot) water and add two drops of pH-neutral liquid Castile soap.
- Gentle Agitation: Submerge the beads for no more than 3 to 5 minutes. Use a baby-soft toothbrush to lightly sweep away dirt from the drill holes and carved crevices.
- Rinse and Dry: Rinse briefly under cool, distilled water. Immediately pat dry with a lint-free microfiber cloth. Leaving water spots on amber can lead to localized clouding over time.
Step 3: Restringing Your Necklace (Step-by-Step)
Because amber is soft and brittle, beads should never knock against one another. Friction between adjacent beads will slowly grind away the drill holes, causing them to enlarge and eventually crack. Professional restringing requires knotting between every single bead. The Amber Institute strongly recommends silk thread for amber, as synthetic nylon threads can act like saws and cut through the soft resin over decades of wear.
Materials Required
- 100% Silk Beading Cord: Use Griffin Size 6 (0.8mm) for bead holes under 1.2mm, or Size 8 (1.0mm) for larger, antique drill holes.
- French Wire (Gimp): Fine sterling silver or gold-filled wire coils to protect the silk from fraying against the metal clasp.
- Clasp: A sterling silver lobster or box clasp (avoid base metals that can react with the resin).
- Tools: Beading awl, tweezers, sharp embroidery scissors, and a flexible beading needle.
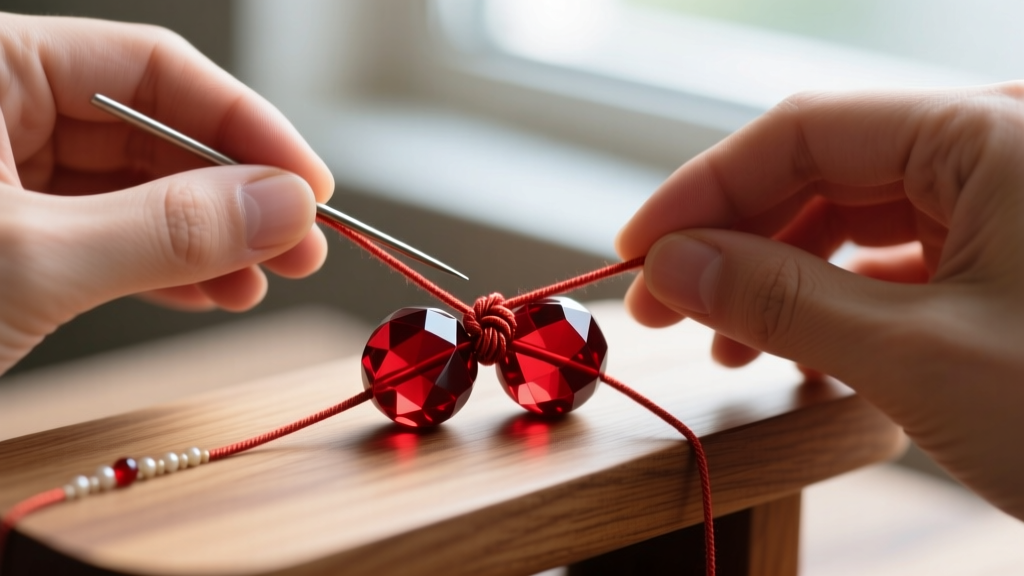
The Restringing Process
1. Prep the Cord and Clasp: Cut a length of silk cord roughly three times the desired finished length of your necklace. Thread one end through a piece of French wire, then through the jump ring of your clasp. Fold the cord back on itself and tie a secure surgeon's knot. Apply a microscopic drop of flexible jewelry glue (like E6000) to the knot, trim the excess, and pull the knot into the French wire coil to hide it.
2. String and Knot: Thread your first amber bead onto the cord. Using a beading awl, push a tight overhand knot directly against the base of the bead. The awl allows you to slide the knot flush against the resin without leaving gaps. Repeat this process for every bead on the strand. The knots should be tight enough to prevent movement but not so tight that they pucker the silk.
3. Finish the Clasp End: Once all beads and knots are in place, thread the final end of the silk through a new piece of French wire and the opposite half of the clasp. Tie a series of half-hitch knots, pulling them tight with the awl. Trim the excess silk close to the knot and seal with a tiny drop of glue.
Long-Term Care and Storage
Proper storage is just as critical as the restringing process. Amber is electrostatic and easily attracts dust and lint. Store your Tibetan amber necklace in a soft, anti-tarnish flannel pouch or a lined jewelry box, completely separate from harder gemstones like diamonds, sapphires, or quartz, which will easily scratch the amber's surface.
Furthermore, keep the necklace away from prolonged exposure to direct sunlight and extreme heat. UV radiation and high temperatures can cause the internal moisture of the resin to evaporate, leading to irreversible internal fracturing known as 'sun spangles.' By following these authentication, cleaning, and restringing protocols, you ensure that your vintage Tibetan amber necklace remains a structurally sound and visually stunning heirloom for generations to come. For further reading on organic gemstone preservation, consult resources provided by the Beadaholique educational archives on traditional silk knotting techniques.


