2026 Beaded Necklace Tutorial: Trending Styles & Pro Techniques
Master the art of jewelry making with our 2026 beaded necklace tutorial. Learn pro stringing techniques, trending materials, and styling tips.

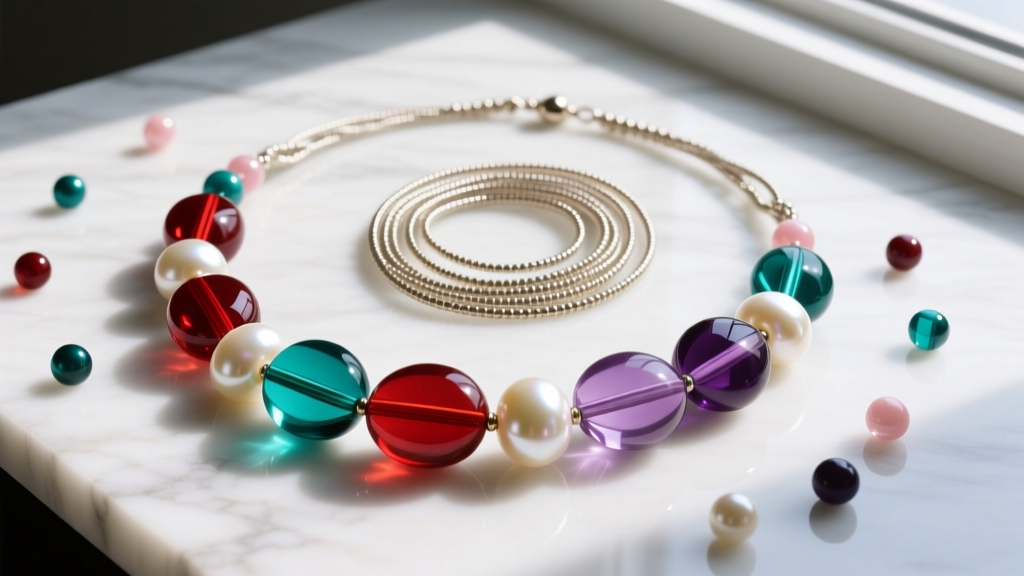
The 2026 Beaded Jewelry Trend Landscape
The jewelry industry has officially pivoted from the minimalist 'quiet luxury' movement of the early 2020s into an era of 'Curated Maximalism' and 'Organic Tech' for 2026. As a jewelry designer, understanding these macro-trends is critical before you even pick up your stringing materials. This year's beaded necklace tutorial focuses on blending unexpected textures: think neon acrylic lucite beads paired with organic, unpolished baroque freshwater pearls, or matte black onyx interspersed with high-polish 14k gold-filled geometric spacers.
Consumers are no longer looking for uniform, factory-made strands. The modern beaded necklace relies on asymmetrical focal drops, graduated bead sizing, and intentional negative space. According to recent market analyses from Fire Mountain Gems, demand for mixed-media stringing projects has surged by 40% this year, driven by a desire for hyper-personalized, statement-making accessories that bridge the gap between fine jewelry and avant-garde art.
Essential Materials: Engineering Your Necklace
The hallmark of an amateur beaded necklace is poor structural engineering. If your necklace kinks, sags, or snaps, the fault lies in the stringing material. For 2026's heavier, mixed-media trends, standard nylon thread or basic elastic will not suffice. You must use nylon-coated, multi-strand stainless steel beading wire.
According to the Soft Flex Company's Beading Wire Guide, the number of micro-strands inside the nylon coating dictates the wire's drape and tensile strength. Here is how to select the right foundation for your design:
| Wire Type | Strand Count | Best For | Tensile Strength | Drape Quality |
|---|---|---|---|---|
| Economy Wire | 7-Strand | Lightweight seed beads, children's crafts | 15-20 lbs | Stiff, prone to kinking |
| Standard Wire | 19-Strand | Glass beads, standard crystal strands | 25-30 lbs | Moderate flexibility |
| Premium Wire | 49-Strand | Heavy gemstones, pearls, asymmetrical chokers | 35-40 lbs | Supple, drapes like silk thread |
For the tutorial below, we are using a 49-strand, 0.018-inch diameter wire. This gauge is the industry sweet spot: it is thick enough to support heavy resin and glass beads without shearing, yet thin enough to pass through most bead holes twice (which is required for professional finishing).
Step-by-Step Beaded Necklace Tutorial: The Asymmetrical Choker
This tutorial will guide you through creating a 16-inch asymmetrical choker featuring a graduated baroque pearl drop on the left side and a cluster of chunky, recycled neon lucite beads on the right. This design perfectly captures the 2026 'Organic Tech' aesthetic.
Step 1: Planning the Drape and Sizing
Never string directly from the bag. Use a flocked bead board to map out your design. For a 16-inch choker, measure out exactly 18 inches of 49-strand beading wire to allow for finishing tails. Place a bead stopper on one end. Map your asymmetrical focal point off-center—approximately 4 inches from the left clasp. Gradually increase the bead size from 4mm seed pearls up to a 14mm baroque pearl at the focal point, then transition sharply into 10mm neon lucite cubes for the right side.
Step 2: Stringing and Tension Control
The most common failure mode in beaded necklaces is improper tension. If you string beads too tightly, the wire has no room to flex, resulting in a stiff necklace that kinks permanently when bent. If strung too loosely, the wire shows between the beads, ruining the illusion of a continuous strand.
The Pro Drape Test: Before securing your clasp, uncoil the necklace and lay it over a rounded surface, like a necklace bust or the curved handle of a coffee mug. Gently push the beads together. You should see a microscopic millimeter of 'slack' between the beads on the inside curve of the drape. This ensures the necklace will lay flat against the collarbone without buckling.
Step 3: The Professional Crimp Finish
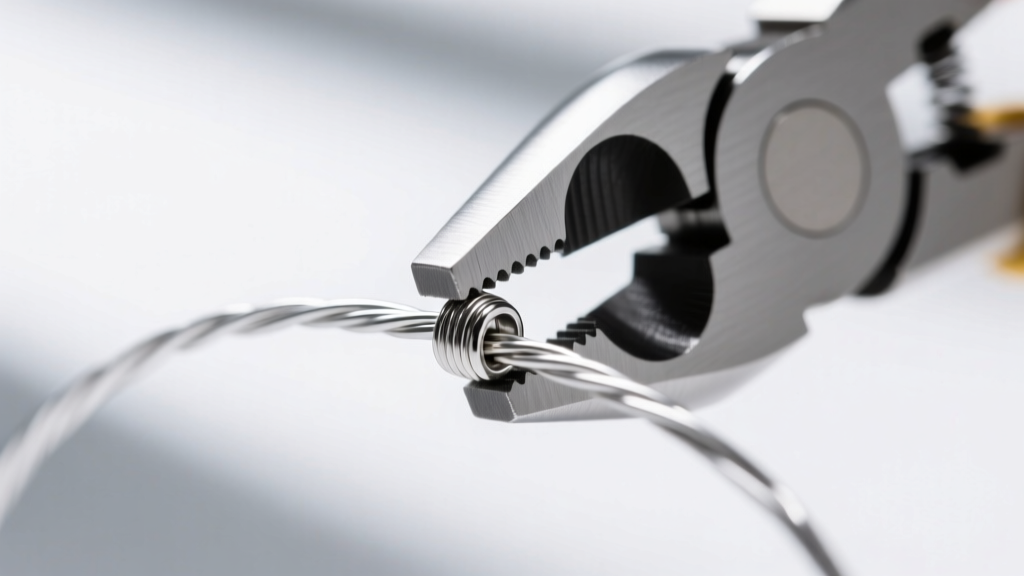
Amateurs crush crimp beads flat with chain-nose pliers, creating sharp edges that fray the wire and look unprofessional. To achieve a seamless, fine-jewelry finish, you must use a two-step crimping tool and sterling silver 2x2mm tube crimps.
- Thread the clasp: Pass the wire through the clasp loop, then through a wire guardian (French wire) to protect the nylon coating from metal friction.
- Loop back: Thread the tail back through the 2x2mm crimp bead and the first 3 beads of your necklace.
- The First Notch: Place the crimp bead in the outer U-shaped notch of the crimping pliers and squeeze firmly. This separates the two wires inside the bead into individual channels.
- The Second Notch: Turn the crimp bead on its side, place it in the inner rounded notch of the pliers, and squeeze. This folds the U-shape perfectly in on itself, creating a smooth, round bead that looks identical to your metal spacer beads.
Trim the excess tail wire flush with flush-cutters, ensuring you do not nick the main structural wire.
Styling Your Beaded Creations for Modern Necklines
A masterfully engineered beaded necklace can be ruined if styled with the wrong neckline. The 2026 styling rules dictate a high-contrast approach to bead size and fabric texture.
- Deep V-Necks & Silk Blouses: Pair these with graduated, asymmetrical chokers (15-16 inches). The sharp angles of the V-neck complement the organic, off-center drop of baroque pearls and chunky resin. Avoid long, dangling opera-length strands, which tangle with the garment's lapels.
- Crew Necks & Heavy Knits: Opt for 'Collar' length necklaces (12-13 inches) made of uniform, high-polish geometric beads (like 8mm onyx or gold-filled cubes). The rigid structure of the beads sits perfectly above the thick fabric collar, providing a sharp, architectural contrast to the soft knitwear.
- Off-the-Shoulder & Strapless: This is the canvas for maximalist, multi-strand bib necklaces. Use 19-strand wire to create three distinct tiers of seed beads (like 11/0 Miyuki Delicas) interspersed with metallic spacer bars. The horizontal lines of a bib necklace frame the exposed collarbones beautifully.
Expert Styling Tip: When mixing matte and high-polish beads in a single strand, always separate them with a 1mm to 2mm metallic spacer bead. This prevents the beads from grinding against each other, which can dull the polish of glass or resin over time, while simultaneously adding a micro-layer of visual rhythm to the design.
Final Thoughts on Beaded Artistry
The evolution of beaded jewelry in 2026 proves that this medium is no longer relegated to craft tables; it is a legitimate form of wearable art. By mastering the structural engineering of 49-strand wire, executing flawless spherical crimps, and leaning into the bold, textural contrasts of Curated Maximalism, you elevate your beaded necklace tutorial skills from hobbyist to professional designer. Whether you are designing for a boutique or building your personal collection, the integration of premium materials and intentional, asymmetrical design will ensure your pieces command attention and withstand the test of time.


