How to Craft a Cosplay Necklace of Fireballs: Step-by-Step
Learn how to craft a wearable, LED-lit cosplay necklace of fireballs. Step-by-step guide on resin casting, wire wrapping, and safe battery integration.

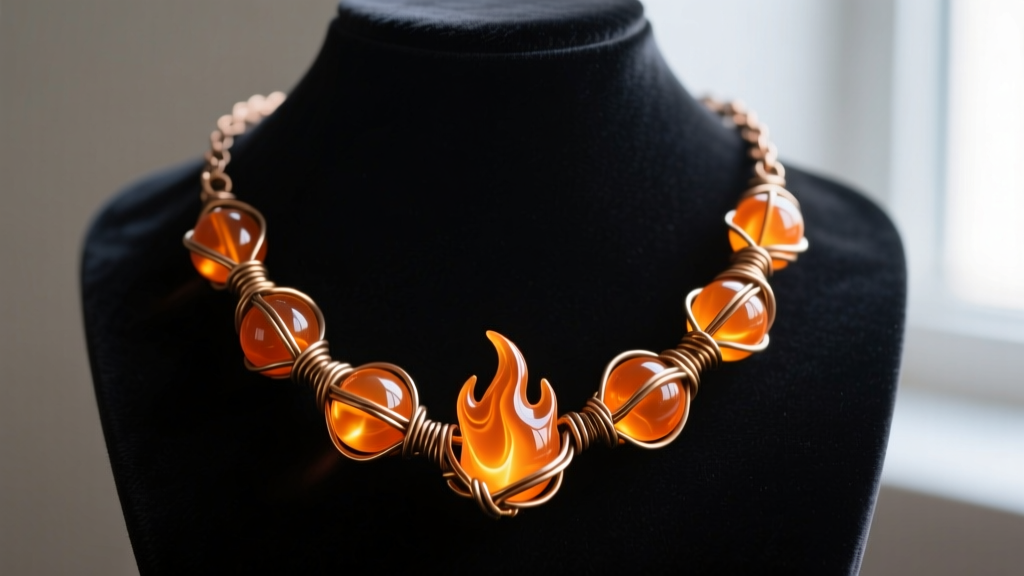
The Ultimate TTRPG Cosplay Challenge
In the realm of tabletop role-playing games, few magic items are as iconic or as heavily relied upon by spellcasters as the necklace of fireballs. According to the D&D Systems Reference Document, this legendary item features a collection of spherical beads that can be detached and thrown to cast devastating area-of-effect fire spells. For cosplay enthusiasts and LARP (Live Action Role-Playing) participants, translating this fantastical concept into a physical, wearable piece of jewelry presents a unique engineering challenge. You need spherical elements that look like contained plasma or fire, a durable setting that can withstand convention floors, and ideally, an integrated lighting system to mimic the magical glow.
This comprehensive guide will walk you through the professional jewelry-making and prop-crafting techniques required to build a high-end, illuminated cosplay necklace of fireballs. We will cover deep-pour epoxy resin casting, micro-LED circuit integration, and structural wire wrapping using traditional metalsmithing principles.
Bill of Materials: What You Need
Before beginning, gather the following specialized materials. Sourcing the correct wire temper and resin viscosity is critical for both the aesthetic outcome and the structural integrity of the piece.
| Component | Specification | Purpose |
|---|---|---|
| Epoxy Resin | ArtResin or Alumilite Clear (1:1 ratio) | Casting the spherical fireball cores with high optical clarity. |
| Alcohol Inks | Jaquard Pinata (Sunshine Yellow, Passion Red) | Creating the internal swirling fire and plasma effects. |
| Micro-LEDs | 3mm Diffused Orange (2.0V Forward Voltage) | Providing the internal magical glow without harsh light hotspots. |
| Power Source | CR2032 3V Coin Cell + Battery Housing | Powering the LED array discreetly within the clasp housing. |
| Structural Wire | 18-Gauge Dead-Soft Brass | Forming the primary load-bearing cages and pendant bails. |
| Binding Wire | 24-Gauge Dead-Soft Brass | Weaving and securing the structural frames together. |
| Patina Solution | Liver of Sulfur (Gel form) | Antiquing the brass wire to give it an aged, arcane artifact look. |
Step 1: Casting the Fireball Cores
The most critical visual element of the necklace is the beads themselves. To achieve a realistic 'contained explosion' look, we use a combination of clear deep-pour epoxy and alcohol inks. According to the experts at Resin Obsession, managing the exothermic reaction of the resin is vital when casting thick, spherical shapes to prevent yellowing or cracking.

The Casting Process:
- Mold Preparation: Use a high-quality, multi-part spherical silicone mold (approx. 20mm diameter). Lightly dust the interior with a mica powder in a pale gold hue to give the edges of the bead a fiery shimmer.
- Mixing: Measure your epoxy resin in a strict 1:1 ratio by volume. Stir slowly for 3-5 minutes to minimize air bubble introduction. Let the mixture rest in a warm water bath for 10 minutes to lower its viscosity, allowing trapped bubbles to rise to the surface.
- Ink Injection: Pour the clear resin into the mold, leaving a small reservoir at the top. Using a fine needle, inject tiny drops of red and yellow alcohol ink into the center of the sphere. Do not stir the ink; let it naturally diffuse and bloom to create organic, smoke-like fire tendrils.
- Curing: If available, place the mold in a pressure pot at 40 PSI for 4 hours to compress any remaining micro-bubbles to an invisible size. Allow the resin to cure undisturbed for a full 48 hours before demolding.
Step 2: Micro-LED Integration and Circuitry
To make the necklace truly pop in the dimly lit halls of a convention center, integrating a lighting system is essential. Because the beads are solid resin, we will route the light through the wire-wrapped settings and the bottom of the beads using surface-mount or micro-LEDs.
For a standard 3-bead necklace setup, you will wire three 3mm diffused orange LEDs in parallel. Since a standard CR2032 coin cell battery outputs 3V, and an orange LED typically has a forward voltage of 2.0V, you must include a small 10-ohm, 1/4-watt resistor in the circuit to prevent the LEDs from drawing too much current and burning out prematurely. Use ultra-thin copper tape or 30-gauge enameled copper wire to run the leads from the beads up the chain to a discreet battery pack hidden inside a custom hollow clasp or a large decorative pendant bail at the nape of the neck.
Step 3: Wire Wrapping the Spherical Beads
Standard jewelry bails will not fit a 20mm spherical resin bead. Instead, we must fabricate custom wire cages using traditional wire wrapping techniques. The goal is to secure the bead firmly while leaving enough of the surface exposed to showcase the internal ink blooms and allow light to escape.
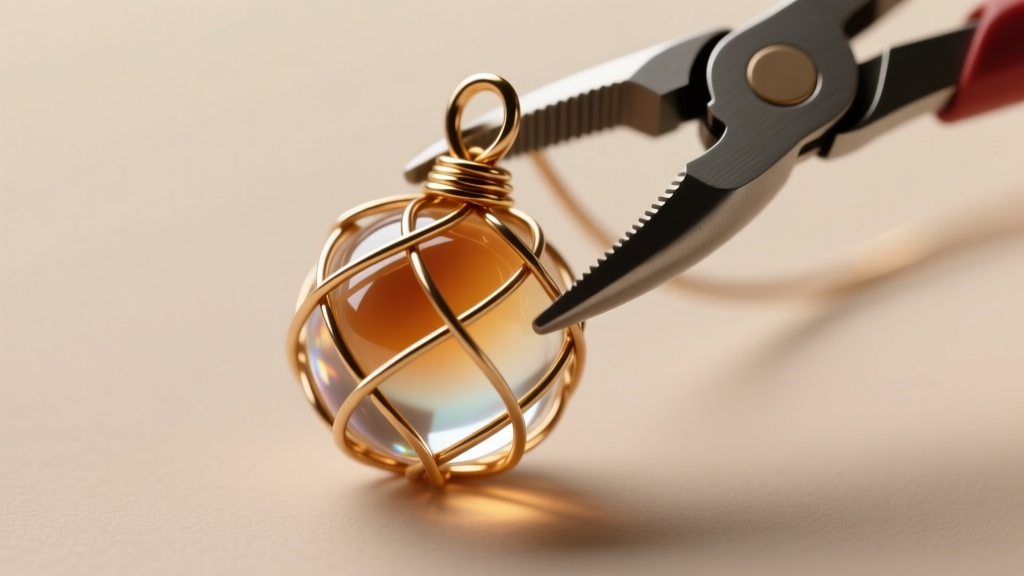
Constructing the Cage:
- The Base Cross: Cut two 6-inch lengths of 18-gauge dead-soft brass wire. Cross them at the center and bind the intersection tightly with 24-gauge wire. This forms the base 'X' that will cup the bottom of the sphere.
- Forming the Meridians: Bend the four arms of the 18-gauge wire upward, contouring them snugly against the curve of the resin bead. These act as the longitudinal meridians of your cage.
- The Equator Weave: Cut a long length of 24-gauge binding wire. Starting at one meridian, weave the thin wire horizontally around the sphere, looping it around each 18-gauge structural wire. This equator band locks the bead into the cage and prevents it from slipping out.
- The Bail: Gather the remaining 18-gauge wire tails at the top of the bead. Twist them together to form a sturdy, unified bail loop for the chain to pass through. Trim any excess wire and use a bur cup or needle file to smooth the ends, ensuring no sharp prongs can scratch the wearer or snag on clothing.
Once the wire wrapping is complete, submerge the brass settings in a diluted Liver of Sulfur solution for 3-5 minutes. This will oxidize the brass, turning it a dark, antique brown. Polish the high points with a brass brush to create a striking two-tone contrast that makes the piece look like an ancient, arcane artifact rather than shiny modern craft wire. For more advanced metal finishing techniques, the Ganoksin jewelry community offers extensive archives on patina applications and metal texturing.
Step 4: Assembly and Convention Safety Protocols
Assembling the final piece requires stringing the wire-wrapped beads onto a heavy-duty chain or a braided leather cord. However, when designing jewelry for cosplay and convention wear, safety must be your primary engineering constraint. Convention centers have strict rules regarding props and jewelry that pose a snag hazard.
Critical Safety Modifications:
- Breakaway Clasps: Never use a standard lobster clasp or bolt ring on a heavy cosplay necklace. If the necklace catches on a door handle, a passing attendee, or an escalator, it could cause severe neck injury. Always integrate a magnetic breakaway clasp or a specialized safety-release cord connector. This ensures the necklace will safely pop open if subjected to sudden, forceful tension.
- Weight Distribution: Resin and brass are relatively lightweight, but a necklace with multiple large beads and a battery pack can still cause neck fatigue. Use a wide, flat chainmaille weave or a padded leather cord at the back of the neck to distribute the weight over a larger surface area, reducing pressure on the cervical spine.
- Battery Security: Ensure the CR2032 battery housing is secured with a micro-screw rather than a simple slide-tab. Convention environments involve a lot of movement, bending, and posing for photos; a slide-tab can easily pop open, dropping the battery and killing the lights in the middle of a cosplay photoshoot.
Final Polish and Wearability
Building a functional, illuminated cosplay necklace of fireballs bridges the gap between traditional metalsmithing, modern resin casting, and basic electrical engineering. By carefully controlling the resin curing environment, calculating the correct electrical resistance for your LEDs, and prioritizing convention-safe breakaway findings, you create a piece that is not only visually stunning but also safe and durable enough for a weekend of LARPing or convention wear. When the lights dim in the dealer's hall and your resin beads begin to glow with a deep, ember-like orange, the hours of meticulous wire wrapping and circuit soldering will be entirely worth the effort.


