How to Craft a Custom Pearl Rosary Necklace: Step-by-Step
Learn how to craft a custom pearl rosary necklace with our step-by-step wire-wrapping guide. Includes pearl grading, wire gauges, and assembly tips.

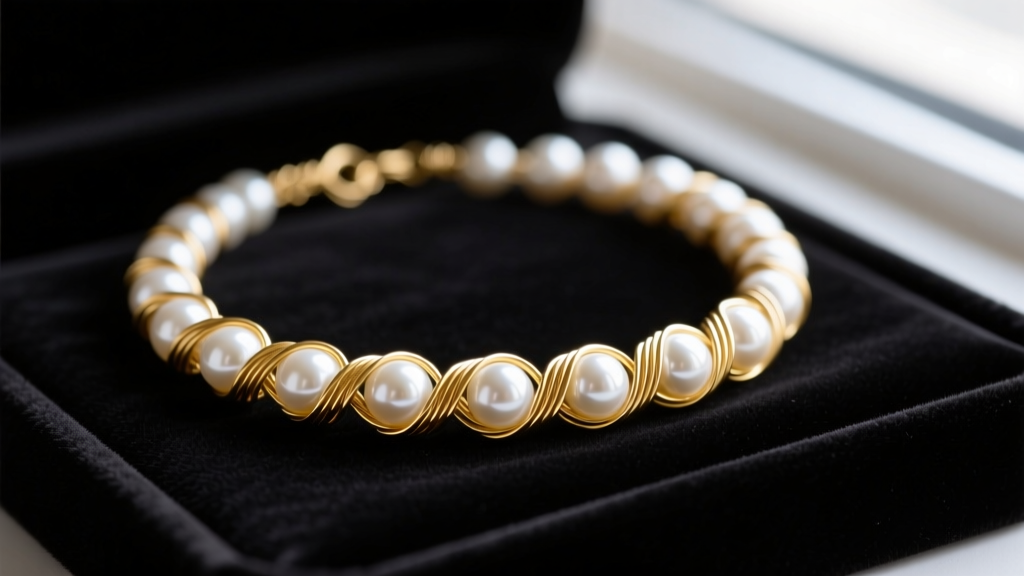
The Anatomy of a Pearl Rosary Necklace
A true pearl rosary necklace is not merely a string of beads on a silk thread; it is a masterclass in structural jewelry design. In a rosary-style chain, every single pearl acts as an individual link, secured by wire-wrapped loops on both sides. This technique creates a fluid, articulated chain that drapes beautifully, catches the light from every angle, and prevents the catastrophic loss of beads if the chain were to break. In 2026, the modern pearl rosary necklace has evolved beyond traditional uniform rounds, with designers increasingly incorporating baroque shapes, mixed-metal wire accents, and asymmetrical spacing. However, the foundational mechanics of the wire-wrapped link remain unchanged.
This comprehensive guide will walk you through the exact metallurgy, gemological grading, and mechanical techniques required to craft a durable, professional-grade pearl rosary necklace from scratch.
Selecting Your Materials: Pearls, Wire, and Findings
The success of your necklace hinges on the precise compatibility between your pearl drill holes and your wire gauge. Unlike standard stringing, wire wrapping requires the wire to pass through the bead multiple times if you are doing complex weaves, but for a classic rosary link, a single pass with a robust wire is ideal.
Pearl Grading and Sizing
According to the GIA Pearl Quality Factors, luster and surface quality are paramount. For a continuous rosary chain, uniformity in size and overtone is critical. AAA-grade Hanadama Akoya pearls (6mm-8mm) offer mirror-like luster, while AAA freshwater pearls provide a cost-effective alternative with excellent durability. Ensure your pearls have a minimum drill hole size of 0.8mm to accommodate structural wire gauges without causing micro-fractures in the nacre.
Choosing the Right Wire Gauge and Temper
Wire temper (hardness) dictates the structural integrity of your wrapped loops. Dead-soft wire is too malleable; the loops will pull open under the pendant's weight or the chain's natural tension. Full-hard wire is too brittle and will snap during the wrapping process. Half-hard wire is the industry standard for rosary links, offering the perfect balance of malleability for wrapping and tensile strength for holding shape.
| Pearl Size | Drill Hole | Recommended Wire Gauge | Wire Temper |
|---|---|---|---|
| 4mm - 5mm | 0.6mm | 26-Gauge (0.40mm) | Half-Hard |
| 6mm - 7mm | 0.8mm | 24-Gauge (0.51mm) | Half-Hard |
| 8mm - 9mm | 1.0mm | 22-Gauge (0.64mm) | Half-Hard |

Step-by-Step Wire Wrapping Technique
Mastering the wrapped loop is essential. A standard simple loop leaves a gap where the wire can slip out; a wrapped loop coils the tail around the stem, creating a permanent, snag-free closure that protects delicate garments and skin.
Step 1: Cutting and Preparing the Wire
For a standard 7mm pearl using 24-gauge wire, cut a piece exactly 2.5 inches (63mm) long using flush cutters. Ensure the cut is perfectly flat on one side and angled (the "pinch") on the other. The flat cut will be the starting point for your first loop.
Step 2: Creating the First Wrapped Loop
- Using chain-nose pliers, grasp the wire about 15mm from the flat end.
- Bend the wire at a precise 90-degree angle.
- Switch to round-nose pliers. Place the jaws at the base of the 90-degree bend and roll the short end over the top jaw to form a complete circle.
- Reposition your chain-nose pliers to hold the loop firmly. Take the 15mm tail and wrap it tightly around the stem wire exactly three to four times.
- Use flush cutters to snip the excess tail flush against the coil, and use the tip of your chain-nose pliers to gently squeeze the cut end inward so it doesn't snag.
Step 3: Threading and the Second Loop
Slide your pearl down the stem wire until it rests flush against the base of your wrapped coils. Crucial Step: Before creating the second loop, you must ensure the loop orientation matches your design. For a flat-laying rosary chain, the second loop must be formed in the exact same plane as the first. If you want a twisting, spiral chain, offset the loop by 90 degrees.
Bend the wire at a 90-degree angle directly above the pearl, leaving a 15mm tail. Wrap your second loop, ensuring the coils sit neatly stacked against the top of the pearl's drill hole.
Assembling the Pearl Rosary Necklace Chain
The paradox of the rosary chain is that you cannot link two closed loops together. Therefore, assembly must be done sequentially or by using open jump rings (which compromises the aesthetic and security of a true wire-wrapped chain). The sequential method is the hallmark of a master jeweler.
Pro-Tip for Sequential Assembly: When making your second wrapped loop on Link A, do not close the loop entirely. Leave the circle slightly open, hook it through the closed loop of Link B, and then use your pliers to finish the wrap and close the circle. This maintains a continuous, unbroken chain structure.
Work over a soft bead mat to prevent pearls from rolling away. As you connect each link, gently manipulate the joints with nylon-jaw pliers to ensure the chain articulates smoothly without binding. Nylon-jaw pliers are mandatory here; bare steel pliers will mar the silver or gold-filled wire, leaving permanent tool marks that degrade the professional finish of your pearl rosary necklace.

Adding the Clasp and Finishing Touches
The termination points of your necklace endure the highest mechanical stress. Never wire-wrap a lobster clasp directly to the final pearl link; the constant friction of the clasp mechanism will eventually wear through the wire.
- The Clasp End: Create a final wire-wrapped link, but instead of a loop, wrap the wire securely around a 6mm or 8mm soldered jump ring. Attach your lobster clasp to this soldered ring. Soldered rings cannot be pulled apart, ensuring the security of the piece.
- The Tag End: On the opposite side, attach a 10mm soldered jump ring or a custom wire-wrapped extender chain. This allows the wearer to adjust the length, which is particularly useful in 2026 layering trends where the pearl rosary necklace might be worn over a turtleneck in winter or directly on the skin in summer.
- Work Hardening: Once the necklace is fully assembled, lay it flat on a steel bench block and very lightly tap the wire-wrapped loops with a rawhide mallet. This gently work-hardens the half-hard wire, locking the coils into place and giving the loops a slightly flattened, forged aesthetic that catches the light beautifully.
Troubleshooting Common Wire-Wrapping Mistakes
Even experienced jewelers encounter structural and aesthetic failures when crafting a pearl rosary necklace. Here is how to diagnose and fix the most common issues:
1. The Wire Snaps During Wrapping
Cause: You are likely using full-hard wire, or you have over-manipulated half-hard wire, causing it to become brittle due to excessive work-hardening.
Solution: Switch to half-hard wire and minimize the number of times you bend and unbend the loop before wrapping. Make your movements deliberate and final.
2. The Pearls Crack Near the Drill Hole
Cause: Using a wire gauge that is too thick for the drill hole, forcing it through and creating internal pressure, or pulling the wrapped coils too tightly against fragile nacre.
Solution: Always measure your drill holes with a digital caliper. If the hole is 0.7mm, do not force 22-gauge (0.64mm) wire through it, as the angled cut end can act as a wedge. Use 24-gauge wire and ensure your coils sit gently against the bead without overtightening.
3. The Chain Twists and Tangles Constantly
Cause: The loops on either side of the pearl are not in the same plane. If one loop faces forward and the other faces sideways, the chain will naturally spiral and tangle.
Solution: Use flat-nose pliers to gently torque the stem wire of the finished link, aligning both loops perfectly parallel to one another before connecting the next link.
Conclusion
Crafting a pearl rosary necklace is a meticulous process that bridges the gap between traditional gemology and modern metalsmithing. By respecting the inherent properties of the pearl, selecting the precise half-hard wire gauge, and executing flawless wrapped loops, you create a piece of jewelry that is not only visually stunning but structurally immortal. Whether you are designing a classic 18-inch collar or an asymmetrical 30-inch opera length, the techniques outlined in this guide will ensure your necklace remains a timeless staple in any jewelry collection.


