How to Craft a Custom Pearl and Silver Chain Necklace
Learn how to craft a custom pearl and silver chain necklace with our step-by-step guide. Master wire wrapping, chain selection, and pearl grading.

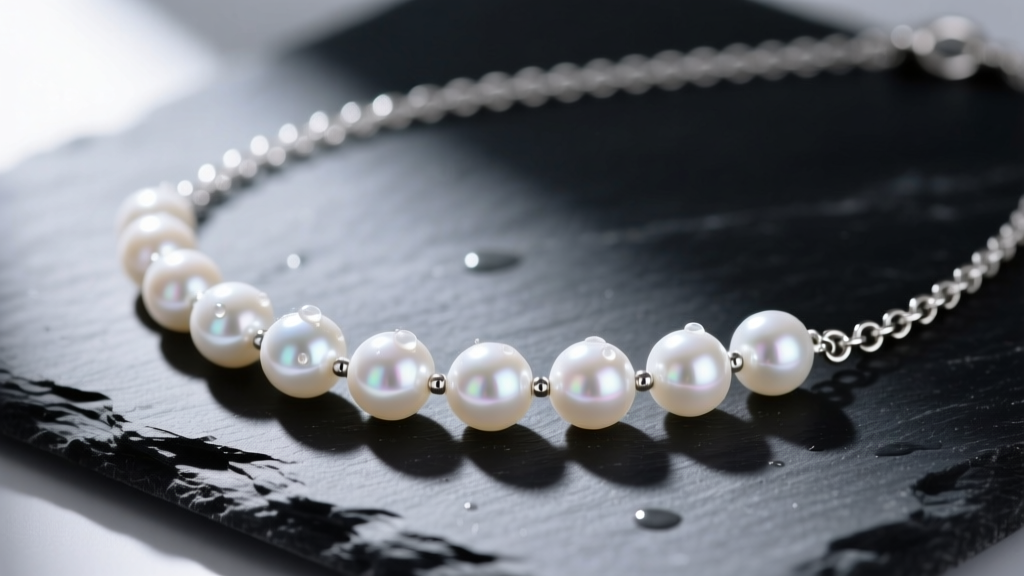
Crafting a custom pearl and silver chain necklace bridges the gap between organic warmth and metallic precision. As we move through 2026, the trend in fine jewelry leans heavily toward mixed-media layering, where the iridescent luster of pearls contrasts sharply with the cool, industrial gleam of sterling silver. Whether you are designing a piece for your personal collection or creating a bespoke gift, understanding the structural mechanics of jewelry assembly is critical. This comprehensive guide will walk you through selecting the right materials, mastering wire-wrapping techniques, and assembling a durable, high-end pearl and silver chain necklace from scratch.
The Anatomy of a Pearl and Silver Chain Necklace
Before picking up your pliers, you must understand the material science behind your components. A necklace is only as strong as its weakest link, and pairing organic gemstones with precious metals requires careful consideration of weight, tensile strength, and chemical compatibility.
Selecting the Right Sterling Silver Chain
For the chain component, you must exclusively use .925 sterling silver. According to The Silver Institute, .925 sterling consists of 92.5% pure silver and 7.5% alloy metals (usually copper). This copper alloy provides the necessary tensile strength to support the weight of pearl pendants. Pure .999 fine silver is far too soft; it will stretch, deform, and eventually snap under the daily friction of wear. For a classic pearl and silver chain necklace, opt for a rolo or cable chain in a 1.2mm to 1.5mm thickness. This gauge is robust enough to hold a clasp securely but delicate enough not to overpower 7mm to 9mm pearls.
Choosing and Grading Your Pearls
The pearls are the focal point of your design. When sourcing freshwater pearls, look for AAA-grade specimens. The Gemological Institute of America (GIA) notes that nacre thickness and surface blemish percentage are the primary drivers of pearl value and durability. For a necklace intended for daily wear, ensure your pearls have a minimum nacre thickness of 0.8mm to prevent peeling or chipping over time. Furthermore, pay close attention to the drill hole size, as this dictates the wire gauge you can use for assembly.
| Pearl Diameter | Standard Drill Hole | Recommended Wire Gauge | Ideal Chain Link Thickness |
|---|---|---|---|
| 5mm - 6mm | 0.4mm - 0.5mm | 26-Gauge (0.40mm) | 0.8mm - 1.0mm Cable |
| 7mm - 8mm | 0.6mm - 0.8mm | 24-Gauge (0.51mm) | 1.2mm - 1.5mm Rolo |
| 9mm - 11mm | 0.8mm - 1.0mm | 22-Gauge (0.64mm) | 1.8mm - 2.2mm Figaro |
Step-by-Step Assembly Guide
Assembling your pearl and silver chain necklace requires a few specialized jewelry-making tools. You will need flush cutters, chain-nose pliers, round-nose pliers, and nylon-jaw pliers (to prevent marring the soft silver wire). Ensure your workspace is well-lit and use a bead mat to prevent pearls from rolling away.
Step 1: Prepping the Silver Chain and Clasp
Determine your desired length. A standard princess length is 18 inches, while a choker sits at 15 to 16 inches. Cut your .925 sterling silver chain to your chosen length using flush cutters. On one end, attach a 9mm or 11mm sterling silver lobster clasp using a 5mm, 20-gauge soldered jump ring. Soldered jump rings are crucial here; because they have no seam, they will not pull apart when the clasp is tugged. On the opposite end of the chain, attach a standard 5mm open jump ring to serve as the catch for the clasp.
Step 2: Wire-Wrapping the Pearl Drops
To integrate the pearls into the chain, we use a wrapped loop technique, which is vastly superior to simple eye loops for security. Cut a 2.5-inch piece of 24-gauge dead-soft sterling silver wire. Using your round-nose pliers, create a small loop at one end. Thread your AAA-grade pearl onto the wire. Bend the wire at a strict 90-degree angle directly above the pearl's surface. Grip the bend with your round-nose pliers and wrap the wire around to form a second loop. Finally, take the remaining tail of the wire and wrap it tightly around the stem between the pearl and the top loop three to four times. Snip the excess wire with flush cutters and use chain-nose pliers to tuck the sharp end flush against the wraps.

Step 3: Integrating Pearls into the Chain
Now, attach your wire-wrapped pearls to the silver chain. Decide on your spacing. A popular 2026 design trend is the 'station necklace' look, where pearls are spaced every 2 to 3 inches along the collarbone. Open a 4mm, 20-gauge sterling silver jump ring using two pairs of pliers. Pro Tip: Never pull jump rings apart laterally (left and right). Always twist them open and closed longitudinally (forward and backward) to maintain their perfect circular shape. Slide the jump ring through the top loop of your pearl drop and through the corresponding link on your silver chain, then twist it securely closed.
Pro-Tips for Tarnish Prevention and Maintenance
Silver and pearls have vastly different chemical vulnerabilities. Sterling silver tarnishes when the copper alloy reacts with sulfur and moisture in the air, forming silver sulfide. Pearls, being organic calcium carbonate, are highly susceptible to acids, cosmetics, and harsh chemicals.
Never use ultrasonic jewelry cleaners or commercial 'silver dip' liquids on a pearl and silver chain necklace. The ammonia and mild acids in these solutions will permanently etch and dissolve the delicate nacre of the pearl, ruining its luster in seconds.
To maintain your piece, wipe the pearls gently with a damp microfiber cloth after every wear to remove skin oils and perfume residue. Polish the silver chain separately with a dry, treated silver polishing cloth. When storing the necklace, place it in an airtight ziplock bag with a Pacific Silvercloth anti-tarnish tab to absorb ambient sulfur.
Styling and Layering Your Finished Piece
The beauty of a handmade pearl and silver chain necklace lies in its versatility. To achieve a modern, curated aesthetic, employ the 'rule of odds' when layering. Pair your newly crafted 18-inch pearl station necklace with a 15-inch plain sterling silver snake chain and a 22-inch silver pendant necklace. This creates three distinct visual tiers that draw the eye downward and flatter the neckline.

For necklines, this specific pearl and silver chain necklace design shines brightest against V-necks, scoop necks, and open-collared silk blouses. Avoid wearing it with high, ruffled collars or heavily patterned fabrics, as the intricate wire wraps and subtle pearl luster will become visually lost in the clutter. By mastering these assembly techniques and adhering to strict material standards, you ensure your custom necklace is not just a fleeting trend, but a durable, heirloom-quality piece of jewelry.


