How to Fix a Broken Necklace: Step-by-Step Chain Repair Guide
Learn how to fix a broken necklace at home with our step-by-step guide. Master jump ring repairs, clasp replacements, and chain maintenance.

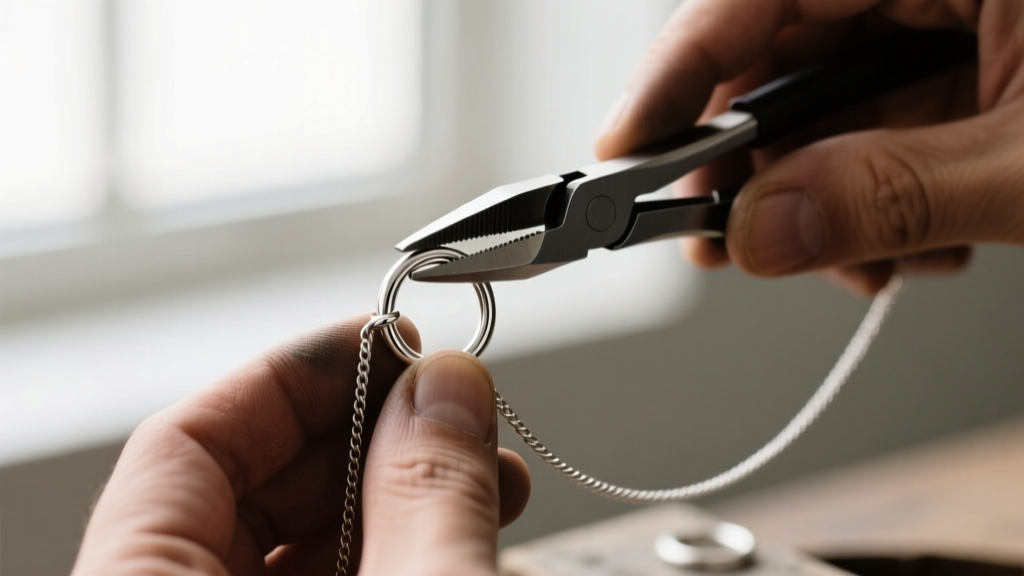
There are few things more frustrating than reaching for your favorite pendant only to find you are holding a broken necklace. Whether it is a delicate 925 sterling silver cable chain or a heavy 14k gold curb link, chain failures are an inevitable part of jewelry ownership. However, not every snap requires an expensive trip to the jeweler. In fact, approximately 85% of all necklace breaks occur at the connection points—specifically the jump rings and clasps—which can be easily repaired at home with the right tools and techniques.
This comprehensive guide will walk you through the metallurgy of chain breaks, the exact tools you need, and step-by-step instructions for fixing a broken necklace chain and replacing hardware. We will also cover when a break requires professional laser soldering, ensuring you never ruin a valuable piece by attempting the wrong repair.
Diagnosing the Break: Why Necklaces Fail
Before grabbing a pair of pliers, it is crucial to understand the anatomy of a chain failure. Necklaces typically break in one of three ways, each dictating a different repair strategy:
- The Jump Ring Pull-Apart (85% of breaks): The jump ring is the small circular wire connecting the clasp to the chain or the pendant to the chain. Over time, lateral tension causes the gap in the ring to widen, eventually allowing the chain to slip through. This is a mechanical failure, not a metal failure.
- Clasp Spring Fatigue (10% of breaks): Lobster clasps rely on a tiny internal steel spring. If the trigger becomes stiff, or the clasp fails to snap shut completely, the internal spring has likely corroded or fatigued. The entire clasp must be replaced.
- Mid-Chain Link Fracture (5% of breaks): This occurs when a specific link experiences a stress fracture, often due to snagging on clothing or sleeping in the necklace. This is common in rigid chains like snake, box, or herringbone styles, as well as heavily worn curb chains.
Expert Insight: Never attempt to fix a mid-chain fracture on a snake or box chain at home. These chains are constructed from tightly interlocked, machine-pressed links. Attempting to bend them back into place will kink the metal, causing a permanent weak point that will snap again within days.
Essential Tools and Findings for Chain Repair
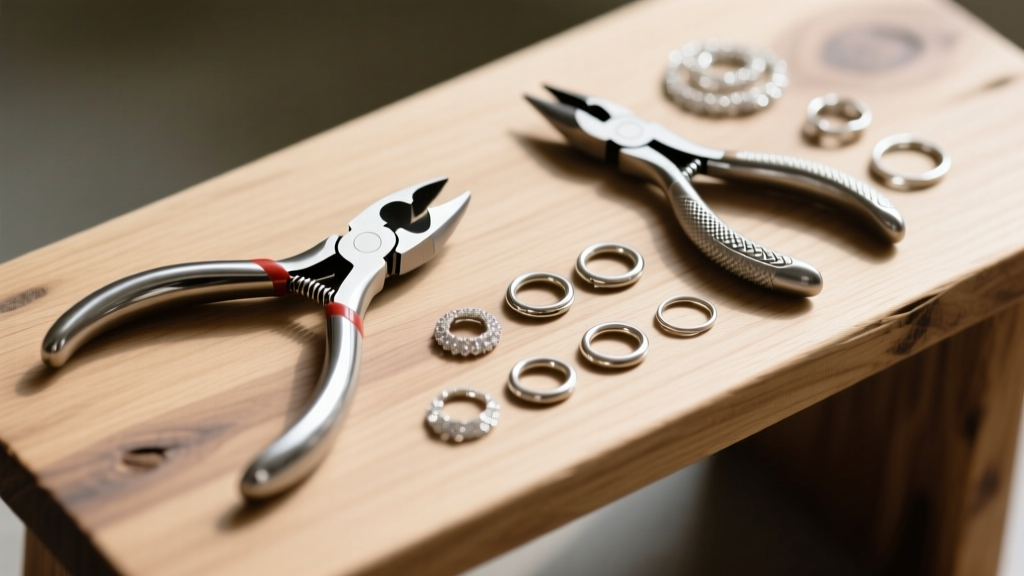
To properly fix a broken necklace, you must use jewelry-specific tools. Standard household pliers have serrated teeth that will permanently mar soft precious metals like 24k gold, high-karat alloys, and sterling silver. Invest in a basic jewelry repair kit (typically $15 to $30 from suppliers like Rio Grande or Halstead) that includes the following:
- Flat-Nose Pliers: Features a flat, smooth gripping surface. Essential for holding one side of a jump ring without scratching the metal.
- Chain-Nose Pliers: Tapered to a fine point. Used for reaching into tight spaces and manipulating small lobster clasp triggers.
- Flush Cutters: Used to cleanly snip wire or remove damaged split rings without leaving sharp, protruding edges.
- Nylon Jaw Pliers: Crucial for working with gold-filled or plated metals. The nylon pads prevent the steel tools from flaking the thin outer layer of gold.
Jump Ring Sizing and Gauge Chart
Using the correct gauge (thickness) and diameter for your replacement jump ring is critical. A ring that is too thin will pull apart under the weight of a pendant; a ring that is too thick will not fit through the delicate end-links of a cable chain.
| Wire Gauge | Millimeter Thickness | Recommended Chain Type | Best Diameter |
|---|---|---|---|
| 22-Gauge | 0.64mm | Delicate cable, thin rolo, bead chains | 3mm - 4mm |
| 20-Gauge | 0.81mm | Standard cable, medium figaro, wheat chains | 4mm - 5mm |
| 18-Gauge | 1.02mm | Heavy curb, thick rolo, large pendant bails | 5mm - 7mm |
| 16-Gauge | 1.29mm | Chunky chain links, heavy statement clasps | 6mm - 8mm |
Step-by-Step: Fixing a Separated Jump Ring
If your necklace broke because the jump ring pulled open, you do not necessarily need a new ring—you just need to close it properly. The most common mistake beginners make is pulling the two ends of the ring apart laterally (like opening a door). This distorts the circle and weakens the metal through work-hardening.
The Correct Technique: The Lateral Twist
- Secure the Ring: Hold the jump ring with your flat-nose pliers on the left side of the split, and your chain-nose pliers on the right side.
- Twist, Don't Pull: Gently twist one hand toward you and the other hand away from you. The ring should open like a spiral staircase, maintaining its perfect circular shape.
- Reattach the Chain: Slip the end-link of the broken necklace and the clasp back onto the open jump ring.
- Close the Gap: Reverse the twisting motion to close the ring. As the two ends meet, you should feel a slight "click" or friction as the metal ends rub against each other. This ensures a flush, gapless seal.
- Check the Alignment: Run your fingernail over the seam. If it catches, the ring is not perfectly closed. Twist slightly past the center and back to align the ends perfectly.
Step-by-Step: Replacing a Broken Lobster Clasp
If the clasp itself is broken, it cannot be repaired and must be replaced. You will need a new lobster clasp and a new jump ring (reusing old, fatigued jump rings is a primary cause of repeat breaks).
- Remove the Old Hardware: Use your flat-nose pliers to twist open the jump ring connecting the broken clasp to the chain. Slide the broken clasp off and set it aside.
- Prepare the New Clasp: Inspect the new lobster clasp. Ensure the small ring at the bottom of the clasp (the pad) is fully soldered and closed. If it is an unsoldered split ring on the clasp itself, use your flush cutters to carefully snip it off and replace it with a properly soldered jump ring.
- Attach and Close: Thread the new jump ring through the chain's end-link and the loop on the new lobster clasp. Use the lateral twist method described above to close the jump ring tightly.
- Test the Tension: Give the clasp a gentle tug to ensure the jump ring holds firm and the clasp trigger operates smoothly without catching on the jump ring seam.
When to See a Professional: Laser Soldering vs. Torch
While jump rings and clasps are easy DIY fixes, a broken necklace that has snapped in the middle of the chain requires professional intervention. Attempting to bend links back together will result in an ugly, weak repair. A professional jeweler will use one of two methods to fix a mid-chain break, typically costing between $45 and $120 depending on the metal and chain complexity.
- Traditional Torch Soldering ($35 - $65): The jeweler uses a micro-torch and silver or gold solder to fuse the broken link. This is highly effective for simple cable, curb, and rolo chains. However, the heat spreads through the metal, which can melt adjacent links on very fine chains or damage heat-sensitive gemstones nearby.
- Laser Welding ($75 - $120+): For intricate chains like box, snake, or Byzantine weaves, laser welding is mandatory. A laser welder uses a concentrated beam of light to melt a microscopic point of metal, fusing the link without transferring heat to the surrounding chain. This preserves the structural integrity and flexibility of complex weaves.
Preventative Maintenance for Delicate Chains
The best way to deal with a broken necklace is to prevent the break from happening in the first place. Incorporate these professional maintenance habits into your jewelry care routine:
- The 6-Month Seam Check: Every six months, run your fingernail over the jump rings at both ends of your necklace. If you feel a gap, or if the ring looks slightly oval rather than perfectly round, use your pliers to twist it tightly closed before it fails.
- Upgrade to Soldered Jump Rings: If you frequently wear a heavy pendant on a delicate chain, ask a jeweler to replace the standard open jump ring with a soldered (closed) jump ring. This eliminates the gap entirely, making it mechanically impossible for the ring to pull apart.
- Proper Storage and Wear: Never sleep in your necklace. Tossing and turning creates immense lateral tension on the links, particularly at the clasp connection. Store chains flat or hanging to prevent micro-kinks that lead to stress fractures.
By understanding the mechanics of your jewelry and keeping a few specialized tools on hand, you can easily fix a broken necklace at home, saving time and money while extending the life of your most cherished pieces.


