Step-by-Step Guide to Healing and Styling a Necklace Piercing
Learn how to safely heal your nape necklace piercing, choose the right titanium surface bars, and style traditional chains without causing rejection.

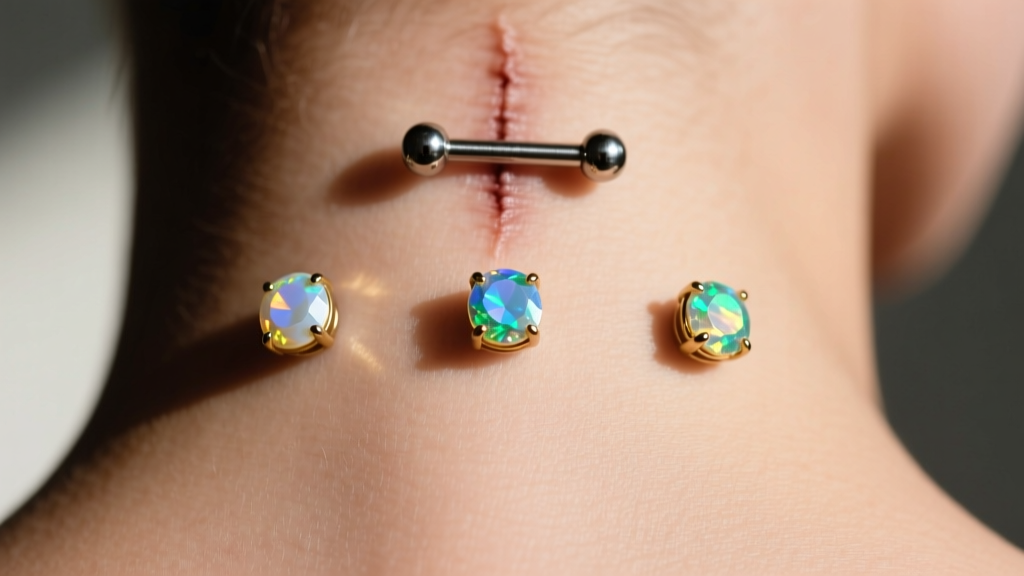
The nape necklace piercing is one of the most visually striking surface modifications in modern body art. Designed to mimic the drape of a delicate chain or pendant across the back of the neck, this piercing requires an exceptional level of aftercare, anatomical precision, and styling awareness. Because the nape of the neck is a high-mobility area prone to friction from hair, clothing, and traditional jewelry, treating this modification with expert-level care is non-negotiable.
As of 2026, advancements in threadless surface jewelry and dermal anchor technology have improved the longevity of these piercings, but the margin for error remains slim. Whether you are considering this modification, currently healing one, or looking to integrate your healed surface bars with your existing necklace collection, this step-by-step guide provides the exact protocols you need to prevent migration, rejection, and infection.
Anatomy of a Necklace Piercing: Surface Bars vs. Microdermals
Before diving into aftercare and styling, it is critical to understand the structural foundation of a necklace piercing. The term generally refers to a horizontal row of piercings across the nape. Professional piercers typically utilize one of two methods to achieve this look:
- Staple-Shaped Surface Bars: A single piece of implant-grade titanium bent into a staple shape, with two 90-degree angles that sit deep within the dermis. The entry and exit holes are connected by a subcutaneous channel.
- Microdermal Anchors (Dermals):strong> Individual, single-point anchors embedded directly into the dermal layer, topped with interchangeable gem ends. A "necklace" effect is created by placing 3 to 5 dermals in a curved line.
Surface bars generally offer better long-term stability for horizontal nape placements because the barbell acts as a stabilizing bridge beneath the skin, resisting the upward pull that causes rejection.
Step-by-Step Healing Protocol (The First 90 Days)
Healing a necklace piercing is a test of patience. While the initial fistula (tissue tube) may form in 8 to 12 weeks, full subcutaneous stabilization takes 6 to 12 months. The Association of Professional Piercers (APP) strictly advises against harsh chemicals, ointments, or rotational movement during this phase.
The LITHA Method and Sterile Saline Soaks
The golden rule of surface piercing aftercare is LITHA: Leave It The Hell Alone. Your body needs to build a collagen matrix around the titanium without constant disruption.
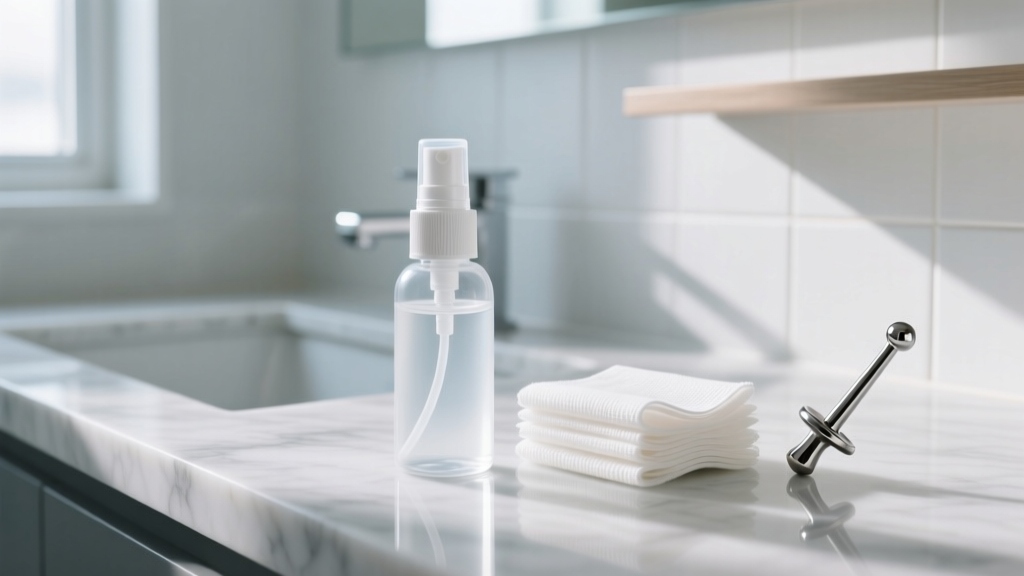
- Prep the Solution: Use only a sterile, isotonic saline wound wash (0.9% sodium chloride with no additives, preservatives, or benzalkonium chloride).
- Apply via Compress: Spray the saline onto a sterile, non-woven gauze pad. Never use cotton balls or swabs, as the microscopic fibers can wrap around the jewelry ends and introduce bacteria or cause snagging.
- Soak: Hold the saturated gauze against the nape piercing for 3 to 5 minutes to soften any lymphatic crusties.
- Dry: Gently pat the area dry with a fresh piece of non-woven gauze or use a hairdryer on the "cool" setting. Moisture trapped against the nape breeds fungal and bacterial issues.
Snag Prevention and Sleep Hygiene
The nape is a notorious snag zone. During the first 90 days, you must tie your hair up in a loose, high bun or claw clip when awake. When sleeping, use a travel neck pillow (the U-shaped kind) to keep your neck elevated and prevent your head from rolling directly onto the fresh surface bars. Avoid high-collared shirts, turtlenecks, and rough wool scarves entirely until the piercing is fully matured.
Jewelry Specifications: Avoiding the Cheese-Cutter Effect
The most common cause of premature necklace piercing rejection is improper jewelry gauge and material. If the jewelry is too thin, the body's natural immune response will treat it like a splinter, slowly pushing it out through the skin—a painful process known as the "cheese-cutter effect."
| Specification | Surface Bar Requirements | Microdermal Anchor Requirements |
|---|---|---|
| Material | ASTM F-136 Implant-Grade Titanium | ASTM F-136 Implant-Grade Titanium |
| Gauge (Thickness) | 14g (1.6mm) or 12g (1.9mm) | 14g (1.6mm) standard post |
| End Type | Threadless or Internally Threaded | Threadless push-pin tops (3mm-4mm) |
| Rise / Depth | Custom fit by piercer (usually 1.5mm rise) | Low-profile base with 2.5mm rise |
Always source your jewelry from reputable manufacturers like Neometal or Industrial Strength. Threadless ends are highly recommended for nape placements because they eliminate the tiny crevices where external threads can harbor dead skin cells and bacteria.
How to Style Traditional Necklaces Around Your Piercing
One of the most frequent questions we receive at Jewel Style Radar is how to wear traditional necklaces and pendants without aggravating a healed or healing nape piercing. The friction from a standard gold or silver chain rubbing against a surface bar is a primary trigger for migration. Here is your framework for styling traditional neckwear safely.
The Two-Inch Clearance Rule
When selecting a chain necklace, measure the drop length carefully. You must maintain a minimum two-inch clearance between the bottom of your necklace piercing and the top edge of your traditional chain. If your surface bars sit at the base of your hairline, opt for necklaces that are 18 inches or longer. Chokers (14-16 inches) and collar-length chains are strictly prohibited, as they will rest directly on the jewelry ends, causing micro-trauma with every head movement.
Clasp and Chain Link Selection
The hardware on your traditional necklaces matters just as much as the length.
- Avoid Lobster and Spring Ring Clasps: These bulky clasps sit at the nape and can easily catch on the gemstone ends of your surface bars when taking the necklace off. Opt for seamless continuous hoops, magnetic clasps positioned at the front, or slide-chain pendants that pull over the head.
- Choose Smooth Chain Profiles: Avoid rope, wheat, or figaro chains. The intricate links act like tiny combs that trap loose hair, which then pulls against the nape piercing. Instead, choose smooth box chains, snake chains, or polished herringbone styles that glide over the skin and hair without catching.

Layering Pendants Safely
If you love the layered pendant look, keep the layers confined to your chest and collarbone. A 16-inch delicate chain with a small solitaire pendant paired with a 20-inch heavier chain creates a beautiful aesthetic that draws the eye downward, completely bypassing the nape area. Never wear heavy, swinging pendants on chains shorter than 18 inches; the momentum of a heavy pendant swinging backward when you bend over can strike the surface bar and tear the fistula.
Troubleshooting Migration and Rejection
Even with flawless aftercare and perfect jewelry, the nape is a high-rejection zone. You must monitor your necklace piercing weekly for signs of migration. If you notice the skin between the entry and exit holes becoming translucent, shallow, or flaky, or if the jewelry feels looser and more visible beneath the skin, migration has begun.
The Action Plan: Do not attempt to "save" a migrating surface piercing with ointments or tape. The moment you suspect rejection, return to your professional piercer to have the jewelry removed immediately. Removing the jewelry early allows the skin to heal with a minimal, flat scar. Leaving a rejecting surface bar in place will result in a deep, bifurcated scar that resembles a split in the skin, which is far more difficult to conceal or revise later.
By respecting the anatomy of the nape, utilizing only implant-grade titanium, and strategically curating your traditional necklace collection to avoid friction, your necklace piercing can remain a stunning, permanent fixture of your personal style.


