How to Detangle a Necklace: Budget & Value Preservation Guide
Learn how to detangle a necklace safely while preserving its value. Compare DIY methods, professional repair costs, and chain replacement budgets.

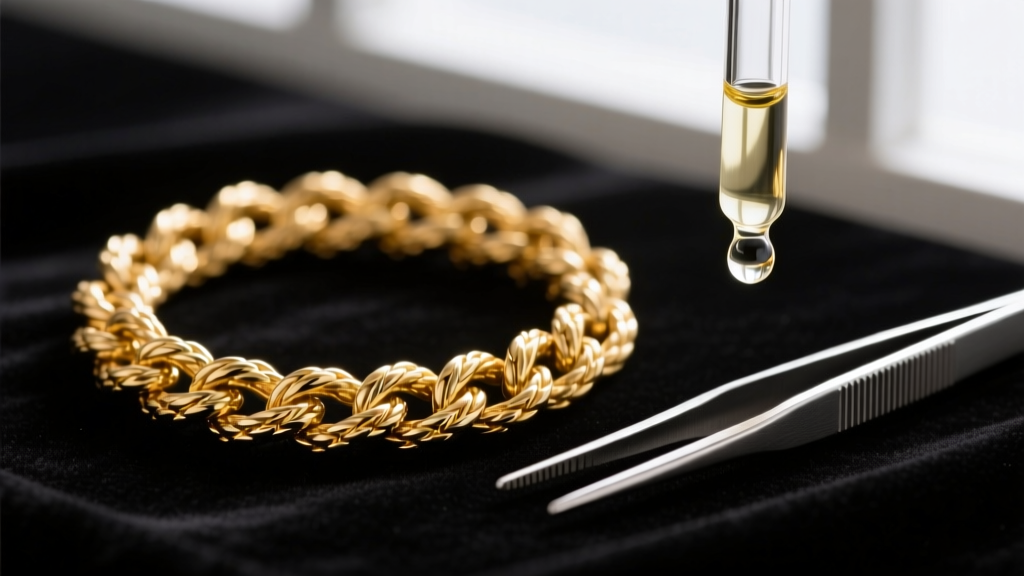
The Economics of a Tangled Chain: Is It Worth Saving?
A severely knotted chain is not just a frustrating inconvenience; it is a direct threat to your jewelry's financial value. When you pull at a tangled necklace, you induce work hardening—a metallurgical process where the metal's crystal lattice structure deforms, becoming brittle and prone to snapping. Before you attempt to learn how to detangle a necklace, you must perform a rapid budget and value assessment. Is the piece a $25 gold-plated brass fashion chain, or a $2,500 solid 18k Italian rope chain?
According to repair benchmarks from Jewelers of America, the average jeweler's bench fee for minor chain repairs in 2026 hovers between $45 and $85. If your necklace's replacement value is under $40, aggressive DIY detangling that results in a break will cost more to solder than to simply replace. However, for solid gold, platinum, or vintage pieces, preserving the original links is paramount for maintaining resale and sentimental value.
The Golden Rule of Chain Triage
- Base Metals & Gold-Plated (Under $30 value): Limit DIY effort to 10 minutes. If the knot persists, cut it out and replace the chain.
- Sterling Silver & 10k/14k Gold ($50 - $500 value): Invest time in proper lubrication and needle techniques. Professional laser welding is a viable backup.
- Platinum, 18k+ Gold & Hollow Chains ($500+ value): Do not pull. Use high-grade lubricants immediately and consider a professional if the knot is tightly compacted.
Step-by-Step: How to Detangle a Necklace Safely (DIY Methods)
When tackling a complex knot, your choice of lubricant and tools dictates whether the chain survives intact. Forget the internet myths about baby powder; talcum powder mixes with skin oils and creates a cement-like paste inside tight linkages, particularly in box and snake chains.
1. Select the Right Lubricant
The goal is to reduce the coefficient of friction between the metal links without degrading the metal or leaving a rancid residue.
- Jojoba Oil (Top Tier): Chemically a liquid wax ester, jojoba oil closely mimics human sebum. It will not go rancid, making it the safest choice for expensive gold and platinum chains.
- Mineral Oil / Baby Oil (Mid Tier): Highly effective and inert, though it requires a thorough wash with mild dish soap afterward to prevent dust attraction.
- Olive or Coconut Oil (Avoid): These organic oils oxidize and turn rancid over time, leaving a foul odor trapped in the microscopic crevices of rope and herringbone chains.
2. Choose Precision Tools
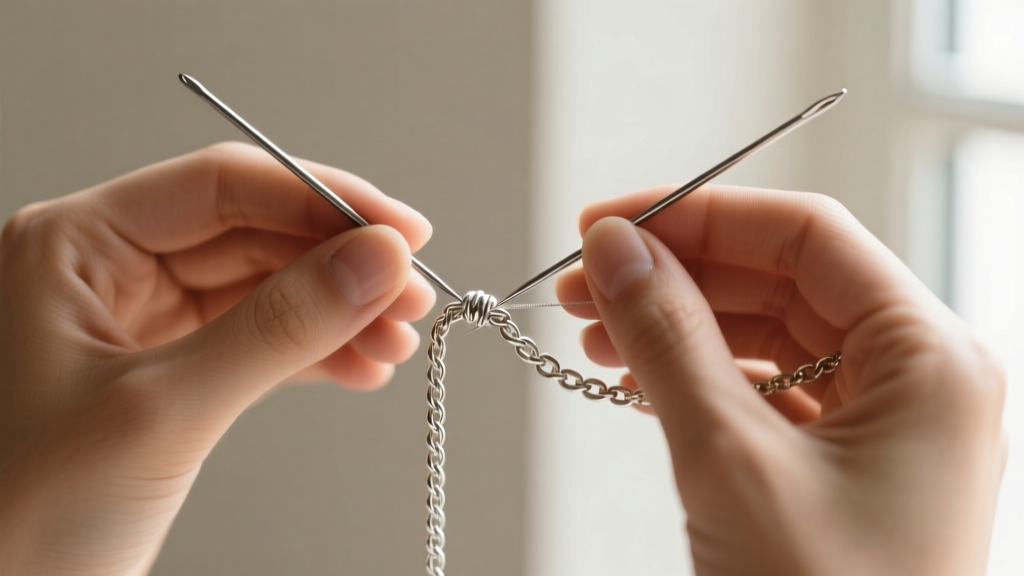
Ditch the tweezers. Tweezers apply compressive force, which crushes hollow links and kinks solid ones. Instead, use two size 9 or 10 beading needles or dental picks. These tools are rigid enough to push metal but fine enough to slip between links measuring less than 1.5mm.
3. The 'Push-Outward' Technique
Lay the necklace flat on a non-slip surface (a dark velvet jewelry pad or a silicone mat). Unclass the clasp so the chain has no tension loop. Apply a single drop of jojoba oil directly to the knot's center. Insert the two needles into the absolute center of the knot. Instead of pulling the ends of the chain, gently push the needles away from each other to expand the knot's core. Once the core loosens, use the needles to tease the outer loops outward.
"The biggest mistake consumers make is pulling the chain ends while the knot is lubricated. This acts like a Chinese finger trap, drawing the links tighter and causing micro-fractures in the solder joints." — Master Bench Jeweler Guidelines, Rio Grande Jewelry Supply.
Chain Link Profiles: Which Tangles Are Costly to Fix?
Not all chains are created equal. The structural geometry of the chain dictates both its propensity to tangle and the financial impact of a botched detangling attempt. Refer to the 2026 repair cost matrix below to assess your risk.
| Chain Style | Tangle Risk | DIY Difficulty | Est. Pro Repair Cost | Value Impact if Broken |
|---|---|---|---|---|
| Herringbone | High | Extreme | $75 - $150 | Severe. Kinks permanently ruin the drape and resale value. |
| Box | Medium | Medium | $50 - $90 | Moderate. Solder joints are highly visible on geometric links. |
| Snake | High | Hard | $60 - $120 | Severe. Once the continuous tube structure kinks, it cannot be fully straightened. |
| Rope | Low | Easy | $35 - $65 | Low. The twisted pattern easily hides solder seams. |
| Cable / Link | Low | Easy | $30 - $50 | Minimal. Standard round links are easily replaced or soldered. |
Professional Repair vs. Replacement: A Budget Breakdown
If your DIY efforts fail, or if the chain snaps during detangling, you must weigh professional repair against replacement. The Gemological Institute of America (GIA) frequently notes that improper at-home soldering with butane torches destroys the temper of precious metals. Always opt for professional bench work.

Torch Soldering vs. Laser Welding
Understanding the technology your jeweler uses is critical for budgeting and value preservation.
- Traditional Torch Soldering ($35 - $65): Uses a gas flame and gold/silver solder. Ideal for standard cable or rope chains. Budget Warning: Do not use torch soldering on hollow chains, platinum, or chains with gemstones set nearby, as the widespread heat will melt hollow interiors or shatter stones.
- Laser Welding ($85 - $150+): Uses a concentrated light beam to fuse metal at a microscopic level without heat transfer to surrounding areas. Value Preservation: Mandatory for platinum, titanium, hollow gold chains, and snake chains. While the upfront cost is double that of torch soldering, it prevents the catastrophic melting that results in total chain replacement.
Value Preservation: Storage Solutions That Pay Off
The ultimate budget hack for necklace care is preventing tangles entirely. Replacing a snapped $400 chain due to poor storage is a complete loss of capital. Invest in preventative infrastructure:
- Polyethylene Zip Bags: Store individual chains in 2-mil thick, PVC-free polyethylene bags. Squeeze the air out before sealing. This prevents tangling and slows tarnishing by limiting oxygen exposure.
- Anti-Tarnish Strips: Drop a 3M anti-tarnish strip into your jewelry box or storage bag. These strips absorb hydrogen sulfide from the air, protecting silver chains from the brittle sulfide layer that makes them prone to snapping when detangled.
- Hanging Organizers: For chains over 18 inches, gravity is your friend. Hang them from a velvet-lined jewelry armoire with individual hooks to ensure links remain relaxed and un-kinked.
By treating your jewelry with the respect its metallurgical properties demand, you ensure that learning how to detangle a necklace remains a rare, manageable task rather than a recurring financial drain.