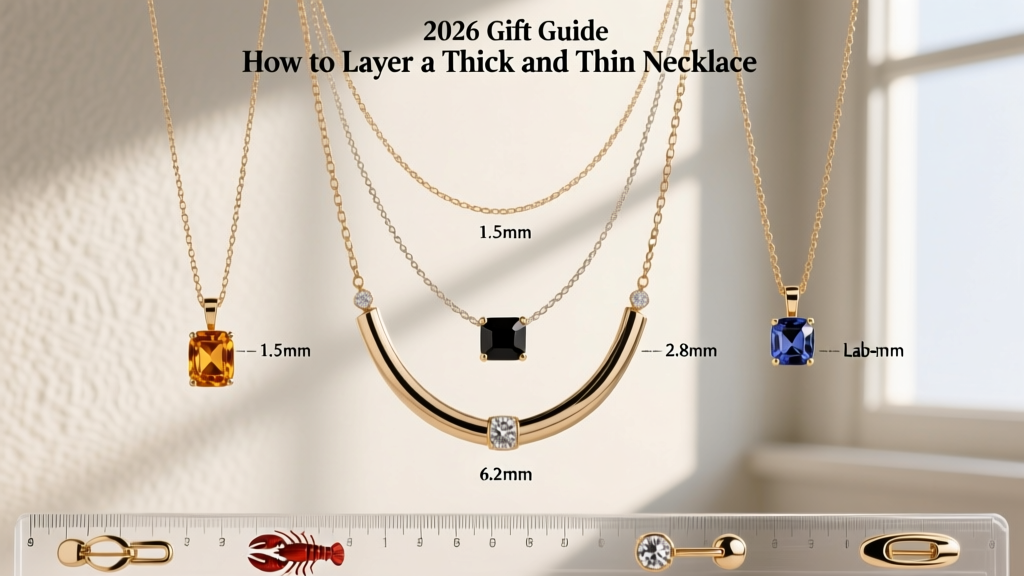
How to Layer a Red and Silver Necklace: A Step-by-Step Style Guide
Master the art of stacking with our step-by-step guide to layering a red and silver necklace. Learn chain gauges, gemstone care, and neckline pairing.

Stacking jewelry is an art form that requires a keen eye for proportion, texture, and color theory. When working with high-contrast combinations, the visual stakes are even higher. A red and silver necklace stack offers a striking juxtaposition: the cool, reflective luminosity of silver against the warm, passionate depth of red gemstones or enamel. However, without a strategic approach, these bold pieces can easily look chaotic or become hopelessly tangled.
This comprehensive, step-by-step guide will teach you how to curate, layer, and maintain a flawless red and silver necklace stack. We will cover exact chain gauges, gemstone hardness ratings, and structural troubleshooting to ensure your layers look intentional and last a lifetime.
The Anatomy of a Perfect Red and Silver Stack
Before layering, you must understand the materials you are working with. The foundation of any silver stack is the metal alloy. Standard .925 Sterling Silver contains 92.5% pure silver and 7.5% copper. While beautiful, the copper content makes it susceptible to oxidation (tarnish) when exposed to sulfur and moisture.
For a low-maintenance stack, consider upgrading your base chains to Argentium Silver. Argentium replaces some of the copper with germanium, creating a highly tarnish-resistant alloy that maintains its bright white luster significantly longer than traditional sterling. When selecting your red focal points, you will generally choose between three categories:
- Natural Gemstones: Almandine Garnet (deep burgundy) or Carnelian (vibrant orange-red).
- Lab-Created Stones: Synthetic rubies or spinels, which offer high clarity and Mohs hardness at a fraction of the cost.
- Red Enamel: Specifically Guilloché enamel, where translucent red glass is fired over engine-turned silver patterns, creating a mesmerizing, multi-dimensional ripple effect.
Step 1: Establishing Your Base Chain (The 14 to 16-Inch Rule)
Every successful layering sequence begins with a base chain that sits close to the collarbone. This piece anchors the stack and provides a subtle metallic frame for the bolder pieces that follow.
Selecting the Right Gauge and Weave
For your base chain, opt for a length between 14 and 16 inches. The thickness (gauge) should be delicate enough to recede visually but strong enough to hold up to daily wear. A 1.0mm to 1.2mm cable chain or a 1.2mm rolo chain is ideal. Avoid box chains for your base layer; their sharp, square edges tend to catch on the links of longer chains, leading to severe tangling.
Pro Tip: Always put your base chain on first and clasp it securely before adding subsequent layers. This prevents the smaller clasps from getting lost in the bulk of heavier chains.
Step 2: Introducing the Focal Red and Silver Necklace
The second layer is where your primary red and silver necklace takes center stage. This piece should sit approximately two inches below your base chain, typically at the 18-inch mark. This spacing prevents the clasps and pendants from colliding and scratching one another.
Balancing Visual Weight
If your focal piece features a large, heavy pendant (e.g., a 15mm oval garnet set in a thick silver bezel), the chain supporting it must be robust. Upgrade to a 1.5mm to 2.0mm wheat chain or a 2.0mm Figaro chain. The varying link sizes in a Figaro chain add a masculine, structured texture that contrasts beautifully with the organic shape of a cabochon red stone.
Material Durability Matrix
When choosing the red element for your focal pendant, consider how it will hold up to daily wear. Refer to the table below for material specifications:
| Red Material | Mohs Hardness | Best Setting Type | Care Warning |
|---|---|---|---|
| Almandine Garnet | 7.0 - 7.5 | Prong or Bezel | Avoid hard knocks; can chip on girdle. |
| Carnelian (Agate) | 6.5 - 7.0 | Bezel or Flush | Prolonged sun exposure can fade color. |
| Guilloché Enamel | 4.5 - 5.5 (Glass) | Silver Framed | Never use ultrasonic cleaners; high heat can crack glass. |
| Lab-Created Ruby | 9.0 | Prong or Tension | Highly durable; safe for ultrasonic cleaning. |
Step 3: Adding the Anchor Piece (20 to 24 Inches)
To complete a three-tier stack, you need an anchor piece that draws the eye downward, elongating the neck. This chain should measure between 20 and 24 inches. Instead of another pendant, use a silver lariat, a long station chain (featuring small red beads interspersed every three inches), or a simple, heavy 3.0mm rope chain that rests on the sternum.
The goal of the anchor piece is to provide a textural counterpoint. If your base is a smooth cable and your focal is a patterned wheat chain, a twisted rope chain for the anchor introduces a completely new light-reflecting surface, maximizing the brilliance of the silver.
Matching Your Stack to Specific Necklines
A meticulously layered stack can be ruined if it fights with the neckline of your garment. Here is how to adapt your red and silver layers to common necklines:
- The V-Neck: The natural geometry of a V-neck perfectly mirrors a layered necklace stack. Ensure your 18-inch focal pendant rests exactly one inch above the apex of the fabric's V-shape.
- The Crew Neck: High, tight collars require longer stacks. Skip the 14-inch choker and start your base at 16 inches, pushing your focal red pendant down to 20 inches so it rests visibly against the fabric.
- The Sweetheart Neckline: This romantic, curved neckline pairs best with shorter, tighter layers. Use a 14-inch red enamel choker and a delicate 16-inch silver chain, leaving the sternum bare to let the dress's architecture shine.
Troubleshooting Common Layering Failures
The Tangling Dilemma
The most common failure in necklace layering is tangling. This occurs when chains of the exact same weave and gauge interlock. To prevent this, never layer identical chains. The physical friction between a round rolo chain and a flat, smooth herringbone chain creates enough surface resistance to keep them separated. Furthermore, ensure there is at least a 0.5mm difference in thickness between adjacent chains.
Skin Oxidation and the 'Green Collar' Effect
While pure silver does not turn skin green, the copper alloy in .925 sterling silver can react with the acids and lotions on your skin, leaving a dark or greenish smudge on your chest. To combat this, wipe your necklaces with a microfiber cloth immediately after wearing to remove skin oils, and apply perfumes or body lotions at least five minutes before putting on your silver stack.
Care and Maintenance for Silver and Red Elements
Maintaining a mixed-material stack requires a bifurcated cleaning approach. According to the Silver Institute, the safest way to clean sterling silver is with a specialized, non-abrasive silver polishing cloth. Avoid liquid silver dips, as the harsh chemicals can strip the protective coatings off red gemstones and permanently cloud Guilloché enamel.
For the red gemstone elements, the GIA Gem Encyclopedia recommends using only warm water, a mild dish soap, and a soft-bristled baby toothbrush to gently remove sebum and dust from behind the stone's pavilion. Never use ultrasonic jewelry cleaners on garnets or enamel; the high-frequency vibrations can shatter the glass enamel or exacerbate microscopic fractures within natural garnet inclusions, leading to catastrophic stone failure.
By respecting the material properties of both the silver alloys and the red focal points, and by adhering to strict spacing and gauge rules, your layered necklace stack will remain a sophisticated, tangle-free statement piece for years to come.