Mastering the DIY Safety Pin Necklace: An Expert Craft Guide
Learn how to craft a premium DIY safety pin necklace using skin-safe metals, proper gauge sizes, and secure clasps in this expert guide.

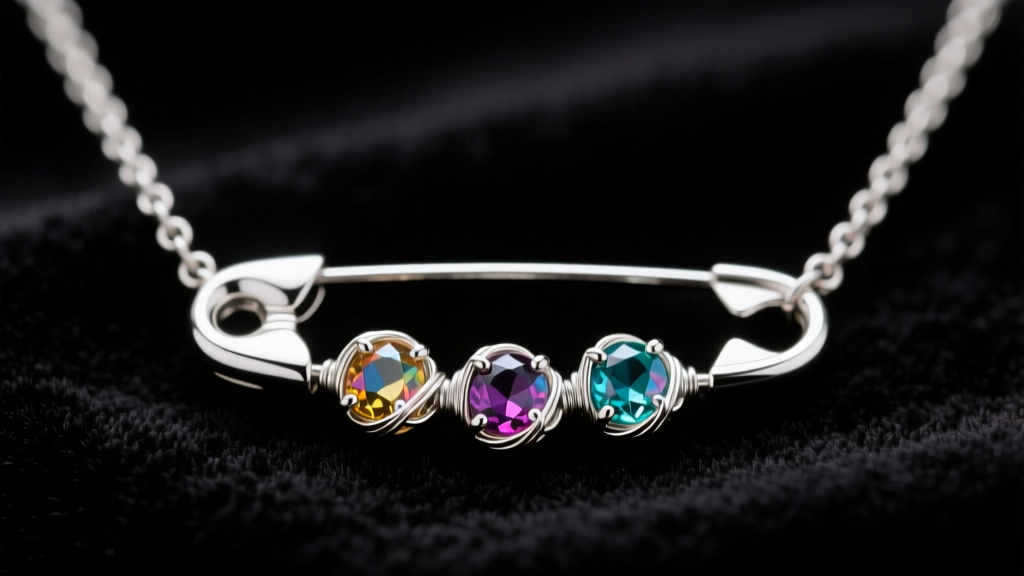
The safety pin has traversed a remarkable journey from a utilitarian fastener to a symbol of punk rebellion, and finally, to a staple of elevated contemporary jewelry. While the 1970s punk movement popularized the safety pin as an anti-establishment statement, modern jewelry artisans have reclaimed it, transforming it into a canvas for fine craftsmanship. Creating a premium DIY safety pin necklace requires moving beyond the flimsy, nickel-laden craft pins of the past. In this expert deep dive, we will explore the metallurgy, structural mechanics, and advanced assembly techniques required to craft a durable, skin-safe, and high-end safety pin pendant that meets the standards of modern luxury streetwear.
The Metallurgy of Skin-Safe Jewelry
The most critical failure point in amateur DIY jewelry is material selection. Standard craft store safety pins are typically stamped from low-grade brass or cheap stainless steel alloys that contain high levels of nickel and lead. According to the American Academy of Dermatology, nickel contact dermatitis is one of the most common causes of allergic skin reactions, resulting in erythema, blistering, and severe itching along the neckline.
To craft a premium DIY safety pin necklace, you must source findings made from 316L surgical stainless steel or solid titanium (Grade 23 / Ti-6Al-4V ELI). The 'L' in 316L stands for 'Low Carbon,' which, combined with 2-3% molybdenum, drastically increases corrosion resistance against the acidic pH of human sweat and environmental humidity.
Material Grade Comparison Chart
| Metal Grade | Composition Highlights | Corrosion Resistance | Hypoallergenic Rating | Est. Cost (per 50 pins) |
|---|---|---|---|---|
| 316L Surgical Steel | 16-18% Cr, 10-14% Ni, 2-3% Mo | Excellent (Sweat/Water proof) | High (Safe for most) | $12 - $18 |
| Grade 23 Titanium | Ti-6Al-4V ELI (Nickel-Free) | Superior (Implant Grade) | Absolute (100% Biocompatible) | $35 - $50 |
| Standard Craft Alloy | Brass/Zinc with Nickel Plating | Poor (Tarnishes/Rusts) | Low (High Allergy Risk) | $2 - $5 |

Structural Integrity: Gauge Sizes and Tensile Strength
A safety pin functions as a spring-loaded clasp. When repurposed as a pendant base, it must bear the static load of the chain and the dynamic kinetic stress of the wearer's movement. Understanding the American Wire Gauge (AWG) system is non-negotiable for structural integrity. For a comprehensive breakdown of wire thicknesses, jewelers frequently consult the Rio Grande Metal Gauge Chart.
- 20-Gauge (0.81mm): Too fragile for a necklace base. The pin will bend laterally under the weight of a standard cable chain.
- 18-Gauge (1.02mm): Acceptable for lightweight, delicate chains (e.g., 1.2mm box chains) and minimal beading.
- 16-Gauge (1.29mm): The ideal baseline for a premium DIY safety pin necklace. It provides sufficient tensile strength to support heavy embellishments without compromising the spring coil's tension.
- 14-Gauge (1.62mm): Best for heavy, oversized statement pieces or industrial streetwear aesthetics.
Expert Warning: Never attempt to re-bend or reshape the main wire of a hardened steel safety pin. The manufacturing process involves work-hardening the metal. Bending it back and forth will cause metal fatigue, leading to a catastrophic snap at the hinge or the coil.
Step-by-Step Assembly and Safety Mechanics
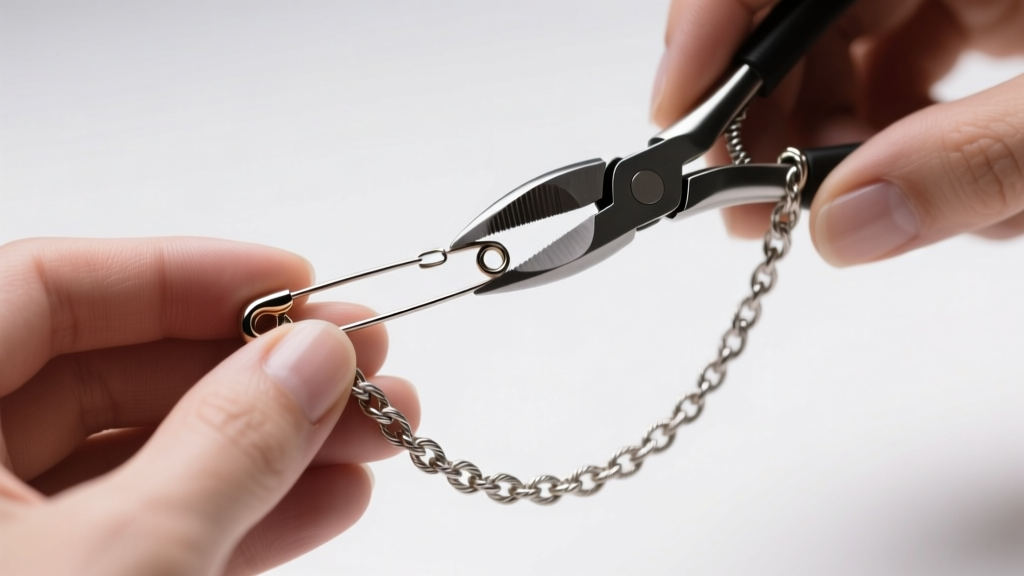
Integrating a safety pin into a necklace chain requires precision to ensure the pin remains closed during wear, preventing the sharp point from lacerating the wearer's skin.
Essential Tooling
- Flush cutters (for trimming jump rings cleanly)
- Chain-nose pliers (for gripping without marring the metal)
- Bent-nose pliers (for ergonomic jump ring manipulation)
- Silicone O-rings (1.5mm inner diameter) or heat-shrink tubing
The Assembly Process
- Secure the Point: Slide a tiny 1.5mm silicone O-ring over the sharp point of the safety pin before closing it. This acts as a secondary locking mechanism and a shock absorber, preventing the point from slipping out of the cap hinge if lateral pressure is applied.
- Open the Jump Rings: Attach two 18-gauge, 4mm soldered jump rings to the top hinge loop of the safety pin. Never pull jump rings apart laterally. Always twist them open in a sawing motion to maintain their perfect circular geometry.
- Chain Integration: Thread your chosen chain through the jump rings. For a balanced drape, use a chain with a high tensile rating, such as a 2.5mm stainless steel curb chain or a 2.0mm rope chain.
- Clasp Addition: Finish the chain with a heavy-duty lobster clasp and a soldered end-ring. Avoid spring-ring clasps, as their internal springs are prone to failure under the pendulum-like swinging motion of a heavy pendant.
Advanced Embellishments: Wire Wrapping and Beading
To elevate your DIY safety pin necklace from a basic finding to a bespoke art piece, incorporate wire wrapping. Using 24-gauge or 26-gauge dead-soft wire (in gold-fill or Argentium silver), you can secure semi-precious stones directly to the pin's straight shaft.
"The beauty of the safety pin silhouette lies in its rigid, linear geometry. When wrapping stones, maintain tight, parallel coils to complement the industrial nature of the base finding, rather than obscuring it with chaotic, messy wrapping."
— Master Jeweler's Bench Notes
Slide 3mm faceted spinel or onyx beads onto the dead-soft wire, then wrap the wire tightly around the 16-gauge pin shaft between the spring coil and the cap hinge. Ensure the wraps do not interfere with the pin's opening and closing mechanism.
Troubleshooting Common Failure Modes
Even with premium materials, structural failures can occur if the physics of the piece are ignored. Below is a diagnostic guide for common issues encountered when crafting and wearing safety pin pendants.
| Failure Mode | Root Cause | Expert Solution |
|---|---|---|
| Spring Coil Fatigue | Over-stretching the pin during beading, causing the coil to lose its memory and tension. | Pre-load beads from the cap side using a bead reamer to widen holes, avoiding the need to force the pin open wider than 45 degrees. |
| Hinge Cap Disengagement | Lateral torque applied to the chain, prying the pin point out of the protective cap. | Use a soldered jump ring at the main attachment point to restrict rotational movement, and always use the silicone O-ring buffer. |
| Galvanic Corrosion | Mixing dissimilar metals (e.g., a carbon steel pin with a solid copper chain) in the presence of sweat (an electrolyte). | Maintain strict metallurgical consistency. Pair 316L steel pins exclusively with 316L steel chains or inert precious metals like solid 14k gold. |
Conclusion
Crafting a premium DIY safety pin necklace is an exercise in applied metallurgy and structural engineering as much as it is an act of creative design. By rejecting cheap craft alloys in favor of 316L surgical steel or implant-grade titanium, respecting the tensile limits of specific wire gauges, and implementing secondary safety locks like silicone O-rings, you transform a subversive punk staple into a sophisticated, durable, and skin-safe luxury accessory. Whether you are designing for high-end streetwear or personal everyday wear, these technical foundations ensure your piece will endure both the elements and the test of time.


