Rift Necklace SkyBlock Replica: Crafting & Troubleshooting Guide
Master gaming jewelry with our 2026 troubleshooting guide to crafting a flawless Rift Necklace SkyBlock replica using resin and oxidized silver.

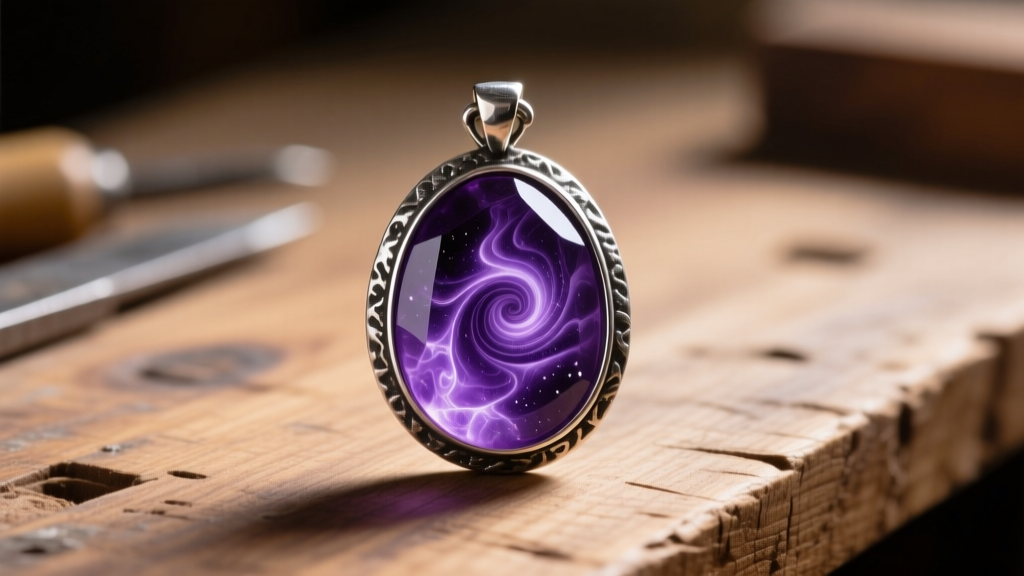
As gaming-inspired fine jewelry trends mature in 2026, collectors and crafters are moving far beyond cheap plastic merchandise. Today, the demand is for high-end, durable, and meticulously crafted replicas of iconic in-game items. The rift necklace skyblock item from Hypixel’s popular MMO is a prime example. Recognized by fans for its deep, void-like aesthetic and jagged metallic housing, it presents a unique challenge for jewelry makers. Translating a digital, pixelated asset into a physical, wearable piece of art requires mastering advanced resin casting, metal oxidation, and structural assembly.
However, crafting dark, void-like resin and oxidized metal pendants comes with specific fabrication nightmares. From stubborn micro-bubbles to bails that snap under the weight of dense epoxy, the troubleshooting curve is steep. This guide dives deep into the technical solutions required to forge a flawless, real-world Rift Necklace replica.
Decoding the Anatomy of a Void Pendant
Before troubleshooting, we must establish the physical parameters of the piece. According to the Hypixel SkyBlock Wiki, the Rift Necklace is an amulet tied to the game's vampiric and void dimensions. To replicate this in the physical world, we rely on a dual-material approach:
- The Core: A faceted or geometric cabochon cast in deep purple-to-black translucent epoxy resin, mimicking the 'void' energy.
- The Housing: A sterling silver or brass bezel and bail, heavily oxidized to create an ancient, tarnished look, contrasting with polished high-spots.
- The Chain: A heavy, 2.5mm to 3.0mm rolo or cable chain, matching the darkened aesthetic of the pendant housing.
Troubleshooting Resin Casting: Bubbles and Clouding
The most common failure point in crafting a gaming replica pendant is the resin core. A void crystal must be deeply saturated with color while remaining optically clear. Clouding or trapped air ruins the illusion of a magical artifact.

The Micro-Bubble Problem
When pouring deep, dark pigments into a silicone bezel mold, micro-bubbles cling to the mold walls and suspend in the viscous liquid. Standard heat guns only pop surface bubbles. To achieve a glass-like void core, you must use a pressure pot.
- Warm the Components: Place your Part A and Part B epoxy bottles in a warm water bath (75°F to 80°F) for 15 minutes before mixing. This lowers the viscosity, allowing bubbles to escape faster.
- Mix Slowly: Stir your epoxy (such as those from Smooth-On's casting lines) with a flat paddle, scraping the sides, for a full 3 minutes. Avoid whipping the mixture.
- Apply Pressure: Pour the resin into your mold and immediately place it in a pressure pot set to 40 PSI. The pressure compresses any remaining micro-bubbles to a microscopic size, rendering them invisible to the naked eye once cured.
Pigment Separation and Clouding
If your purple-black resin cures with a milky or cloudy appearance, you have likely used a moisture-sensitive pigment or introduced water into the mold. Always use highly concentrated, oil-based resin dyes rather than alcohol inks for deep, dark void colors. Alcohol inks can react with the amine hardeners in epoxy, causing a cloudy, blushing effect that cannot be polished out.
Hardware & Assembly: Fixing Bail and Jump Ring Failures
A heavy resin and silver pendant requires robust hardware. The most frequent complaint from replica jewelers is the bail snapping off the pendant during wear, resulting in a lost piece. Glue-on bails are insufficient for pendants weighing over 15 grams.
Choosing the Right Bail Mechanics
Instead of relying solely on E6000 or G-S Hypo Cement, you must integrate mechanical retention. Below is a troubleshooting matrix for bail selection based on pendant weight and design.
| Bail Type | Weight Limit | Attachment Method | Troubleshooting Tip |
|---|---|---|---|
| Glue-On Pad Bail | Up to 10g | Epoxy Adhesive | Sand the resin back with 220-grit paper to create a mechanical tooth before gluing. |
| Pinch Bail (Pronged) | Up to 25g | Drilled Channel | Drill a 1.5mm channel into the top of the resin. Insert prongs and secure with a drop of thin CA glue. |
| Wrap-Tie Bail | Unlimited | Wire Wrapping | Use 20-gauge half-hard sterling silver wire to cage the top of the bezel, forming a custom loop. |
Jump Ring Warping and Gapping
When connecting your heavy pendant to the chain, standard dead-soft jump rings will warp and pull open. Always use 16-gauge or 18-gauge half-hard wire for your jump rings. Furthermore, never pull a jump ring open by stretching it outward; always twist it open laterally using two pairs of chain-nose pliers to maintain the perfect circular geometry required to prevent chain slippage.
Chain Selection and Anti-Tarnish Solutions
The metallic housing and chain of the rift necklace skyblock replica require an oxidized, 'ancient' finish. Achieving this involves chemically darkening the metal, but this introduces a new problem: the black oxidation rubbing off onto the wearer's skin and clothing.
The Liver of Sulfur Process
To blacken sterling silver or brass, jewelers use Liver of Sulfur (LOS). You can source high-quality LOS gel from specialized suppliers like Rio Grande. Dissolve a pea-sized amount of LOS gel in a cup of warm water. Submerge your silver bezel and chain for 2 to 5 minutes until they turn a deep, iridescent black. Rinse immediately in cold water to halt the chemical reaction.
Sealing the Oxidation
Raw LOS oxidation is powdery and will stain skin. To troubleshoot this, you must seal the metal. After polishing the high spots of the bezel with a micro-mesh pad to create contrast, coat the entire pendant housing and chain in a jewelry-specific sealant like ProtectaClear. This forms a microscopic, skin-safe polyurethane barrier that locks the black tarnish in place, ensuring the void aesthetic survives daily wear without turning the wearer's neck green or gray.
Final Polish and Wearability Testing
Crafting a gaming replica is not just about visual accuracy; it is about creating a functional piece of jewelry. Before declaring your Rift Necklace complete, perform a stress test. Hang the pendant by its chain and apply gentle lateral tension to ensure the bail and jump rings hold firm. Check the resin for any sharp flashing left over from the mold line, and sand it smooth with 2000-grit wet paper followed by a plastic polish.
By respecting the material science of epoxy resins and the metallurgy of oxidized silver, you elevate a digital skyblock asset into a stunning, tangible artifact. The troubleshooting steps outlined above will save you hours of wasted materials and ensure your 2026 replica stands as a masterclass in gaming-inspired jewelry design.