Style a Self Portrait With Thorn Necklace and Hummingbird Pendants
Learn how to source, layer, and photograph a self portrait with thorn necklace and hummingbird pendants using safe, modern nature-inspired jewelry.

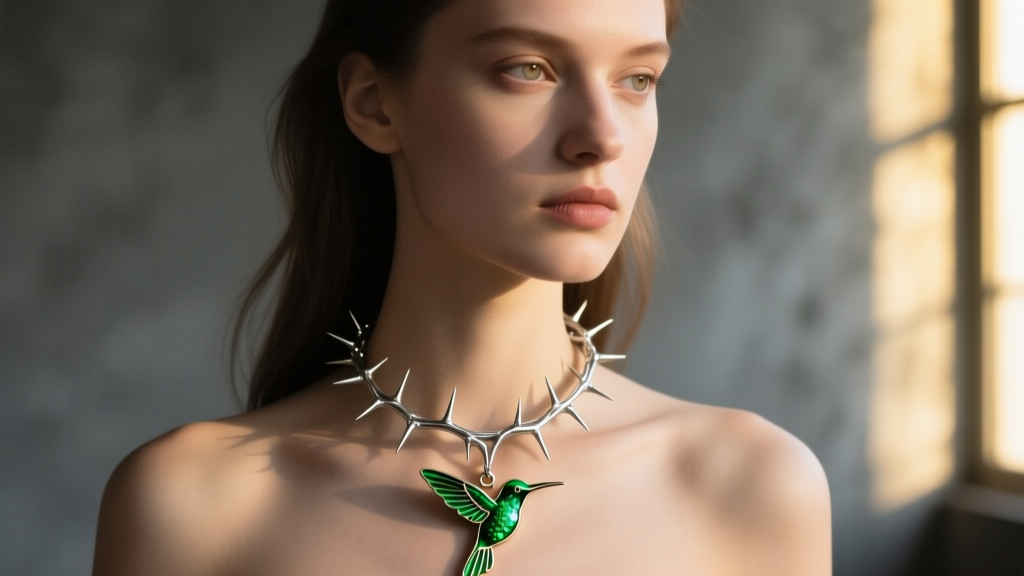
The Renaissance of Surreal Nature-Core Jewelry
Frida Kahlo’s 1940 masterpiece, Self-Portrait with Thorn Necklace and Hummingbird, remains one of the most visually arresting explorations of jewelry as emotional armor. In 2026, the 'nature-core' and surrealism movements in high jewelry have brought this iconic aesthetic back to the forefront. Modern artisans are no longer just replicating the past; they are engineering wearable, safe, and highly detailed botanical necklaces that allow wearers and artists to channel this powerful imagery. Whether you are a jewelry collector, a cosplayer, or a portrait photographer looking to capture a striking editorial image, styling a thorn and hummingbird ensemble requires a deep understanding of metallurgy, layering mechanics, and lighting.
This step-by-step guide will walk you through sourcing the right materials, ensuring skin safety with botanical motifs, and photographing your own self portrait with thorn necklace and hummingbird elements to achieve a gallery-ready finish.
Step 1: Engineering and Sourcing the Thorn Collar
The foundation of this look is the thorn necklace. In the original painting, the thorns dig into the skin, but in modern jewelry design, safety and wearability are paramount. You must source or commission a piece that mimics the danger of thorns without the actual risk of laceration.
Wire Gauges and Metallurgy
A high-quality thorn necklace is typically constructed using a heavy base wire with smaller wires wrapped or soldered to create the thorns. Look for a base chain or collar made from 10-gauge or 12-gauge dead-soft sterling silver. The thorns themselves should be crafted from 16-gauge or 18-gauge wire. According to jewelry fabrication standards outlined by Rio Grande, using dead-soft wire allows the artisan to sculpt organic, asymmetrical bark textures before work-hardening the piece.
The Polishing Protocol: Visual Sharpness vs. Tactile Safety
The most critical step in commissioning a thorn necklace is the finishing process. The thorn tips must be visually tapered but tactilely blunt. Artisans achieve this by filing the tips to a minimum 0.5mm radius and then tumble-polishing the entire piece with stainless steel shot. This rounds off any micro-burrs that could catch on clothing or scratch the clavicle. Never wear a raw, unpolished wire-wrapped thorn necklace directly against the skin, especially near the jugular.
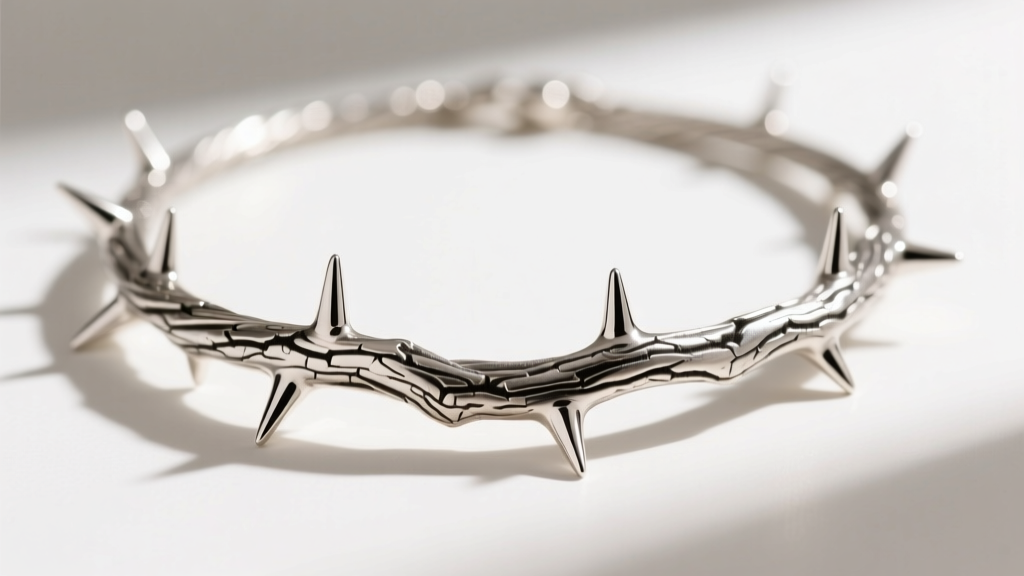
Oxidation for Bark Texture
To give the silver a realistic, woody appearance, the metal should be oxidized using a liver of sulfur solution. This darkens the recesses of the 'bark' texture. A light hand-polish with a rouge cloth afterward will leave the high points of the thorns bright and reflective, creating a stunning contrast that reads beautifully on camera.
Step 2: Selecting the Hummingbird Pendant
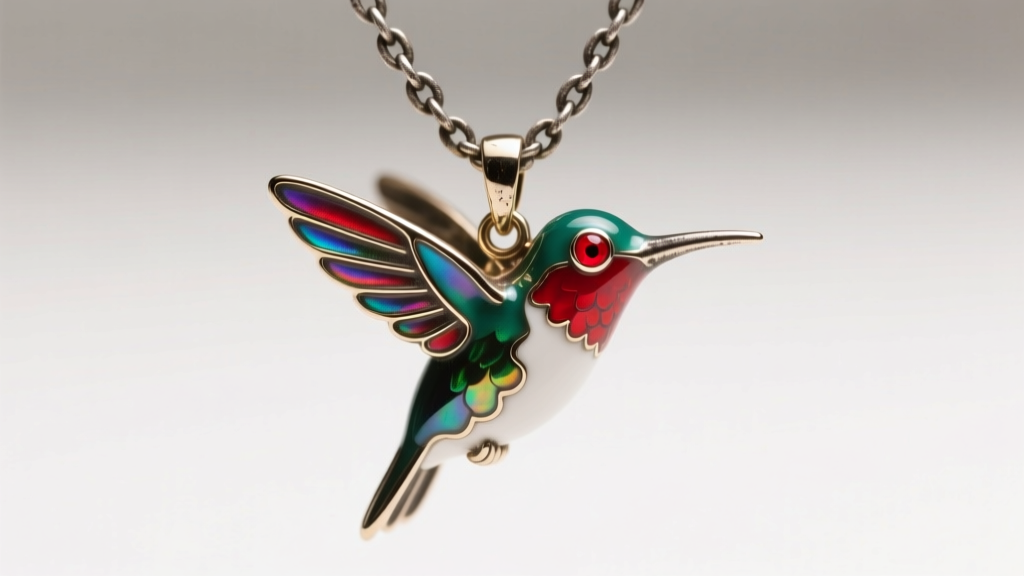
While Kahlo’s painting features a lifeless hummingbird, contemporary 2026 jewelry trends favor vibrant, living motifs rendered in high-end enameling. When selecting your pendant, you have two primary artisan techniques to choose from.
- Champlevé Enamel: This involves carving troughs into a thick metal base (usually copper or silver) and filling them with vitreous enamel powder before firing in a kiln. The Gemological Institute of America (GIA) notes that champlevé provides deep, opaque, and highly durable color fields, perfect for the rich emerald and sapphire tones of a hummingbird’s plumage.
- Guilloché Enamel: This technique involves engraving a precise, repetitive pattern (like engine-turning) into the metal base and then applying translucent enamel over it. The result is a shimmering, iridescent effect that perfectly mimics the light-catching feathers of a real hummingbird.
Bail Sizing and Chain Compatibility
Ensure the hummingbird pendant has a bail with an inner diameter of at least 4mm to 5mm. If you plan to thread the pendant directly onto the thorn collar, the bail must be large enough to slide over the 12-gauge base wire and the protruding thorns without snagging. Alternatively, you can rig the pendant on a separate, ultra-thin chain to create a layered effect.
Step 3: Layering and Rigging Techniques
Achieving the tangled, surreal look of the iconic self portrait with thorn necklace and hummingbird elements requires strategic rigging. You want the hummingbird to appear as though it is caught in the thorns, without actually putting stress on the enamel or bending the silver wires.
| Rigging Method | Material | Best For | Durability |
|---|---|---|---|
| Invisible Monofilament | 0.2mm clear nylon thread | Suspended 'tangled' illusion | High (if knotted securely) |
| Slide-Knot Cord | Waxed black linen cord | Adjustable depth layering | Medium (wears over time) |
| Secondary Micro-Chain | 1.2mm oxidized silver cable | Traditional layered necklace look | Very High |
Pro-Tip for Stylists: Use the invisible monofilament to tie the hummingbird’s beak or wing to a specific thorn on the collar. This creates the exact suspended tension seen in surrealist portraiture, keeping the pendant perfectly positioned for the camera regardless of how the model moves.
Step 4: Lighting and Shooting Your Portrait
Capturing the intricate details of oxidized silver and vitreous enamel requires a deliberate lighting setup. Flat, front-facing flash will wash out the bark textures and create harsh glare on the enamel.
The Rembrandt Lighting Setup
Position a single key light with a softbox at a 45-degree angle above and to the side of the subject. This creates a Rembrandt lighting triangle on the cheek and casts deep, directional shadows across the thorn necklace. The side-lighting will catch the polished tips of the thorns, making them gleam sharply against the dark, oxidized bark texture. Use a black V-flat on the opposite side to absorb bounce light and deepen the shadows, enhancing the moody, dramatic atmosphere inherent to the original 1940 painting.
Camera Settings and Lens Choice
Ditch the wide-angle lenses. To capture the jewelry while maintaining a flattering facial compression, use an 85mm or 100mm macro lens. Set your aperture between f/2.8 and f/4. This provides enough depth of field to keep both the thorn collar wrapping around the neck and the hummingbird pendant in sharp focus, while allowing the background to fall off into a smooth, creamy bokeh. Keep your ISO as low as possible (ISO 100-400) to prevent digital noise from obscuring the fine metallic details of the thorns.
Conclusion: Wearing Art with Intention
Recreating a self portrait with thorn necklace and hummingbird motifs is more than a simple styling exercise; it is an engagement with jewelry as a medium of storytelling. By prioritizing safe metallurgy, selecting master-crafted enamels, and utilizing directional lighting, you transform a historical reference into a striking, modern piece of wearable art. Whether for an editorial shoot or a personal collection, this meticulous approach ensures your jewelry looks as breathtaking in person as it does through the lens.


