How to Style and Layer a San Marco Necklace: Expert Guide
Master the art of styling a San Marco necklace. Learn step-by-step layering techniques, clasp security tips, and hollow gold care.

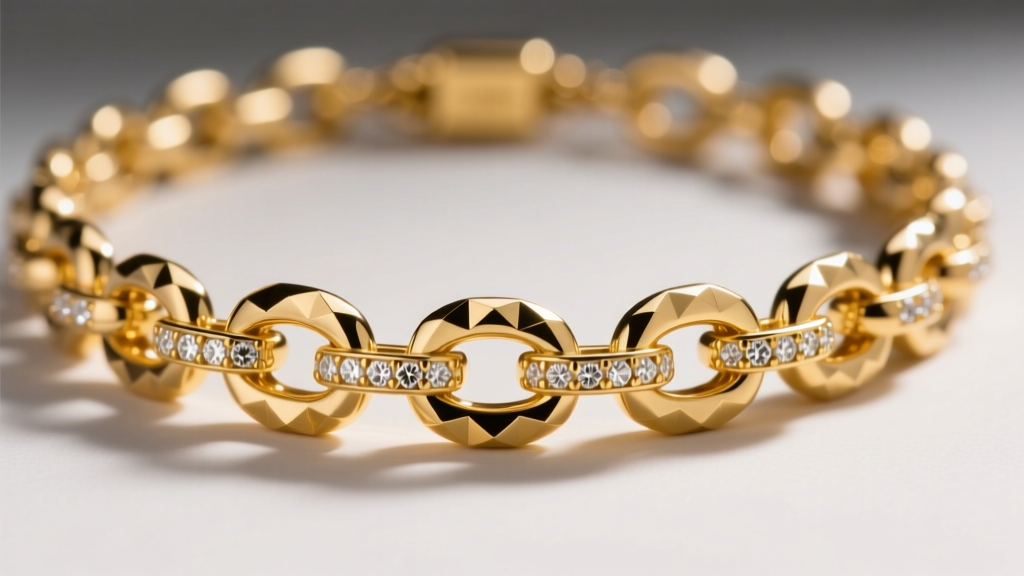
The San Marco necklace is a masterclass in Italian jewelry design, offering the bold, commanding presence of a heavy gold chain without the oppressive physical weight. Named after the iconic Piazza San Marco in Venice, this chain style mirrors the grand, architectural aesthetics of its namesake. Characterized by its rounded, tubular links that are often diamond-cut or faceted to catch the light from every angle, the San Marco chain is a staple for those who appreciate vintage-inspired luxury with a modern edge.
However, styling and maintaining a San Marco necklace requires specific knowledge. Because these chains are typically crafted using hollow or semi-solid electroforming techniques to keep them lightweight, they behave differently than solid cable or curb chains. In this comprehensive guide, we will walk you through the exact steps to layer, style, and care for your San Marco necklace to ensure it remains a cornerstone of your jewelry collection for decades.
The Architectural Anatomy of the San Marco Link
Before diving into styling, it is crucial to understand the physical construction of the San Marco link. Unlike solid chains, the links are essentially seamless, hollow tubes of gold that have been flattened slightly and faceted. This manufacturing process, often utilizing 14k or 18k gold alloys, allows jewelers to create wide, substantial-looking chains (ranging from 5mm to over 15mm in width) that remain comfortable for all-day wear.
From an E-E-A-T perspective, we highly recommend opting for 14k gold over 18k gold when purchasing a hollow San Marco necklace. The higher percentage of alloy metals (like copper and zinc) in 14k gold provides superior tensile strength and dent resistance, which is critical for protecting the hollow tubular structure from everyday compression and impact.
Step-by-Step Guide to Layering Your San Marco Necklace
Layering a San Marco chain can be tricky due to its high visual volume and faceted texture. If paired incorrectly, it can easily overwhelm the neckline or cause excessive friction against softer, solid chains. Follow this three-step framework to build a balanced, expert-level stack.

Step 1: Establish the Anchor Length and Width
Your San Marco necklace should serve as the foundational anchor of your stack. For a balanced look that flatters most necklines, select a 5mm to 7mm width at an 18-inch length. This specific dimension provides enough surface area for the diamond-cut facets to reflect light, while the 18-inch drop ensures it rests perfectly on the collarbone without competing with the neckline of a crewneck or V-neck top. If you are wearing a high-neck blouse or turtleneck, size up to a 20-inch or 22-inch length to allow the chain to drape over the fabric.
Step 2: Introduce Textural Contrast
The golden rule of chain layering is contrast. Because the San Marco link is wide, smooth, and highly reflective, you must pair it with chains that offer a completely different visual texture. Avoid pairing it with other hollow or wide chains (like a Cuban link), as this creates a cluttered, heavy aesthetic.
- The Ideal Companion: A solid 2mm Wheat chain or a 1.5mm Box chain. The intricate, woven texture of a Wheat chain provides a matte-finish contrast to the high-polish facets of the San Marco.
- Length Spacing: Ensure there is at least a 2-inch gap between chains. If your San Marco is 18 inches, your secondary chain should be 16 inches (a choker length) or 20 inches (a mid-chest drop).
Step 3: Select Compatible Pendants and Slides
Adding a slide pendant to a San Marco necklace is a popular way to customize the piece, but the tubular width of the links dictates strict bail requirements. A standard pendant bail designed for a 2mm chain will not fit over a 7mm San Marco link. When shopping for pendant slides, you must look for oversized bails with an internal diameter of at least 8mm to 10mm. Alternatively, utilize a specialized tube-slide clasp that integrates directly into the chain's links, preserving the seamless flow of the necklace.
Crucial Maintenance: Protecting Hollow and Semi-Solid Links
The most common failure mode of a San Marco necklace is link denting. Because the links are hollow, applying pressure (such as sleeping in the chain or carrying a heavy shoulder bag that presses the strap against your collarbone) can easily crush the tubular gold. Once a hollow link is crushed, it cannot be popped back out; it must be replaced by a master jeweler.
The Cleaning Protocol: What to Avoid
According to care guidelines from Jewelers of America, ultrasonic cleaners are strictly off-limits for hollow jewelry. The high-frequency vibrations can weaken the microscopic solder points holding the links together. Furthermore, if there is a micro-fracture in a hollow link, the ultrasonic solution can become trapped inside the tube, leading to internal corrosion or discoloration over time.

Step-by-Step Manual Cleaning
- Prepare the Solution: Mix a few drops of mild, phosphate-free dish soap (like Dawn) into a bowl of lukewarm water. Avoid hot water, which can shock certain gemstone accents if your chain features them.
- Soak Briefly: Submerge the San Marco necklace for no more than 3 to 5 minutes to loosen surface oils and cosmetics.
- Agitate Gently: Using a soft-bristled baby toothbrush, gently sweep along the length of the chain. Do not scrub aggressively against the diamond-cut facets, as this can cause micro-scratches on the high-polish surfaces.
- Rinse and Dry: Rinse under a gentle stream of lukewarm water. Pat dry with a lint-free microfiber cloth, ensuring no moisture is trapped between the tightly packed links.
Clasp Security and Solder Points
Due to the visual weight and actual value of wider San Marco chains, the clasp mechanism is a critical point of failure. For any San Marco necklace exceeding 8mm in width, a standard lobster clasp is insufficient. You must ensure your piece is fitted with a box clasp featuring a figure-8 safety latch. The box clasp distributes the tension evenly across the wide end-links, while the figure-8 wire acts as a secondary fail-safe if the primary tongue mechanism loosens over time.
San Marco Chain Specifications and Buying Guide
When shopping for a San Marco necklace, use the following specification table to determine which width and construction type best suits your lifestyle and styling needs.
| Chain Width | Construction Type | Recommended Clasp | Best Use Case |
|---|---|---|---|
| 3mm - 5mm | Semi-Solid / Hollow | Lobster Claw | Everyday wear, delicate layering anchor |
| 6mm - 8mm | Hollow Electroformed | Large Lobster or Small Box | Statement solo wear, pendant slides |
| 9mm - 12mm | Hollow Electroformed | Box Clasp with Figure-8 Safety | Bold outerwear statements, evening wear |
| 13mm+ | Semi-Solid (Reinforced) | Heavy Box Clasp with Dual Safeties | Collector pieces, high-value investment |
Final Styling Takeaways
The San Marco necklace is a triumph of jewelry engineering, offering the opulent look of heavy Italian gold with a featherlight feel. By treating it as the visual anchor of your layering stack, contrasting it with solid, textured chains, and adhering to strict, non-ultrasonic cleaning protocols, you protect the structural integrity of the hollow links. Whether you are draping a 7mm 14k gold San Marco over a silk blouse for the office or layering it with a delicate wheat chain for a weekend outing, this chain style guarantees a sophisticated, light-catching finish that commands attention without weighing you down.


