How to Style a Long Layered Necklace Stack Without Tangling
Master the art of the long layered necklace. Learn exact length gradients, chain friction physics, and gauge sizing to prevent tangling.

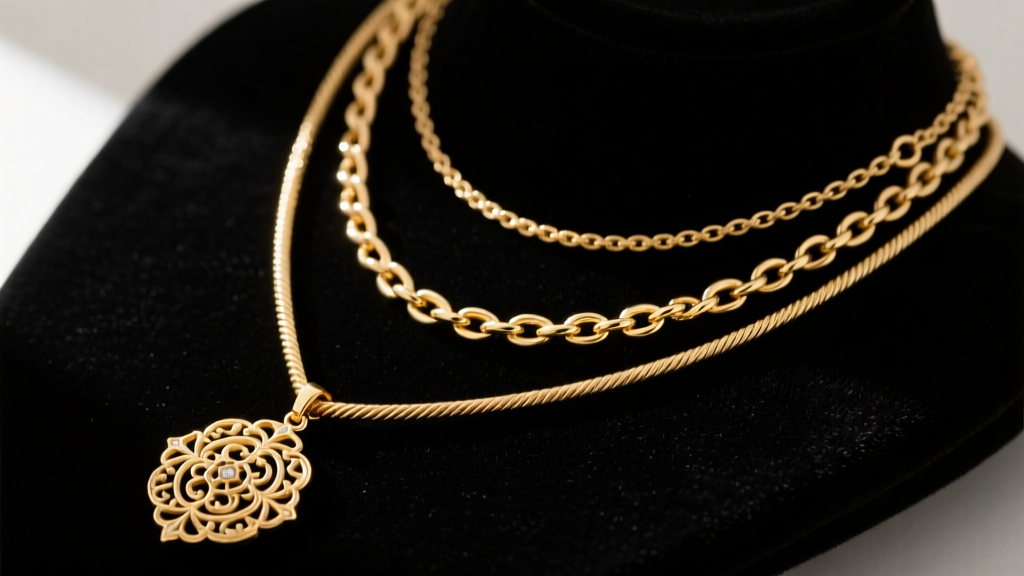
Building a flawless long layered necklace stack is one of the most effective ways to elevate a basic outfit, but it is also one of the most frustrating jewelry challenges to master. We have all experienced the inevitable result of a poorly planned stack: a tangled, twisted knot of metal that pulls at your neck hair and risks breaking delicate links. The secret to a perfect stack is not just aesthetic; it is rooted in the physics of metal friction, weight distribution, and precise length gradients.
In this guide, we will break down the exact mechanics of building a long layered necklace arrangement that drapes beautifully, stays separated, and preserves the structural integrity of your chains. Whether you are working with solid 14k gold, gold vermeil, or sterling silver, these principles apply universally.
The Mathematics of the Drop: Length Gradients
The most common mistake beginners make when building a long layered necklace stack is ignoring the mathematical gap between each chain. If the length differential is too small, the chains will overlap, catch on each other's links, and tangle within minutes. If the gap is too large, the stack looks disjointed and loses its cohesive visual flow.
Professional jewelers and stylists rely on the 2-to-3-inch gradient rule. This ensures that the natural swing of each chain operates in its own distinct spatial zone.
- The Base Layer (16 to 18 inches): This sits at the collarbone. It should be the thickest and most durable chain in your stack, acting as the visual anchor.
- The Mid Layer (20 to 22 inches): This rests on the upper chest. It bridges the gap between the base and the longest layer, often featuring a small, lightweight charm or a simple solitaire pendant.
- The Long Layer (24 to 30 inches): This is the statement piece that draws the eye downward. A 24-inch chain hits the sternum, while a 30-inch chain drops to the solar plexus. This layer should feature the heaviest or most intricate pendant.
By strictly adhering to a minimum 2-inch gap between layers, you eliminate the primary point of contact where friction-induced tangling begins.
Chain Link Friction and Tangling Physics
Not all chains are created equal. The physical geometry of the chain links dictates how they interact with one another. When building a long layered necklace, mixing incompatible chain styles is a guaranteed recipe for a tangled mess. For instance, the sharp, angular edges of a box chain will easily slip through the smooth, oval links of a cable chain, locking them together like a zipper.
According to metallurgical principles highlighted by the Gemological Institute of America (GIA), the finish and alloy composition of gold and silver also affect surface friction. High-polish chains slide past each other more easily than matte or diamond-cut chains, which feature microscopic grooves that act like velcro when rubbed against other metals.
| Chain Style | Surface Profile | Tangling Risk | Best Paired With |
|---|---|---|---|
| Cable Chain | Smooth, rounded links | Low | Rope, Curb, or Figaro chains |
| Box Chain | Angular, flat edges | High | Wear alone or as the bottom-most layer |
| Herringbone | Flat, liquid-like surface | Extreme | Never layer; it wraps around other chains |
| Rope Chain | Textured, twisted spiral | Medium | Cable or Bead chains (avoid fine meshes) |
| Snake Chain | Tightly joined, smooth tube | Low | Cable or Curb chains |
Weight Distribution and Gauge Sizing
A frequent failure mode in a long layered necklace stack is the "pendulum effect." This occurs when the longest chain is significantly heavier than the base chains. As you move, gravity pulls the heavy 24-inch chain downward, which in turn drags the lighter 16-inch and 20-inch chains out of alignment, causing them to twist and wrap around the heavier chain.
To prevent this, you must balance the gauge (thickness) and gram weight of your chains. The base layer must be structurally robust enough to hold its own shape and resist being pulled by the layers beneath it.

Recommended Gauge Sizing by Layer
- Base Layer (16"-18"): 1.5mm to 2.5mm thickness. Opt for a solid curb, figaro, or thick cable chain. Weight should be between 4 to 8 grams.
- Mid Layer (20"-22"): 1.0mm to 1.5mm thickness. A delicate rope or wheat chain works beautifully here. Weight should be 2 to 4 grams.
- Long Layer (24"-30"): 0.8mm to 1.2mm thickness. Because this chain is long, a thicker gauge will become uncomfortably heavy and pull on your neck. Keep the chain light (under 3 grams) and let the pendant (up to 5 grams) provide the visual weight.
Hardware: Clasps That Actually Work
The clasp is the weakest point of any necklace, and in a layered setup, a failing clasp can lead to lost jewelry. Standard 5mm spring ring clasps are entirely inadequate for long layered necklace setups, especially on the base layer. The constant tension and pulling from the lower layers will warp the thin wire of a spring ring, causing it to fail to close properly.
For the base and mid layers, always upgrade to a solid lobster clasp. Ensure the clasp is proportionate to the chain: a 1.5mm chain requires at least a 10mm or 12mm lobster clasp to provide enough internal clearance for the jump ring to sit securely without bending the clasp lever. For the longest layer, a high-quality neodymium magnetic clasp can be a game-changer, allowing you to easily remove the heavy pendant chain without struggling with tiny levers behind your neck.
Neckline Pairing Framework
How your long layered necklace interacts with your clothing is just as important as how the chains interact with each other. The goal is to create a continuous vertical line that complements the garment's architecture.

- Deep V-Necks: The ideal canvas. The longest chain (24"-28") should perfectly parallel the V of the neckline, terminating just above the point where the fabric intersects. This elongates the torso and creates a striking geometric frame.
- Crew Necks & T-Shirts: Keep the base layer tight (16") so it sits above the collar, and let the long layer (24"+) drop completely below the hem of the crew neck. Avoid mid-length chains (18"-20") that will get swallowed by the fabric rim.
- Button-Down Shirts: Leave the top two or three buttons undone to create an artificial V-neck. A 22-inch mid-layer chain with a small pendant resting in the center of the exposed chest adds a sophisticated, effortless touch.
- Turtlenecks: Skip the base layer entirely. The friction of the thick knit fabric will destroy delicate chains. Instead, wear a single, heavy 28-inch or 30-inch long layered necklace with a bold, oversized pendant over the dark fabric.
Troubleshooting: The Untangling Protocol
Even with perfect planning, a long layered necklace stack may occasionally tangle, especially when taken off and tossed onto a dresser. Pulling at a knot tightens the metal links, increasing the risk of snapping a delicate long chain. If your stack becomes a knot, do not use brute force. Instead, use the dry lubrication method recommended by jewelry care experts at Jewelers Mutual.
- Unfasten All Clasps: Never try to untangle a closed loop. Open every clasp to give the chains a linear exit route.
- Apply a Dry Lubricant: Sprinkle a small amount of baby powder or cornstarch directly onto the knot. This reduces the microscopic friction between the metal links.
- Use Precision Tools: Lay the necklace flat on a hard, well-lit surface. Use two sewing needles or straight pins to gently pick at the center of the knot, pushing the links outward rather than pulling them apart.
- Clean the Residue: Once untangled, wash the chains in warm water with a drop of mild dish soap and a soft baby toothbrush to remove the powder, then pat dry with a microfiber cloth.
By respecting the mechanics of chain geometry, adhering to strict length gradients, and selecting the proper hardware, your long layered necklace stack will remain a flawless, tangle-free statement piece for years to come.


