How to Style, Layer, and Untangle a 3 Circle Necklace
Master the art of the 3 circle necklace. Learn step-by-step layering techniques, safe untangling methods, and neckline pairing strategies.

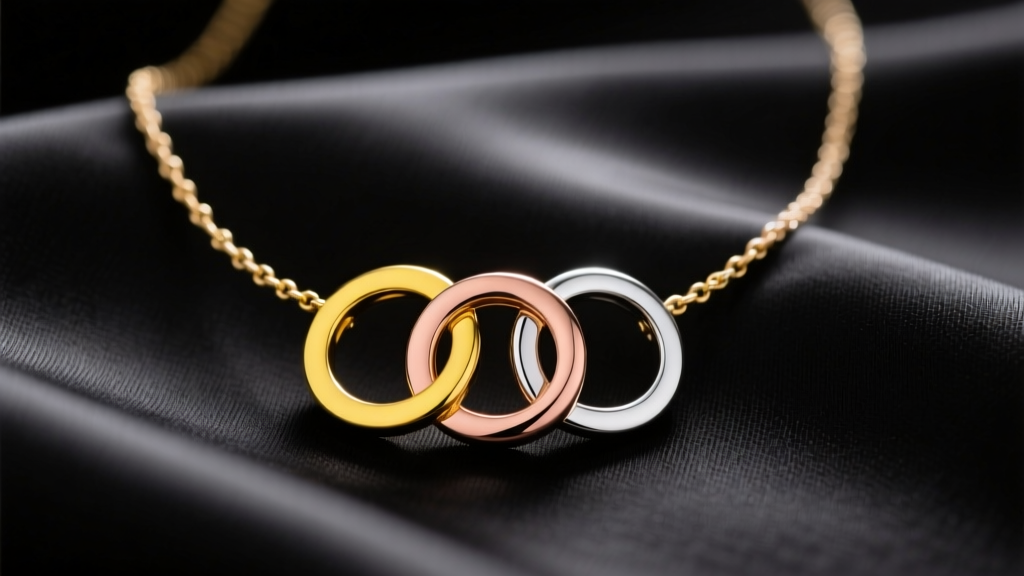
The Anatomy and Appeal of the 3 Circle Necklace
The 3 circle necklace—frequently recognized as the Trinity motif, interlocking rings, or Borromean rings design—is a masterclass in symbolic jewelry. Representing concepts like past, present, and future, or the intertwining of friendship, love, and fidelity, this design relies on three individual rings that pass through one another without a single clasp or solder joint connecting the circles themselves. While visually stunning, the interlocking nature of the pendant introduces unique structural challenges, specifically regarding metal friction, chain tangling, and layering physics.
To wear and maintain this piece like a true jewelry connoisseur, you must understand the material grades and wire gauges that dictate its behavior. According to the Gemological Institute of America (GIA), the purity of the gold used in these rings drastically affects their durability. A 14k gold 3 circle necklace (58.5% pure gold) offers superior structural rigidity, making it highly resistant to the micro-abrasions caused by the rings constantly rubbing against each other. Conversely, an 18k gold version (75% pure gold) provides a richer, warmer hue but is significantly softer, meaning the friction points will develop a matte, brushed patina over time. Understanding these metallurgical realities is the first step in mastering your necklace.
Step-by-Step Guide to Layering Without Tangling
Layering a 3 circle necklace requires strategic spacing. Because the interlocking rings create a concentrated point of weight and movement at the center of the chest, they can easily flip over or tangle with adjacent chains if the length differential is incorrect.

Step 1: Establish the Base Chain (14 to 16 Inches)
Start with a lightweight, rigid chain that resists kinking. A 14-inch or 16-inch 1.0mm box chain or herringbone chain sits flush against the collarbone. Avoid delicate cable chains for the base layer, as the heavier interlocking circles of the middle layer will catch in their open links.
Step 2: Position the 3 Circle Necklace (18 Inches)
The golden rule of layering is the 2-inch drop differential. Your 3 circle necklace should hang exactly two inches below the base chain. At 18 inches, the interlocking rings will rest perfectly on the upper sternum. Opt for a chain with a slight weight—such as a 1.5mm rope chain—to counterbalance the pendant and prevent the clasp from migrating to the front of your neck.
Step 3: Add the Anchor Pendant (20 to 22 Inches)
Finish the stack with a single, vertical drop pendant (like a solitaire diamond or a simple gold bar) on a 20-inch or 22-inch chain. This vertical line draws the eye downward and prevents the horizontal spread of the three circles from looking too wide or cluttered against your neckline.
How to Safely Untangle Interlocking Circles
The most common pain point with this jewelry style is the dreaded "gypsy hitch"—a complex slip knot that occurs when the chain loops through one of the interlocking rings. Pulling the chain tightly only increases the friction coefficient, locking the knot further.
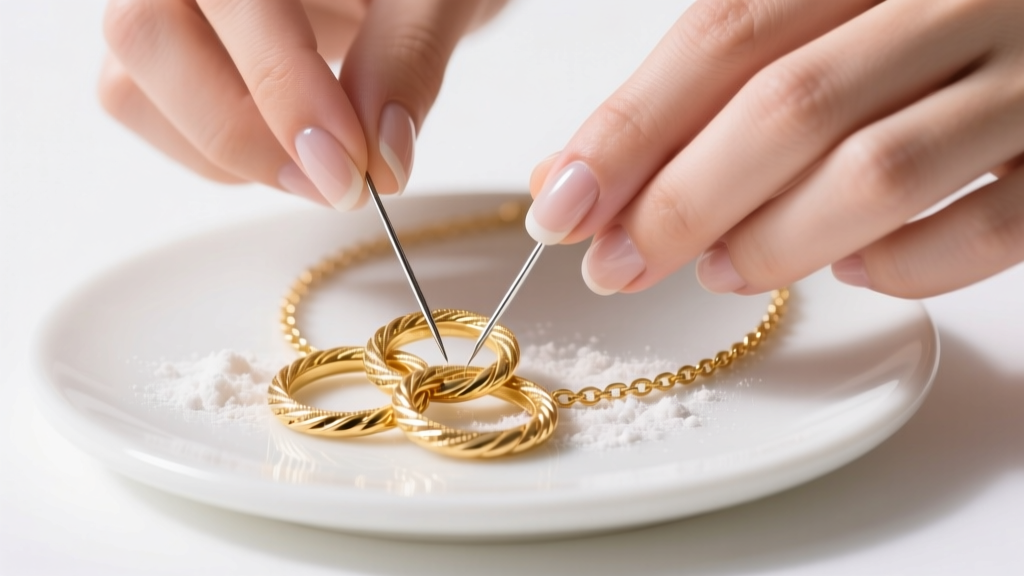
The Push-Pin and Powder Method
- Prepare the Surface: Lay the necklace flat on a hard, white ceramic or glass surface. Avoid fabric, which creates static and grips the metal.
- Apply a Friction Reducer: Dust the knot generously with a cornstarch-based baby powder. Do not use talc or oils, as oils can trap dirt in the chain links and degrade the rhodium plating on white gold or sterling silver components over time.
- Loosen the Core: Take two fine sewing needles or push-pins. Insert the tips into the exact center of the knot. Gently push the pins away from each other to expand the metal links outward, creating microscopic gaps.
- Work the Chain Through: Once the knot has expanded by even a millimeter, use the pins to guide the chain link back through the interlocking ring. Never pull the ends of the chain; always push the knot from the inside out.
Neckline Pairing Matrix
The visual weight of three interlocking circles demands careful consideration of your garment's neckline. The wrong pairing can result in the pendant getting lost in fabric folds or awkwardly catching on collars.
| Neckline Type | Ideal Chain Length | Ring Diameter | Styling Strategy |
|---|---|---|---|
| V-Neck | 18 - 20 Inches | 15mm - 20mm | Let the bottom ring rest exactly one inch above the apex of the V-neck to frame the face. |
| Crew Neck | 20 - 22 Inches | 10mm - 15mm | Wear over the fabric. Choose smaller, delicate rings so they don't look like a heavy medallion against the cotton. |
| Off-the-Shoulder | 14 - 16 Inches | 20mm+ (Statement) | Keep it tight to the collarbone. The bare shoulders provide a wide canvas that balances large, bold interlocking rings. |
| Turtleneck | 24 - 28 Inches | 25mm+ (Oversized) | Layer over the dark fabric as a statement piece. Ensure the rings are thick (2.0mm+ gauge) to stand out against the heavy knit. |
Maintenance and Polishing Protocols
Because the three circles are in constant motion against one another, they generate microscopic metal dust and surface scratches. Proper maintenance is critical to preserving the luster, especially if your piece features mixed metals or diamond pavé.
According to Jewelers of America, ultrasonic cleaners are highly effective for removing trapped sebum and lotion from chain links. However, if your 3 circle necklace features micro-pavé diamonds set into the bands, the high-frequency vibrations of an ultrasonic machine can loosen the delicate prongs over time. For diamond-accented interlocking rings, stick to manual cleaning: soak the piece in a solution of warm water and a few drops of mild, phosphate-free dish soap for 15 minutes, then gently agitate with a soft-bristled baby toothbrush.
When it comes to polishing, avoid aggressive rotary buffing wheels. The friction points between the rings are already thinned from daily wear. Instead, use a treated silver or gold polishing cloth (impregnated with micro-abrasives) and gently wipe each ring individually, paying special attention to the inner edges where skin oils and cosmetics accumulate. Store the necklace flat or hanging individually; tossing it into a communal jewelry box guarantees that the open circles will hook onto other pieces, requiring you to repeat the untangling process all over again.


