How to Style a Three Tier Necklace: Beginner's Guide
Learn how to style a three tier necklace with our beginner-friendly guide. Discover ideal lengths, chain pairings, and tangle-free layering tips.

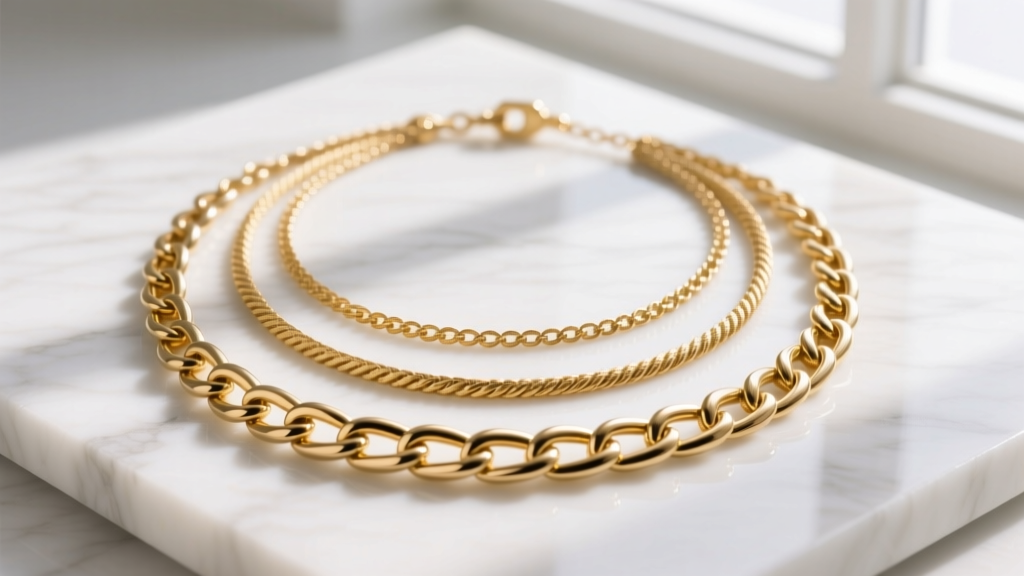
The layered jewelry trend has evolved from a fleeting fashion moment into a permanent staple of modern personal style. At the pinnacle of this movement is the three tier necklace stack. When executed correctly, a three-tiered layering approach creates a cascading, curated aesthetic that draws the eye and elevates even the simplest outfit. However, beginners often struggle with visual clutter, unbalanced proportions, and the dreaded chain tangle.
This beginner-friendly explainer breaks down the exact geometry, material science, and styling frameworks you need to master the three tier necklace. We will move past generic advice and dive into specific gauge sizes, micron counts, and structural pairings to ensure your stack looks intentional and stays tangle-free.
The Anatomy of a Perfect Three Tier Necklace
The secret to a flawless three tier necklace lies in the "Rule of Thirds" and precise spatial distribution. If your chains are too close in length, they will cluster together, creating a messy knot at the base of your throat. If they are too far apart, the visual connection is lost, and they look like three separate, unrelated pieces.
The industry-standard spacing for a balanced stack requires a minimum two-inch drop between each tier. This spacing accounts for the physical drape of the metal and the natural curve of the collarbone and sternum.
- Tier 1 (The Anchor): 16 inches. This sits snugly at the base of the neck or just above the collarbone, acting as a choker or collar. It frames the face and sets the metallic tone.
- Tier 2 (The Bridge): 18 inches. This is the standard necklace length, resting gracefully on the upper chest. It bridges the gap between the delicate top tier and the heavier bottom tier.
- Tier 3 (The Statement): 20 to 22 inches. This matinee-length tier rests on the sternum, providing a visual anchor and allowing room for larger pendants or heavier chain links.

Chain Textures and Weights: Avoiding the Tangle Trap
The most common complaint among beginners wearing a three tier necklace is tangling. This is not a matter of bad luck; it is a matter of physics. Chains tangle when they share similar link geometries and gauge widths. Kinetic friction from walking and moving causes identical links to interlock like gears.
To prevent this, you must vary both the chain style and the gauge (thickness) across the three tiers. A good rule of thumb is to increase the gauge by at least 1.0mm to 1.5mm with each descending tier. This ensures the chains physically cannot interlock.
| Tier Position | Ideal Length | Recommended Chain Style | Gauge Width (mm) | Visual Role |
|---|---|---|---|---|
| Top (Tier 1) | 16" | Cable, Box, or Herringbone | 1.0mm - 1.5mm | Delicate framing, subtle shine |
| Middle (Tier 2) | 18" | Rope, Bead, or Satellite | 2.0mm - 2.5mm | Texture introduction, bridge |
| Bottom (Tier 3) | 20" - 22" | Cuban, Figaro, or Paperclip | 3.5mm - 5.0mm | Bold anchor, structural weight |
By mixing a smooth 1.2mm herringbone on top, a textured 2.5mm rope in the middle, and a flat 4.0mm Cuban link on the bottom, you create a tangle-resistant stack that offers rich, varied light reflection.
Pendant Placement and Visual Weight
Adding pendants to a three tier necklace requires a strategic approach to visual weight. If every chain features a massive charm, the stack will look bottom-heavy and chaotic. Instead, utilize the Inverted Triangle Strategy.
The Focal Point Strategy
Choose one tier to be your primary focal point, and let the other two act as supporting actors.
- The Minimalist Stack: Keep Tier 1 bare (just a delicate chain), add a small 5mm gemstone solitaire to Tier 2, and feature a larger 15mm medallion or geometric pendant on Tier 3.
- The Mid-Century Focus: Place a vintage-inspired locket or horizontal bar pendant on Tier 2 (18"), leaving Tier 1 and Tier 3 as bare, textured chains. This draws the eye directly to the center of the chest.
Always consider the bail (the loop that attaches the pendant to the chain). Ensure the bail is wide enough to accommodate the thicker gauge of your bottom-tier chain without causing friction or bending the metal.
Neckline Pairings for Everyday Wear
A three tier necklace is incredibly versatile, but its impact changes drastically depending on the neckline of your garment. Understanding how to pair your stack with your wardrobe is essential for a polished look.

- The V-Neck: This is the most forgiving neckline for a three tier necklace. The V-shape naturally mirrors the cascading drape of the chains. Ensure your bottom tier (20"-22") sits roughly one inch above the apex of the V-neck to avoid a cluttered intersection.
- The Crew Neck: A high crew neck can make a three-tier stack look choked if the top chain is too short. Opt for a 17" top tier instead of a 16" to allow the stack to breathe over the fabric. A mixed-metal stack (e.g., alternating gold and silver chains) works exceptionally well here to break up the solid block of fabric color.
- The Button-Down Shirt: Leave the top two buttons undone to create a makeshift V-neck. Let the middle tier rest against the skin, while the top and bottom tiers interact with the fabric of the collar and placket. This creates an effortlessly chic, editorial aesthetic.
Material Grades and Skin Sensitivities
When investing in a three tier necklace, the sheer amount of metal resting against your skin means material quality is non-negotiable. Cheaper alloys can cause contact dermatitis, especially when layered and trapping heat and moisture against the chest.
According to the Gemological Institute of America (GIA), understanding gold purity and plating standards is vital for longevity. If you are opting for gold vermeil rather than solid gold, you must verify the micron thickness. In the United States, the FTC requires a minimum of 2.5 microns of gold plating over a sterling silver base to be legally marketed as "vermeil." Anything less (often sold as "gold plated") will wear through quickly due to the friction of three chains rubbing together.
For those with severe nickel allergies, avoid standard "surgical steel" which can still contain trace nickel. Instead, look for 316L Surgical Stainless Steel or, ideally, Grade 23 Titanium (Ti 6AL-4V), which is entirely biocompatible and hypoallergenic. For a comprehensive breakdown of metal properties and alloy compositions, Britannica's guide on gold and precious metals offers excellent foundational knowledge.
Troubleshooting Common Layering Mistakes
Even with the right lengths and gauges, beginners can run into practical issues. Here is how to troubleshoot the most common three tier necklace problems:
- Problem: The clasps keep migrating to the front.
Solution: This happens when the chain is too light for the clasp. Use a small silicone necklace spacer bar at the back of the neck to hold all three clasps together and anchor them in place. - Problem: The stack looks too wide and overwhelming.
Solution: You are likely using chains with wide horizontal profiles (like wide paperclips) on all three tiers. Swap the middle tier for a vertical-oriented chain, like a satellite or bead chain, to elongate the silhouette. - Problem: The metals are clashing awkwardly.
Solution: If mixing gold and silver, do not do it randomly. Use the "sandwich method": Gold on top, Silver in the middle, Gold on the bottom. Intentional patterns read as high-fashion; random mixes read as accidental.
Mastering the three tier necklace is about understanding the interplay of geometry, texture, and material science. By respecting the two-inch drop rule, varying your chain gauges to prevent friction, and choosing hypoallergenic metals, you can build a signature stack that is as functional as it is beautiful.


