How To Make Clip On Earrings Into Pierced: A Metallurgical Guide
Learn how to make clip on earrings into pierced safely. Explore metal compatibility, soldering vs adhesives, and biocompatible posts.

The Metallurgy of Earring Conversion
When researching how to make clip on earrings into pierced pieces, most tutorials focus solely on the mechanical steps of snapping off the hinge and gluing on a post. However, as a jewelry metallurgist, I must emphasize that ignoring the material properties of your vintage or modern clip-ons will result in skin irritation, structural failure, or the destruction of the earring itself. Converting non-pierced jewelry requires a deep understanding of base metal compositions, melting points, and biocompatibility.
Vintage clip-on earrings, particularly those from the 1940s through the 1980s, were rarely made of solid precious metals. They were predominantly stamped from brass, heavily plated base metals, or cast from pot metal (Zamak). Attaching a modern, skin-safe earring post to these materials requires specific thermal or chemical bonding techniques. In this guide, we break down the exact material science required to successfully and safely convert your clip-ons into pierced earrings.
Identifying Base Clip-On Materials
Before applying heat or adhesive, you must accurately identify the base metal of the clip-on earring. The composition dictates your entire conversion strategy.
- Brass and Copper Alloys: Common in mid-century stamped earrings. These have high melting points (around 1,700°F / 926°C) and can be successfully torch-soldered using silver-bearing solders.
- Gold-Filled and Rolled Gold Plate: Features a thick layer of karat gold mechanically bonded to a brass core. Torch soldering is possible but requires careful heat control and specialized gold-filled solder to prevent blistering the gold layer.
- Zamak (Pot Metal): A zinc-aluminum-copper alloy used for cast vintage pieces. Zamak has a dangerously low melting point of approximately 780°F (415°C). Traditional torch soldering will melt and destroy the earring.
- White Metal / Pewter Alloys: Often used in antique pieces. Like Zamak, these have low melting points and are highly susceptible to thermal shock.
If you are unsure of the metal, perform a streak test on an unglazed ceramic tile or use a precious metal testing acid kit, as recommended by the Gemological Institute of America (GIA), to check for gold or silver content.
Selecting Biocompatible Pierced Posts
The post that enters the earlobe must meet strict biocompatibility standards. Never use cheap surgical steel or mystery-metal posts for conversions, as the nickel content can cause severe contact dermatitis.
Recommended Post Materials
- Implant-Grade Titanium (ASTM F136): The gold standard for sensitive ears. It is completely nickel-free, lightweight, and highly resistant to corrosion. Available in 20-gauge (0.81mm) and 18-gauge (1.02mm) thicknesses.
- Niobium: An excellent hypoallergenic alternative to titanium. It can be anodized to various colors and is easily soldered or glued.
- Solid 14k or 18k Gold: Ideal for high-end conversions. Ensure it is nickel-free (alloyed with silver, copper, or palladium). Avoid gold-plated posts, as the plating will eventually wear off inside the piercing.
Material Compatibility Matrix
Choosing between soldering and adhesive bonding depends entirely on the intersection of your base metal and your chosen post material. Refer to the matrix below to determine the safest joining method.
| Base Clip-On Metal | Post Material | Recommended Join Method | Risk Level |
|---|---|---|---|
| Solid Brass / Copper | 14k Gold / Sterling | Torch Soldering (Silver Solder) | Low (with flux) |
| Gold-Filled | Gold-Filled Post | Torch Soldering (Easy Gold Solder) | Medium (blister risk) |
| Zamak / Pot Metal | Titanium / Niobium | Two-Part Jewelry Epoxy | Low (no heat) |
| Plated White Metal | Surgical Steel | Cyanoacrylate (Super Glue) | High (brittle failure) |
Soldering vs. Adhesive Bonding: Technical Execution
Once you have mapped your materials, you must execute the bond. Both methods require meticulous surface preparation.
The Soldering Route (For High-Melt Metals)
For brass or solid silver clip-ons, soldering provides a permanent, mechanical bond. You will need a micro-torch, lead-free silver solder (such as Stay-Silv), and a fluoride-based flux. First, use a Dremel with a diamond burr to flatten a small 2mm area on the back of the earring and the base of the earring post. Apply flux to both surfaces. Heat the base metal (not the post) until the flux turns clear and glassy, then introduce the solder. The solder will flow via capillary action into the joint. After quenching, pickle the earring in a warm citric acid solution to remove oxidation.
The Adhesive Route (For Low-Melt and Plated Metals)
When dealing with Zamak or delicate plating, heat is your enemy. Instead, rely on advanced chemical bonds. According to jewelry supply experts at Rio Grande, standard super glue (cyanoacrylate) is too brittle for the shear stress an earring post endures when bumped. Instead, use a two-part lap-joint epoxy like Epoxy 330, which boasts a lap shear strength of over 3,000 psi. Roughen both bonding surfaces with 400-grit sandpaper, clean with isopropyl alcohol, mix the epoxy in a strict 1:1 ratio, and clamp the post in place using a specialized jewelry peg board for 24 hours.
Preventing Galvanic Corrosion in Mixed-Metal Earrings
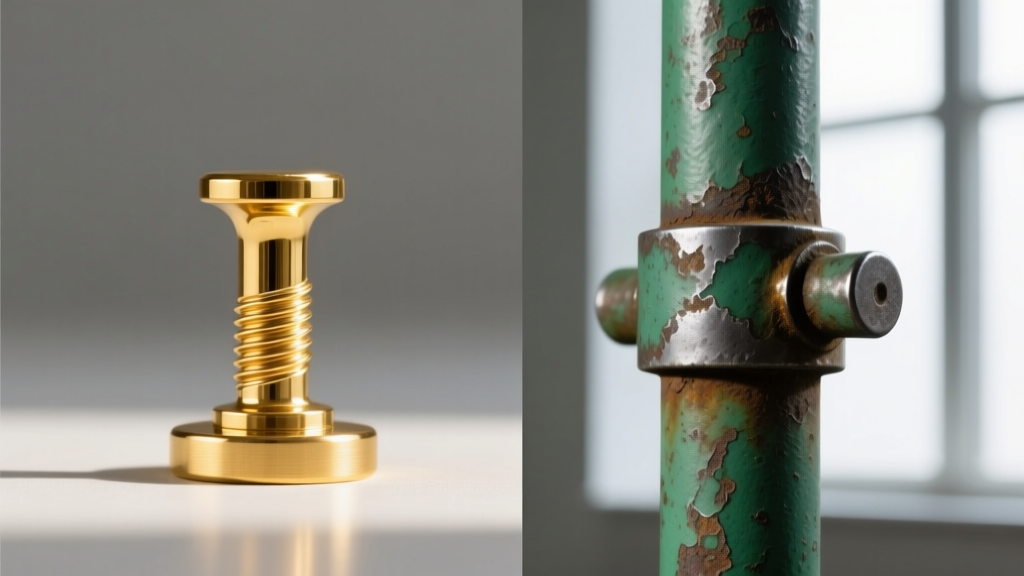
A frequently overlooked danger when learning how to make clip on earrings into pierced jewelry is galvanic corrosion. This electrochemical process occurs when two dissimilar metals (like a titanium post and a brass base) are joined and exposed to an electrolyte (human sweat). The less noble metal (brass) will rapidly corrode, resulting in a weak joint and green stains on the wearer's neck and ears.
To prevent this, you must electrically isolate the dissimilar metals. If you must glue a titanium post to a brass base, apply a microscopic layer of clear nail polish or a specialized jewelry sealant like ProtectaClear to the brass base before applying the adhesive. This dielectric barrier stops the electron transfer that causes corrosion, ensuring the earring remains structurally sound and skin-safe for years.
Final Polishing and Skin Safety Verification
After the bond is set and cured, the conversion is not complete until the earring is sealed and polished. If you soldered the piece, use a rouge polishing cloth to buff the joint, ensuring no sharp solder burrs remain that could scratch the earlobe. For glued pieces, carefully scrape away any epoxy squeeze-out using a wooden orange stick to avoid scratching the vintage patina.
Finally, coat the entire back of the earring and the post with a hypoallergenic jewelry coating. This not only seals any exposed base metals from skin acids but also provides a smooth, frictionless surface for the earlobe. By respecting the metallurgical properties of your materials, you can successfully transform vintage clip-ons into comfortable, heirloom-quality pierced earrings.


