Troubleshooting a 4 Earring Piercing Layout: Spacing and Healing
Fix common issues with your 4 earring piercing setup. Expert troubleshooting for spacing, irritation bumps, migration, and jewelry tangling.

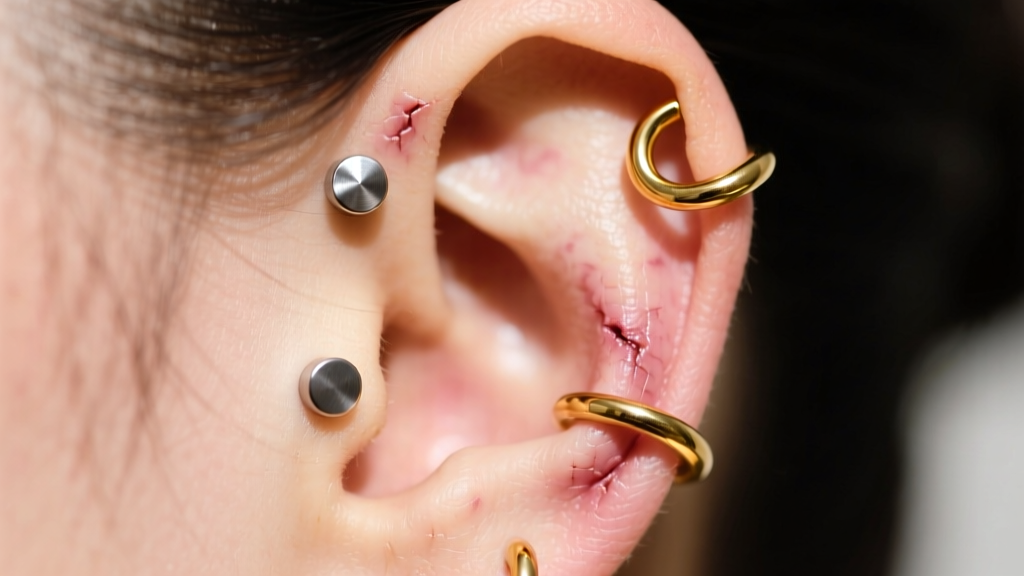
The Geometry of a Multi-Hole Ear Project
Curating a multi-hole ear is an exercise in anatomical geometry, and a 4 earring piercing setup is one of the most popular yet challenging configurations. Whether you are building a four-hole lobe stack or combining two lobes with a flat and a helix, the physical real estate on your ear is limited. When you introduce four separate wounds to a single ear, you exponentially increase the risk of healing complications, cross-contamination, and jewelry interference. Troubleshooting a 4 earring piercing project requires moving beyond basic aftercare and understanding the biomechanics of tissue swelling, jewelry leverage, and precise spatial distribution.
Many enthusiasts rush into getting all four piercings in a single session. While a highly skilled piercer can safely perform multiple piercings at once, the immune system tax is significant. If you are currently struggling with a stalling heal, chronic irritation bumps, or jewelry that constantly snags, this guide will break down the exact mechanical and biological fixes required to save your curated layout.
Spacing Rules and Gauge Requirements
The most common point of failure in a 4 earring piercing layout is inadequate spacing. If holes are placed too close together, the swelling from adjacent wounds will overlap, causing the tissue to merge or the jewelry to press against neighboring fistulas. This constant friction guarantees the formation of hypertrophic irritation bumps.
Standard Spacing and Sizing Chart
| Piercing Zone | Ideal Gauge | Minimum Spacing | Initial Post Length |
|---|---|---|---|
| Standard Lobe (Hole 1) | 18g (1.0mm) or 16g (1.2mm) | 8mm from Hole 2 | 5/16" (8mm) |
| Upper Lobe (Hole 2) | 18g or 16g | 6mm-8mm from Hole 1 & 3 | 5/16" (8mm) |
| High Lobe / Lobule Edge (Hole 3) | 16g (1.2mm) | 8mm from Hole 2 | 3/8" (9.5mm) |
| Cartilage (Helix/Flat) | 16g (1.2mm) | 10mm from nearest hole | 5/16" or 3/8" |
If your piercer placed your third and fourth holes closer than 6mm apart, you may need to retire one of the holes once they heal to prevent long-term tissue thinning. According to the Association of Professional Piercers, proper initial jewelry length is critical to accommodate the localized edema (swelling) that occurs in multi-hole setups.
Troubleshooting Irritation Bumps in a Stack
Irritation bumps are the nemesis of the 4 earring piercing stack. They usually appear as small, flesh-colored or red bumps directly adjacent to the piercing hole. These are rarely infections; they are hypertrophic scars caused by mechanical trauma. In a four-hole setup, the primary culprits are excessive post length and sleeping pressure.
The Downsizing Imperative
When you are initially pierced, your jeweler will use a longer post (typically 5/16" or 3/8") to allow for swelling. However, once the swelling subsides (usually between weeks 4 and 8), that extra metal becomes a lever. Every time you brush your hair or pull a sweater over your head, the long post catches, pivoting inside the delicate healing fistula. This micro-trauma triggers the bump.
The Fix: Visit your piercer for a "downsize." Swapping to a 1/4" (6mm) or 3/16" (5mm) post eliminates the leverage. For a 4 earring piercing layout, flat-back labrets are mandatory. They sit flush against the back of the ear, distributing pressure evenly and preventing the jewelry from acting as a crowbar against the healing tissue.
Material Upgrades: Ditch the Surgical Steel
If you are battling persistent bumps across your four holes, audit your jewelry material. "Surgical steel" is a marketing term that encompasses various alloys, many of which contain nickel. When your immune system is managing four simultaneous wounds, it becomes hyper-reactive to nickel exposure, leading to contact dermatitis that mimics infection. Upgrade all four holes to implant-grade titanium (ASTM F136) or solid 14k/18k nickel-free gold. Brands like BVLA machine their ends to exact tolerances, ensuring no microscopic burrs irritate the fistula.
The Snagging Epidemic: Fixing Hair Tangling
A major logistical nightmare of a 4 earring piercing configuration is hair snagging. If you are using traditional butterfly-back earrings or externally threaded jewelry, you are creating four separate nets for your hair to weave through. Butterfly backs harbor bacteria and feature sharp prongs that tear healing tissue. Externally threaded jewelry has screw threads that must pass through the fistula, acting like a cheese grater on the delicate new cells.
Switch to Threadless or Internally Threaded Mechanics
To troubleshoot snagging, you must eliminate all external friction points. Threadless (push-pin) jewelry relies on the tension of a slightly bent pin locking into the hollow post. This creates a completely smooth exterior profile. Internally threaded jewelry features the screw mechanism on the inside of the post, leaving the exterior perfectly smooth. Upgrading your entire 4 earring piercing stack to threadless flat-backs will reduce hair tangling by over 90%, allowing you to wash and brush your hair without the anxiety of ripping out a healing stud.
Sleeping Protocols for Multi-Hole Setups
Sleeping on a fresh 4 earring piercing layout is notoriously difficult. The pressure from a standard pillow compresses the ear against the mattress, cutting off circulation and forcing the jewelry at an unnatural angle. This is especially problematic for the highest hole in a lobe stack or a fresh helix, which bear the brunt of lateral head weight.

The Travel Pillow Hack
The most effective, low-cost troubleshooting tool for sleeping with a multi-hole ear is a U-shaped memory foam travel pillow. Place the pillow on your mattress and sleep with your pierced ear positioned directly inside the hollow center of the "U". This completely suspends the ear in the air, eliminating all contact pressure while still supporting your neck and head. This single adjustment is often the difference between a smooth heal and months of battling recurring irritation bumps.
Recognizing Migration and Rejection
When you pack four piercings into a small area, the tissue between the holes can sometimes thin out, leading to migration. Migration is the body's attempt to push a foreign object to the surface. The fourth hole in a stack (often the highest lobe or the lowest cartilage) is the most susceptible because it sits closest to the anatomical edge of the ear.
The Flashlight Test
To troubleshoot potential migration, perform the flashlight test. In a dark room, press your phone's flashlight against the back of your earlobe or cartilage, shining the light directly through the tissue toward the piercing hole.
- Healthy Tissue: The tissue between the hole and the edge of the ear will appear opaque, thick, and block the light.
- Migrating Tissue: The tissue will appear translucent, thin, and you may clearly see the shadow of the jewelry bar shining through the skin.
Aftercare: Less is More
Finally, troubleshoot your aftercare routine. With four open wounds, the temptation to over-clean is high. Avoid tea tree oil, rubbing alcohol, hydrogen peroxide, and homemade sea salt soaks, which are often mixed at incorrect, tissue-burning ratios. Use only a sterile, preservative-free 0.9% sodium chloride wound wash. Spray the front and back of all four holes twice daily, and let the shower rinse away any softened lymph crusties. By respecting the spacing, upgrading your hardware, and minimizing mechanical trauma, your 4 earring piercing layout will heal into a flawless, lifelong curated ear.


