How to Tie an Adjustable Necklace Knot: Best Cord Materials
Learn how to tie an adjustable necklace knot and discover which cord materials offer the best friction, durability, and glide for sliding knots.

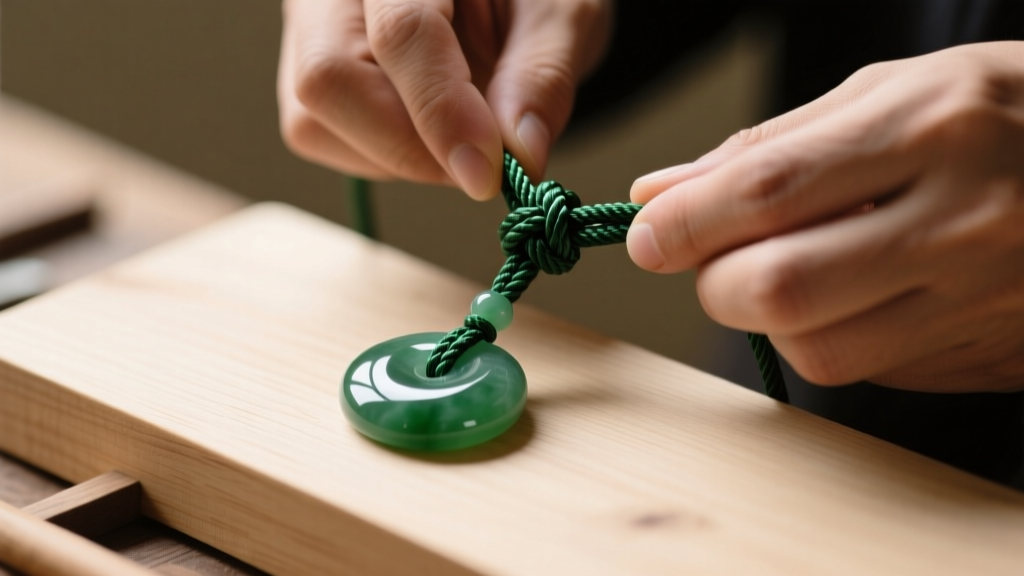
Mastering the mechanics of sliding jewelry closures requires more than just dexterity; it demands a deep understanding of textile physics. While many tutorials focus solely on the manual steps of how to tie an adjustable necklace knot, experienced jewelry makers know that the success of a sliding closure relies entirely on the material properties of the cord. A knot that slides effortlessly on waxed cotton may jam completely on raw silk, while a knot that holds firm on nylon might slowly creep and loosen on leather.
In this comprehensive guide, we break down the exact material properties, friction coefficients, and finishing techniques required to create flawless, durable adjustable necklace closures in 2026.
The Physics of a Perfect Sliding Knot
An adjustable necklace knot operates on the delicate balance between static friction (the force keeping the knot locked in place while wearing) and kinetic friction (the resistance felt when adjusting the length). For a pendant weighing between 15 to 30 grams, the cord must possess enough surface texture to grip itself under tension, but enough smoothness to glide when manual force is applied.
The diameter of the cord also plays a critical role. According to textile tension principles, a thicker cord increases the surface area of the knot, resulting in higher static friction. For most standard gemstone or metal pendants, a 1.0mm base cord paired with a 0.8mm working cord (the cord used to tie the knot) provides the optimal mechanical advantage.
How to Tie an Adjustable Necklace Knot (Step-by-Step)
The most secure and aesthetically pleasing closure for heavy pendants is the Sliding Square Knot (a variation of the macrame square knot). Unlike the simple overhand sliding knot, the square knot distributes tension evenly and is less prone to twisting.

- Prepare the Base: Cut a 40-inch length of your chosen 1.0mm cord. Fold it in half to create a loop at the top for your pendant. Secure the loop to a macrame board.
- Measure the Gap: Leave a 4-inch gap below the pendant loop. This is where the adjustable mechanism will live.
- Introduce the Working Cord: Take a 30-inch piece of 0.8mm cord and place it horizontally behind the two base cords, finding its exact center.
- The First Half-Knot: Bring the left working cord over the base cords and under the right working cord. Bring the right working cord under the base cords and up through the left loop. Pull tight.
- The Second Half-Knot: Reverse the process. Right cord over the base, under the left. Left cord under the base, up through the right loop. Pull tight.
- Repeat: Alternate these steps until you have a knot barrel roughly 1/2 inch long.
- Finish the Tails: Trim the working cords close to the knot and seal them according to the material guidelines below.
Material Comparison: Which Cord Works Best?
Not all cords are created equal. The chemical composition and surface treatment of a cord dictate its suitability for adjustable knots. Below is a technical comparison of the most common jewelry cords.
| Material | Friction Profile | Melt Point | UV/Sweat Resistance | Best Knot Type |
|---|---|---|---|---|
| Chinese Knotting Cord (Nylon) | Medium (Optimal) | ~220°C (Melts cleanly) | Excellent | Sliding Square Knot |
| Waxed Cotton | High (Can jam) | Does not melt (Burns) | Poor (Wax degrades) | Overhand Sliding Knot |
| Round Leather | Variable (Stretches) | Does not melt | Poor (Dries/cracks) | Simple Wrap Knot |
| S-Lon / C-Lon (Polyester) | Low (Too slippery) | ~250°C (Hardens) | Excellent | Micro-Macrame (Not sliding) |
| Hemp | Very High (Rough) | Does not melt (Burns) | Poor (Absorbs moisture) | Fixed Knots Only |
Nylon (Chinese Knotting Cord): The Gold Standard
Nylon, specifically polyamide-based Chinese knotting cord, is the undisputed champion for adjustable necklace knots. Its slightly waxy factory finish provides the exact kinetic friction required for smooth sliding, while its braided core ensures it won't snap under the 20+ lbs of tensile force a heavy jade or quartz pendant might exert. Furthermore, nylon's thermoplastic properties allow for clean, seamless melting to finish the ends.
Waxed Cotton: High Friction & Maintenance
Waxed cotton offers a beautiful, organic aesthetic but presents mechanical challenges. The wax coating creates high static friction, meaning the knot will hold securely, but it can be stubborn to adjust. Over time, body heat, sweat, and UV exposure will strip the wax, causing the cotton fibers to fray and the knot to permanently seize. If using waxed cotton, you must re-wax the sliding area annually using microcrystalline jewelry wax.
Leather: The 'Creep' Factor
Round leather cords (1.5mm to 2.0mm) are popular for rustic or bohemian designs, but leather suffers from mechanical 'creep'—a tendency to permanently stretch under constant load. A sliding knot tied on leather will eventually loosen over months of wear as the leather fibers elongate. Additionally, leather cannot be melted; it requires mechanical crimps or cyanoacrylate adhesives to finish.
Finishing Techniques: Melting vs. Gluing
The longevity of your adjustable knot depends entirely on how you finish the cut tails of the working cord. Using the wrong finishing method will result in the knot unraveling or the cord snapping at the glue joint.
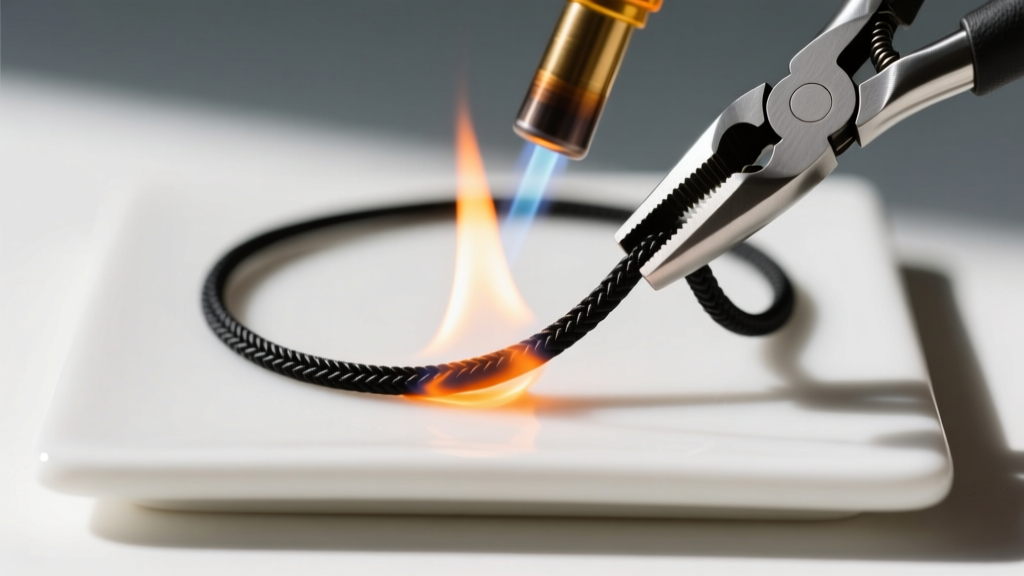
- For Nylon & Polyester (Melting): Use a butane micro-torch or a dedicated thread zapper. Apply heat until the synthetic fibers liquefy into a small bead, then immediately press the bead flat against the side of the knot using a pair of flat-nose pliers or a glass burnisher. Warning: Do not use a standard cigarette lighter, as the soot will permanently stain light-colored cords.
- For Cotton, Hemp, & Leather (Gluing): Since natural fibers burn rather than melt, you must use an adhesive. Avoid standard super glue (cyanoacrylate), which cures brittle and will crack when the cord flexes. Instead, use a flexible jeweler's epoxy like E6000 or G-S Hypo Cement. Apply a microscopic drop into the gap between the tail and the knot barrel using a toothpick, then hold for 60 seconds.
Troubleshooting Stubborn or Loose Knots
Even with perfect technique, material inconsistencies can cause issues. Here is how to troubleshoot the most common adjustable knot failures.
Pro-Tip from the Bench: If your nylon sliding knot is too tight to pull, do not use oils or lotions to lubricate it, as these will attract dust and eventually create an abrasive paste that shreds the cord. Instead, rub a tiny amount of pure beeswax or a specialized cord lubricant like 'Thread Heaven' onto the base cords before tying the knot.
The Knot Slips Under the Pendant's Weight
The Cause: The cord is too slippery (common with polyester or silk), or the base cord diameter is too thin relative to the working cord.
The Fix: Switch to a braided nylon cord with a higher denier count. If you must use a slippery cord, tie a double-barrel sliding knot (making the knot barrel twice as long) to increase the surface area and friction grip.
The Knot Seizes and Won't Slide
The Cause: The working cord was pulled too tightly during the tying process, or the cord material has swollen due to humidity (common with cotton/hemp).
The Fix: Gently roll the knot barrel between your thumb and forefinger to break the static friction lock. For natural fibers, ensure the necklace is stored in a low-humidity environment with silica gel packets to prevent fiber swelling.
By matching the correct cord material to the specific mechanical demands of your pendant, you ensure that your adjustable necklace is not only beautiful but structurally sound for years of daily wear. For further reading on gemstone weights and pendant bail sizing, consult the Gemological Institute of America's Gem Encyclopedia, or explore advanced cord specifications via the Fire Mountain Gems EncycloBEADia.


