Troubleshooting Necklace Extenders: Fix Fit and Prevent Breakage
Learn how to choose, install, and troubleshoot necklace extenders. Fix fit issues, match gauges, and prevent chain breakage with our expert guide.

A necklace that sits too high on the collarbone or fails to drape correctly over a specific neckline can ruin an otherwise perfect outfit. While necklace extenders offer an immediate, cost-effective solution to adjust your jewelry's drop length, they are also the number one culprit behind unexpected chain breakages, tangling, and clasp failures. As a senior jewelry stylist, I see countless ruined pendants and snapped chains resulting from improperly matched extender hardware. This comprehensive troubleshooting guide will walk you through the exact metallurgical and mechanical principles required to safely extend your necklaces without compromising their structural integrity.
The Anatomy of a Necklace Extender Chain
Before troubleshooting, we must understand the mechanical stress points of an extender setup. A standard extender consists of three components: the attachment jump ring, the extension chain itself, and the terminal clasp receiver (usually a series of open links or a specialized catch ring). When you add an extender, you are effectively creating a secondary hinge point on the necklace. This new hinge alters the tensile load distribution. If the extender's jump ring is not properly soldered or if the wire gauge is too thin, the natural swinging motion of a pendant will cause metal fatigue at the connection point, leading to a shear failure.
Material and Gauge Matching: The Core of Extender Safety
The most common failure mode when using necklace extenders is gauge mismatch. If your primary necklace is a sturdy 18-gauge (1.02mm) rope chain, but you attach a flimsy 24-gauge (0.51mm) extender, the extender will bear the brunt of the kinetic energy and snap. According to the Federal Trade Commission's Jewelry Guides, accurate metal marking and structural integrity are paramount in jewelry manufacturing, a principle that applies equally to aftermarket modifications.
| Primary Chain Gauge | Required Extender Gauge | Max Pendant Weight | Recommended Clasp Type |
|---|---|---|---|
| 22G - 20G (Delicate) | 20G (0.81mm) | Under 5 grams | Standard Spring Ring |
| 18G - 16G (Medium) | 18G (1.02mm) | 5 - 15 grams | Small Lobster Claw |
| 14G - 12G (Heavy) | 14G (1.63mm) | 15 - 30+ grams | Large Locking Lobster |
Furthermore, you must match the metal composition to prevent galvanic corrosion. The Gemological Institute of America (GIA) notes that dissimilar metals in prolonged contact, especially in the presence of moisture (sweat), can cause rapid tarnishing and structural degradation. Never connect a brass-based gold-plated extender to a solid 925 sterling silver chain; the electrochemical reaction will pit the silver and weaken the jump ring.
Step-by-Step Troubleshooting: Common Extender Problems
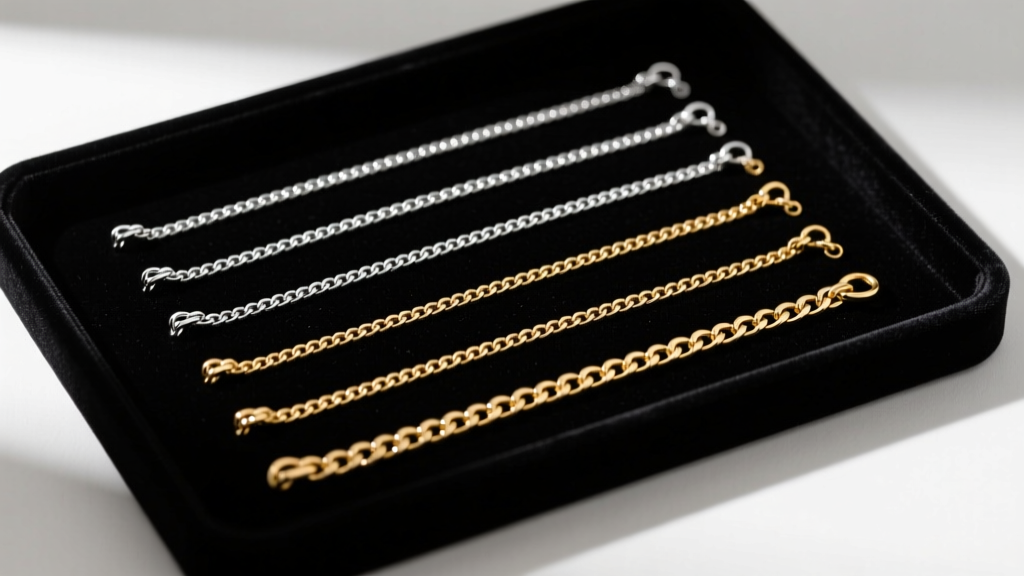
Problem 1: The Extender Clasp Keeps Slipping Open
If your necklace constantly unclasps at the extender junction, the issue is usually a poorly tensioned spring ring or a lobster claw with a worn internal spring. The Fix: Swap the terminal clasp for a 'locking lobster claw.' These feature a secondary sleeve that slides down over the trigger mechanism, physically preventing the lever from depressing if it catches on a sweater. Alternatively, slide a 2mm clear silicone jewelry stopper bead over the jump ring to act as a friction buffer.
Problem 2: Severe Tangling and Hair Catching
Cable chain extenders are notorious for catching on fine hair and tangling with the primary chain. This happens because the alternating horizontal and vertical oval links create microscopic hooks when subjected to friction. The Fix: Discard cable chain extenders for everyday wear and upgrade to a box chain extender. Box chains feature smooth, square links that lay flat against each other, eliminating the snag points that cause tangling and hair breakage.
Problem 3: Color Mismatch and Tarnish Transfer
Gold vermeil extenders often fade to a brassy yellow after a few months, clashing with your solid 14k gold necklace. The Fix: Invest in solid 14k gold-filled (not plated) extenders. Gold-filled wire contains a mechanically bonded layer of 14k gold that constitutes at least 5% of the total weight, ensuring the color matches solid karat gold indefinitely and will not flake off onto your primary chain.
How to Install an Extender on Different Chain Styles
Not all chains accept standard jump ring extenders. Forcing a round jump ring through certain chain types will distort the links and ruin the necklace.
- Snake Chains: These are rigid and tubular. You cannot pry a link open. You must use a specialized 'tube clasp' or 'barrel clasp' extender that slides over the flush-cut end of the snake chain and is secured via a tiny friction pin or screw mechanism.
- Box Chains: The square links are easily crushed by pliers. Use a flat, oval-shaped jump ring rather than a round one to maintain the geometric flow of the box links without requiring excessive force to close.
- Rope Chains: The twisted links can easily unravel if a jump ring is forced through them. Always attach the extender to the solid soldered end-ring of the rope chain, never directly through the twisted body links.
DIY vs. Pre-Made Extenders: Cost and Durability Breakdown
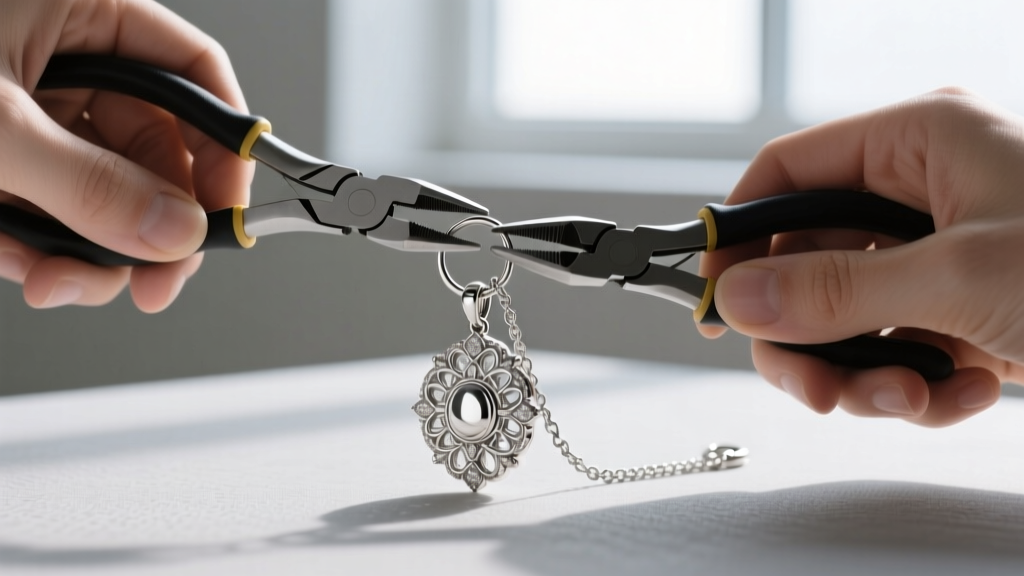
Should you buy a pre-made extender or build one from raw findings? Pre-made extenders (typically priced between $12 and $28) are convenient but often utilize hollow-core links to save on material costs. Building your own extender using solid wire jump rings and a high-quality lobster clasp from a reputable supplier like Rio Grande costs roughly $6 to $14 in components. The DIY route allows you to select dead-soft wire for easy manipulation, then work-harden the jump ring by twisting it slightly before closing, increasing its shear strength by up to 40%.
Expert Insight: Always close jump rings using two pairs of flat-nose pliers, twisting the ends laterally past each other before bringing them back to center. Never pull the ends apart outward, as this permanently distorts the circle and creates a weak point that will inevitably pull open under the weight of a pendant.
Final Pre-Wear Safety Checklist
Before wearing your newly extended necklace out of the house, run through this rapid diagnostic checklist to ensure your hardware is secure:
- The Tug Test: Hold the primary chain and the extender clasp, applying moderate lateral tension. If the jump ring shows any sign of gapping, it needs to be re-closed or soldered.
- The Drape Check: Put the necklace on and lean forward. Ensure the pendant does not slide entirely onto the extender chain, which could cause the extender's clasp to bear weight it was not designed to hold.
- The Friction Audit: Run the extender chain through your fingers. If you feel any sharp burrs or rough seams on the links, lightly buff them with a jewelry polishing cloth to prevent them from acting as micro-saws against your primary chain or clothing.
By treating necklace extenders as critical structural components rather than mere afterthoughts, you can safely customize your jewelry's fit while preserving the longevity and beauty of your most cherished pendants and chains.


