How to Style and Mount a Great White Shark Tooth Necklace
Learn how to ethically source, wire-wrap, and style a great white shark tooth necklace with our expert step-by-step mounting guide.

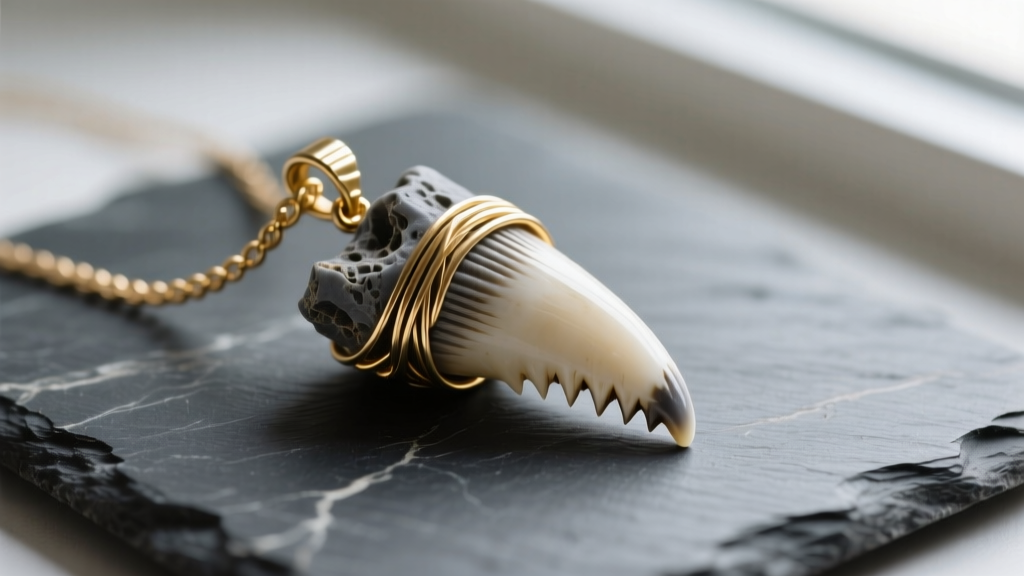
Crafting a custom great white shark tooth necklace is a masterclass in balancing rugged natural history with refined jewelry design. Unlike standard gemstone pendants, mounting an apex predator’s tooth requires a deep understanding of specimen preservation, ethical sourcing, and non-destructive wire-wrapping techniques. Drilling a hole through a fossilized or modern tooth instantly destroys its structural integrity and collector value. In this comprehensive guide, we break down the exact materials, gauges, and step-by-step wrapping methods needed to create a secure, museum-quality pendant that honors the ocean's most iconic hunter.
The Legal and Ethical Reality: Fossil vs. Modern
Before you begin crafting your great white shark tooth necklace, you must understand the legal landscape surrounding Carcharodon carcharias. The great white shark is strictly protected under Appendix II of the Convention on International Trade in Endangered Species (CITES). According to the official CITES Appendices, international trade of modern great white parts requires rigorous permitting and is largely restricted to scientific or educational purposes.
Expert Sourcing Rule: For jewelry making, always opt for fossilized great white teeth (typically 2 to 15 million years old). Fossils recovered from ancient phosphate beds, such as the Hawthorn Formation in Florida, are entirely legal to buy, sell, and mount without CITES permits. Modern teeth sold online without verifiable pre-CITES documentation are often mislabeled bull or tiger shark teeth, or sourced illegally.
Fossilized teeth are characterized by their deep gray, black, or reddish-brown hues, caused by mineral replacement (permineralization) over millions of years. Modern teeth, conversely, are stark white. According to NOAA Fisheries, protecting modern populations is critical, making fossilized specimens the only ethical choice for jewelry designers.
Understanding Tooth Anatomy for Mounting
To wrap a tooth securely without adhesives, you must map its anatomy. A great white tooth features three distinct zones:
- The Cusp: The triangular, blade-like upper section. Great whites possess distinct, coarse serrations along the cusp edges, unlike the smooth edges of a mako shark.
- The Bourlette: The dark, V-shaped band separating the cusp from the root. This is the thickest part of the tooth and the ideal anchor point for your primary wire wraps.
- The Root: The V-shaped, lobed base. The root is highly porous and fragile in fossilized specimens; avoid placing high-tension wire directly around the fragile root tips.
Materials and Tools for Non-Destructive Wrapping
Adhesives like cyanoacrylate (Super Glue) or epoxy will degrade over time, yellow, and permanently damage the fossil's surface. We use a tension-based wire wrap method.
Required Materials
- Base Wire: 18-gauge (1.02mm) half-hard 14k gold-filled or sterling silver wire. You will need approximately 18 inches for a standard 2-inch tooth.
- Weaving Wire: 24-gauge (0.51mm) dead-soft wire in a matching metal. You will need about 3 feet.
- Sealant: Microcrystalline wax (e.g., Renaissance Wax) to protect the porous fossil.
Required Tools
- Nylon jaw pliers (to prevent marring the metal and the fossil).
- Flush cutters for clean wire snips.
- A stepped ring mandrel for forming the bail.
- A soft brass wire brush for work-hardening the finished piece.
Step-by-Step Wire Wrapping Guide
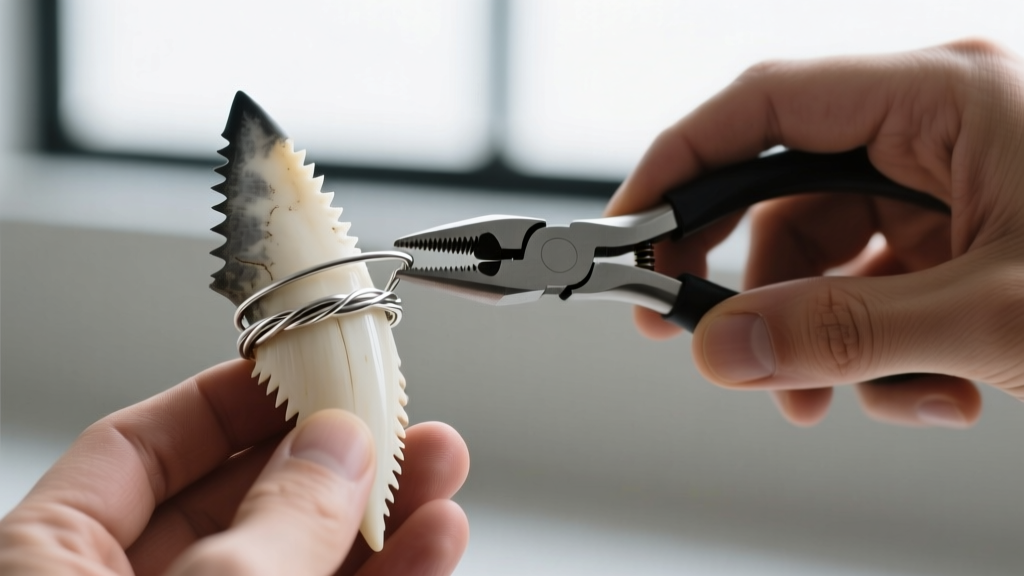
Step 1: Creating the Tension Base
Cut an 18-inch length of your 18-gauge base wire. Find the exact center and press it firmly against the back of the tooth, right along the bourlette line. Bring both ends of the wire up and over the front of the tooth, crossing them just above the serrated edges of the cusp. Using your nylon jaw pliers, pull the wires taut. The goal is to create a "V" shape on the front that mirrors the V-shape of the root on the back, locking the tooth in place through pure geometric tension.
Step 2: Securing the Serrations
Great white serrations are fragile. Do not wrap wire tightly over the sharp teeth, as the metal will saw through the fossilized enamel over time. Instead, route your 18-gauge base wires smoothly up the flat sides of the cusp, stopping just below the very tip. Take your 24-gauge weaving wire and anchor it to the left base wire. Begin a tight, continuous weave, wrapping the 24-gauge wire around both 18-gauge base wires to bind them together. Continue this weave up the sides of the tooth, stopping an inch below the cusp tip. Snip the weaving wire flush and tuck the sharp ends inward with your pliers.
Step 3: Forming the Bail
You now have two 18-gauge wires extending straight up from the top of the tooth. Grip both wires together with your nylon jaw pliers and bend them backward at a 90-degree angle. Wrap them around a ring mandrel at the 4mm mark to form a circular bail. Feed the tail ends of the wire back down through the center of the bail, then wrap them tightly around the base of the bail (the "neck") to secure the structure. Snip the excess wire and file the ends completely smooth so they won't catch on your clothing.
Chain Selection and Length Guide
A great white shark tooth necklace demands a chain that can support its visual weight and physical mass. Fossilized teeth are surprisingly dense. Avoid delicate cable chains, which will snap under the pendulum effect of a heavy pendant.
| Chain Style | Recommended Thickness | Best Length | Why It Works |
|---|---|---|---|
| Spiga (Wheat) | 2.5mm - 3.0mm | 22 - 24 inches | Interlocking links offer immense tensile strength and a rope-like texture that complements the organic shape of the tooth. |
| Box Chain | 2.0mm - 2.5mm | 20 - 22 inches | Provides a modern, geometric contrast to the fossil. Excellent for polished sterling silver mounts. |
| Mariner (Anchor) | 3.0mm - 4.0mm | 24 - 26 inches | Nautical heritage pairs perfectly with marine fossils. The horizontal bars add visual width to balance a large 2.5-inch tooth. |
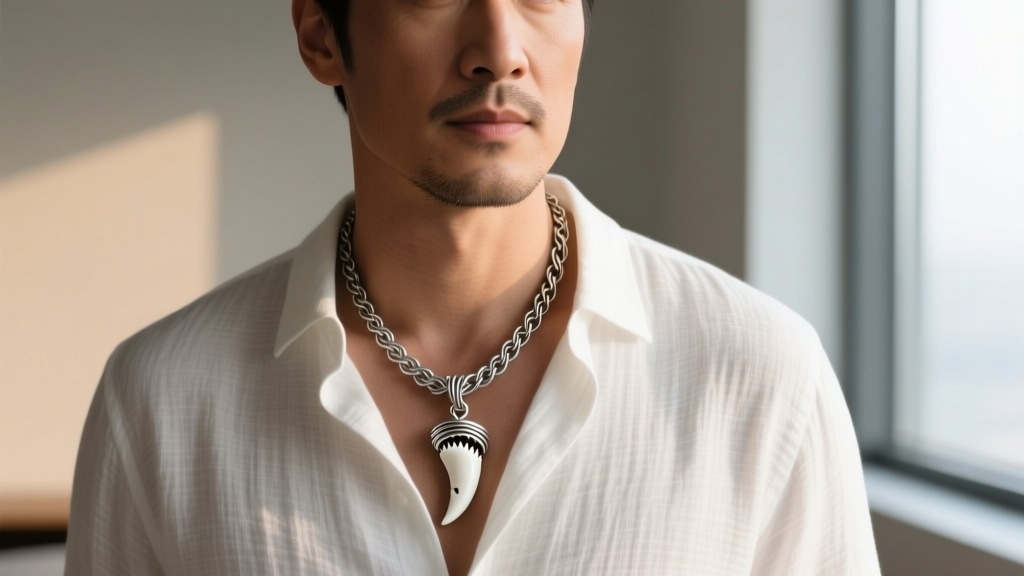
For a standard 2-inch fossilized tooth, a 22-inch Spiga chain sits perfectly at the sternum, allowing the pendant to rest outside the collar of a t-shirt or over a casual button-down.
Preservation and Care
Fossilized shark teeth are essentially stone, but they can still suffer from environmental degradation. The root structure often retains microscopic pockets of the original phosphate matrix, which can absorb oils, sweat, and moisture. If left untreated, the root may develop a chalky white crust or begin to flake.
The Renaissance Wax Protocol: Once your great white shark tooth necklace is fully mounted, apply a micro-thin layer of Renaissance Wax (a museum-grade microcrystalline wax developed by the British Museum) using a soft horsehair brush. Allow it to dry for 10 minutes, then buff it gently with a microfiber cloth. This creates an oxygen and moisture barrier that locks in the deep gray and black hues of the fossil without adding an artificial, glossy shine. Reapply the wax every 6 to 12 months depending on how often you wear the piece against your skin.
Final Styling Tips
Because a great white shark tooth necklace is inherently bold and rugged, it serves as a statement piece that requires minimal supporting jewelry. Avoid layering it with other pendants, which will cause metal-on-fossil scratching. Instead, pair it with subtle, minimalist accessories—such as a simple silver cuff bracelet or a plain signet ring. Whether you are wearing a heavy flannel in the winter or a crisp linen shirt in the summer, the organic geometry of the wire-wrapped fossil provides a striking, conversation-starting focal point that bridges the gap between natural history and high-end artisan jewelry.


