How to Fix a Broken Necklace Chain: Step-by-Step Repair Guide
Learn how to fix a broken necklace chain at home. Step-by-step guide covering jump rings, soldering, and tools for gold, silver, and steel.

Understanding Chain Anatomy and Failure Points
When a favorite piece of jewelry snaps, it is rarely a random accident. Chains fail due to specific mechanical stress points, metal fatigue, or manufacturing flaws. Before you attempt a repair, you must understand how to fix a broken necklace chain by first diagnosing the failure mode. The most common break points are the jump rings connecting the clasp, the links immediately adjacent to the clasp (which endure the most friction), and the midpoint of the chain (usually caused by catching on clothing or hair). According to the Gemological Institute of America (GIA), precious metals like sterling silver and high-karat gold are highly malleable, making them prone to stretching and eventual snapping if subjected to repetitive tensile stress.
Essential Tools for Chain Repair
You cannot successfully repair fine jewelry with standard household pliers. Serrated teeth on standard hardware pliers will permanently mar soft precious metals. To execute a professional-grade repair, you need specialized bench tools. Below is a matrix detailing the correct tool and material sizing based on your chain's weight.
| Chain Weight / Style | Jump Ring Gauge | Jump Ring OD (Outer Diameter) | Required Pliers Type |
|---|---|---|---|
| Delicate (Cable, Rolo <1mm) | 22-24 Gauge (0.5-0.6mm) | 1.5mm - 2.0mm | Micro Chain-Nose (Smooth Jaw) |
| Medium (Curb, Figaro 1-3mm) | 18-20 Gauge (0.8-1.0mm) | 2.5mm - 3.5mm | Standard Flat-Nose (Smooth Jaw) |
| Heavy (Rope, Cuban >4mm) | 14-16 Gauge (1.3-1.6mm) | 4.0mm - 5.0mm | Heavy-Duty Nylon Jaw Pliers |
For sourcing high-quality findings and tools, bench jewelers frequently rely on industry standards like Rio Grande's jewelry repair resources, which offer precisely calibrated jump rings that ensure a flush closure without leaving a visible gap.
Method 1: The Jump Ring Fix (For Standard Link Breaks)
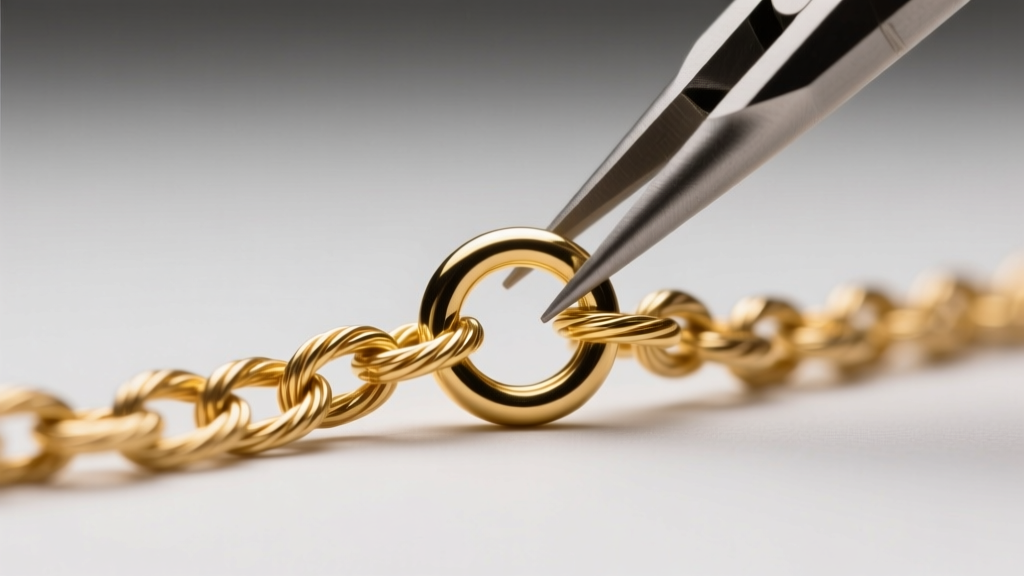
If your chain has snapped at the clasp or at a standard oval link, a jump ring repair is the most reliable, non-destructive method. The critical error amateurs make is pulling the jump ring apart laterally (like an 'O' becoming a 'C'). This distorts the circle and makes it impossible to close flush.
Step-by-Step Instructions
- Secure the Chain: Lay the necklace on a jeweler's bench pin or a soft microfiber cloth to prevent the links from tangling.
- Open the Jump Ring: Grip the jump ring with two pairs of smooth-jaw flat-nose pliers at the 3 o'clock and 9 o'clock positions. Twist one hand forward and the other backward to open the ring laterally. The circle must remain perfectly round.
- Thread the Links: Slide the broken ends of the necklace chain onto the jump ring. If the chain links are work-hardened or slightly deformed, use a pair of flush cutters to trim the damaged edges before threading.
- Close and Bind: Reverse the twisting motion to close the jump ring. Push the ends slightly past each other, then back to center. This creates a binding tension that snaps the ends flush. You should hear a faint 'click' and feel no burrs with your fingernail.
Method 2: Soldering Fine Chains (Cable & Box Chains)
Jump rings alter the drape of certain chains, particularly box chains, wheat chains, and snake chains. If a link snaps in the middle of these continuous patterns, adding a jump ring will create a stiff, visible hinge. The correct approach is soldering.
When to Use Solder Paste vs. Laser Welding
For at-home or small-studio repairs, silver solder paste is the standard. Gold chains require specific karat-matched solder chips. Solder paste is a mixture of powdered solder alloy and flux, which melts and flows into the seam via capillary action.
- Easy Solder: Melts at ~700°C (1292°F). Best for final repairs where previous solder joints exist.
- Medium Solder: Melts at ~740°C (1364°F). Good for standard link repairs.
- Hard Solder: Melts at ~780°C (1436°F). Used for manufacturing or heavy structural joints.

To solder a box chain, align the broken link on a charcoal block. Apply a microscopic dot of flux and solder paste using a fine needle tool. Use a micro-torch with a pinpoint blue flame, heating the surrounding metal rather than the solder directly. The metal will reach the flow point, and the solder will instantly flash into the seam. Quench in water and pickle in a mild citric acid solution to remove oxidation.
Material-Specific Considerations
The metallurgy of your chain dictates the repair methodology. Ignoring material properties will result in melted links or structural failure.
Sterling Silver and Karat Gold
Both are highly conductive and respond beautifully to torch soldering. However, silver is prone to fire-scale (a dark copper oxide layer that forms when heated). Always use a boric acid and alcohol dip before heating silver to prevent fire-scale from etching into the porous surface of the metal.
Stainless Steel and Titanium
You cannot torch-solder stainless steel or titanium at home. These metals have extremely high melting points and react poorly to standard silver or gold solders, resulting in brittle, blackened joints. If a steel or titanium chain breaks, it requires industrial laser welding, which fuses the base metals together without adding filler. You must take these pieces to a professional bench jeweler equipped with a Nd:YAG laser welder.
Platinum
Platinum requires specialized platinum solder and temperatures exceeding 1000°C. Furthermore, platinum does not oxidize, meaning it doesn't require flux, but its high thermal conductivity means heat sinks rapidly down the chain, risking the melting of adjacent delicate links if a laser is not used.
Fixing a Broken Clasp or Lobster Claw
Sometimes the chain is intact, but the clasp has failed. The internal spring mechanism inside a lobster claw or spring ring clasp is incredibly small and prone to corrosion from lotions, perfumes, and sweat. Once the internal spring snaps or the lever dislodges, the clasp cannot be repaired; it must be replaced.
Use flush cutters to snip the tiny jump ring connecting the broken clasp to the chain. Discard the broken clasp. Source a replacement lobster claw (cast styles are more durable than stamped sheet-metal styles) and attach it using the lateral twist method outlined in Method 1. Ensure the new clasp is proportionate to the chain weight; a heavy lobster claw on a delicate 1mm chain will cause the chain to bunch up and tangle constantly at the nape of the neck.
Expert Bench Tip: Never pull on a chain to test the strength of a newly closed jump ring. Tensile pulling will stretch the adjacent soft gold or silver links. Instead, test the repair by applying lateral pressure or gently shaking the chain to ensure the jump ring ends remain flush and do not catch on a microfiber cloth.
When to See a Professional Jeweler
While knowing how to fix a broken necklace chain empowers you to handle minor wardrobe malfunctions, certain scenarios demand professional intervention. If the break occurs on a hollow-tube chain (like certain rope or herringbone styles), the metal is too thin to hold a solder joint and will likely crush under pliers. Similarly, if a diamond or gemstone pendant is soldered directly into the chain links, the heat from a jeweler's torch could cause thermal shock, shattering stones like emeralds, opals, or tanzanite. In these cases, a professional jeweler will use a laser welder to fuse the metal locally, keeping the heat-affected zone under 1mm and protecting your valuable gemstones from catastrophic damage.


