Mastering Stacked Gold Necklaces: A Technical Layering Guide
Master the art of stacked gold necklaces with our technical guide. Learn about karat durability, chain weave friction, gauge balancing, and anti-tangle tips.

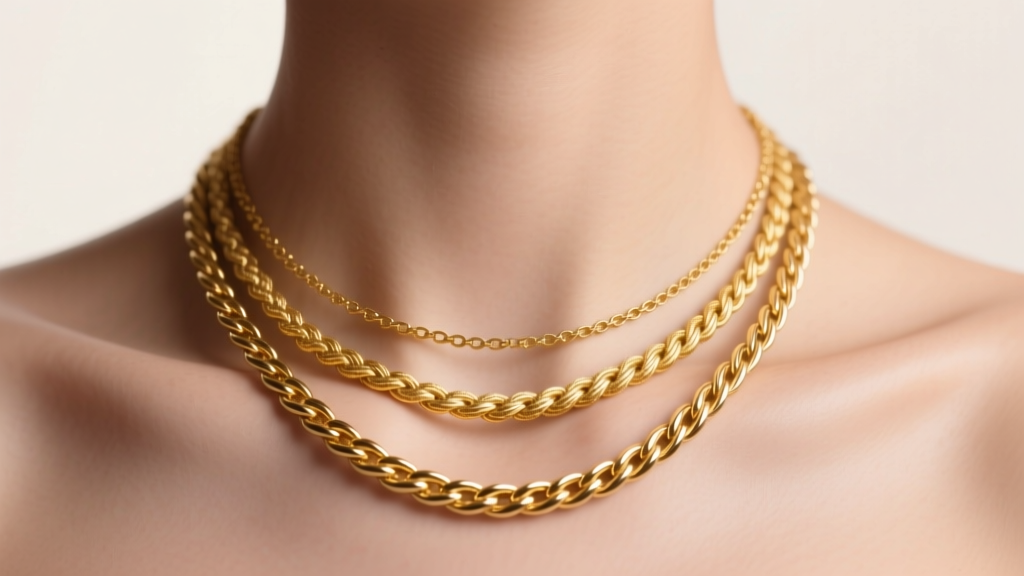
As we navigate the jewelry landscape of 2026, the era of chaotic, haphazard layering is officially over. Today’s approach to stacked gold necklaces is an exercise in precision engineering, material science, and deliberate visual weight distribution. Throwing three random chains around your neck is a recipe for tangled links, broken clasps, and visual clutter. True mastery of the stack requires an understanding of gold metallurgy, chain weave friction coefficients, and the mathematics of gauge balancing. This expert deep dive will provide you with the technical frameworks needed to build a flawless, tangle-free gold stack that drapes perfectly and withstands daily wear.
The Metallurgy of Layering: Karat Selection for Daily Wear
Before selecting your chain styles, you must address the foundational metallurgy of your stack. Gold purity, measured in karats, directly dictates the Vickers hardness (HV) of the metal, which in turn affects how the chains interact when layered. According to the Gemological Institute of America (GIA), pure 24k gold is exceptionally soft (approx. 60-80 HV) and entirely unsuitable for the friction inherent in layering.
- 14k Gold (58.3% purity): With a Vickers hardness of roughly 140-160 HV (depending on the copper/zinc alloy mix), 14k gold is the workhorse of the stack. It resists stretching and link deformation, making it the mandatory choice for your bottom anchor layer, which bears the cumulative weight and friction of the chains above it.
- 18k Gold (75% purity): Softer (approx. 120-130 HV) but possessing a richer, deeper yellow hue due to higher gold content. 18k is best reserved for the top layer or as a dedicated pendant carrier where drape and color saturation are prioritized over structural rigidity.
Expert Warning: Never mix 14k and 18k yellow gold in the same stack unless you are intentionally aiming for a two-tone effect. The differing copper and silver ratios in the alloys will cause the 14k to look pale and slightly greenish when placed directly against the warm, buttery tone of 18k gold.
Chain Weave Physics: Friction Coefficients and Tangling
The most common failure mode in stacked gold necklaces is severe tangling. This is not bad luck; it is a matter of surface friction and micro-mechanical interlocking. Chains with high surface-area contact or protruding edges will act like gears, grabbing adjacent links and twisting them into knots. The International Gem Society notes that the structural geometry of a chain dictates its durability and how it interacts with other metals.
| Chain Weave | Surface Friction | Tangling Risk | Optimal Stack Position |
|---|---|---|---|
| Cable / Link | Low | Minimal | Base Layer (18"-20") |
| Box | Medium | Low | Middle Layer (16") |
| French Rope | High | Severe | Top Layer / Solo |
| Snake / Omega | Very High | Catastrophic | Do Not Stack |
| Figaro | Medium-High | Moderate | Middle Layer (Thick Gauge) |
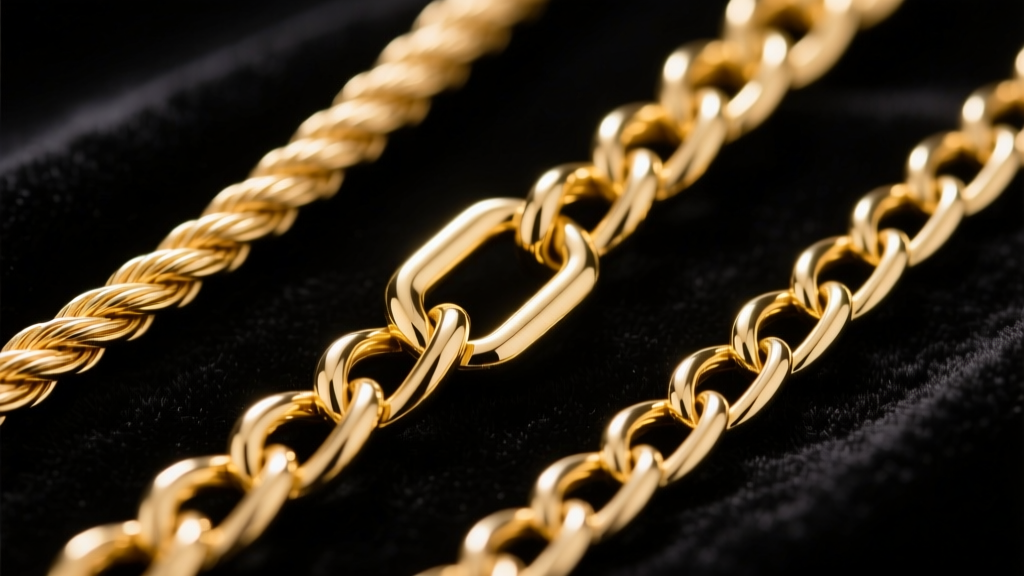
Notice the exclusion of snake and omega chains. These are continuous, semi-rigid weaves that do not drape fluidly. When forced into a stack, they kink permanently and trap softer chains beneath them. For a frictionless stack, pair a low-friction base (cable) with a medium-friction middle (box or curb), ensuring the links are large enough that they cannot physically pass through the gaps of the adjacent chain.
The Mathematics of the Stack: Length, Gauge, and Weight
A successful stack relies on strict spatial gradation. The standard "2-inch rule" dictates that each subsequent layer should be exactly two inches longer than the one above it. However, this rule must be adjusted based on the wearer's neck circumference and the gauge (thickness) of the chains.
The 3-Layer Technical Blueprint
Use this exact specification sheet to build a balanced, tangle-resistant 3-layer stack that works on an average 14-inch neck circumference:
- Layer 1 (The Choker): 14-inch length, 1.0mm to 1.2mm gauge. Style: Delicate cable or bead chain. Function: Sits flush against the collarbone. Must be lightweight to prevent choking.
- Layer 2 (The Princess): 16-inch length, 1.5mm to 2.0mm gauge. Style: Box chain or small Figaro. Function: The visual anchor. This is the ideal layer for a 4mm to 6mm pendant.
- Layer 3 (The Matinee): 18-inch or 20-inch length, 2.5mm to 3.0mm gauge. Style: Curb or thick rope. Function: The heavy base. The thicker gauge and heavier weight pull the lower chain taut, preventing it from riding up and tangling with the 16-inch layer.
"The most frequent mistake in layering is placing the heaviest, thickest chain on top. Gravity demands that the highest mass sits at the lowest point to act as a pendulum anchor, keeping the entire stack aligned."
Pendant Integration and Bail Sizing
Adding pendants to stacked gold necklaces introduces a new variable: the bail. The bail is the loop that connects the pendant to the chain. If you are stacking, you must calculate the internal diameter of the bail against the outer width of your chosen chain. A standard 1.5mm box chain requires a bail with an internal clearance of at least 2.5mm to slide freely. If the bail is too tight, it will create a rigid hinge point, causing the chain to kink and eventually snap at the stress point. Always opt for sliding bails or oversized jump rings when integrating pendants into the middle layer of a stack.

Hardware Mechanics: Solving the Clasp Migration Problem
Have you ever noticed your necklaces constantly spinning around your neck, forcing you to readjust the clasps every ten minutes? This is the "clasp migration" phenomenon. It occurs when the center of gravity of the chain is perfectly symmetrical, and the heavy clasp acts as a pendulum weight, naturally swinging to the lowest point (the front of your chest).
The Technical Fix:
- Counter-Weighting: Attach a small, decorative gold charm or a heavier jump ring directly opposite the clasp on the back of the neck. This balances the center of gravity, keeping the clasp anchored at the nape.
- Multi-Strand Spacers: For a permanent solution, utilize a 14k gold multi-strand magnetic clasp. This hardware piece gathers the ends of all three chains into a single, unified locking mechanism. Not only does this eliminate the spin, but it also ensures the 2-inch graduation spacing is mathematically locked in place, making tangling physically impossible.
- Clasp Type: Avoid spring-ring clasps for stacks. Their tiny, protruding lever acts as a hook, catching on the links of adjacent chains. Always upgrade to streamlined lobster clasps or magnetic neodymium locks.
Maintenance: Ultrasonic Protocols for Layered Gold
Cleaning stacked gold necklaces requires care. While ultrasonic cleaners are excellent for removing sebum and lotion buildup from complex weaves like rope or Figaro, they can be destructive if the chains are tangled. Never place a tangled stack into an ultrasonic bath; the high-frequency vibrations will tighten the knots into permanent deformations. Always detangle the stack using a fine sewing needle and a drop of mineral oil before cleaning. For daily maintenance, simply wipe the stack down with a microfiber polishing cloth, moving in the direction of the chain links to avoid snagging.
By treating your jewelry not just as accessories, but as engineered systems of weight, friction, and metallurgy, you elevate your style from accidental to intentional. Master these technical parameters, and your stacked gold necklaces will remain pristine, perfectly draped, and entirely tangle-free.


